Boston Cream Pie Fudge-Easy Delicious Dessert
Boston Cream Pie Fudge is not just a dessert; it’s an experience. Imagin extracte the classic, beloved flavors of a Boston Cream Pie – that creamy vanilla custard, the rich, decadent chocolate ganache – all meticulously transformed into a portable, bite-sized treat. We’re talking about pure, unadulterated bliss in every square. This isn’t your average, everyday fudge. It’s a carefully crafted confection that captures the essence of the iconic cake, delivering a complex yet harmonious blend of textures and tastes. People adore this confection because it offers a delightful nostalgia, evoking memories of childhood treats and special occasions, all within a luxurious and satisfying fudge format. What truly makes Boston Cream Pie Fudge special is the surprising depth of flavor and the perfect balance achieved between the smooth, almost silken custard layer and the intensely chocolatey topping, all held together by the dense, sweet embrace of the fudge base. Get ready to be amazed by how these familiar flavors can be reinvented into something so utterly extraordinary.
Ingredients:
- 2 cups granulated sugar
- 4 ounces unsalted butter, cut into cubes
- 1/2 cup heavy cream
- 2 cups white chocolate chips
- 7 ounce container of marshmallow creme
- 3 tablespoons instant vanilla pudding mix (not the kind you cook)
- 1/2 teaspoon vanilla extract
- 3 tablespoons unsweetened cocoa powder
- 6 ounces semisweet chocolate chips
- 1 tablespoon vegetable oil
Preparing the Boston Cream Pie Fudge Base
The foundation of our delicious Boston Cream Pie Fudge lies in creating a rich and creamy base. This initial step involves combining sugar, butter, and cream and bringin extractg them to a precise temperature. It’s crucial to follow the instructions carefully here, as achieving the right consistency is key to a smooth and melt-in-your-mouth fudge.
Step 1: Melting the Sugar Mixture
In a heavy-bottomed saucepan, combine the 2 cups of granulated sugar, the 4 ounces of unsalted butter (cut into cubes so it melts evenly), and the 1/2 cup of heavy cream. Place the saucepan over medium heat. Stir the mixture constantly with a wooden spoon or heat-resistant spatula, ensuring the sugar dissolves completely and the butter melts. Don’t rush this process; low and steady heat is your friend. As the mixture heats, it will become smooth and glossy. Once it reaches a gentle boil, continue to stir and cook for exactly 5 minutes. This controlled cooking time is essential for the fudge to set properly. Be mindful of the heat; you don’t want it to scorch the bottom of the pan, which can lead to an off-flavor in your fudge.
Step 2: Incorporating the Creamy Elements
After the 5 minutes of boiling, immediately remove the saucepan from the heat. Now, this is where the magic starts to happen and the fudge gets its signature creamy texture. Add the 2 cups of white chocolate chips to the hot sugar mixture. Let them sit undisturbed for about 5 minutes, allowing the residual heat to gently melt them. After the waiting period, start stirring slowly and continuously. You’ll notice the white chocolate gin extractps begin to melt and emulsify into the sugary base, creating a beautiful, smooth, and creamy liquid. Continue stirring until all the white chocolate chips are fully melted and no lumps remain. Next, add the entire 7-ounce container of marshmallow creme. This ingredient is crucial for that characteristic marshmallowy sweetness and helps create a wonderfully pliable fudge. Stir it in vigorously until it’s fully incorporated and the mixture is smooth. Finally, add the 3 tablespoons of instant vanilla pudding mix and the 1/2 teaspoon of vanilla extract. The pudding mix acts as a stabilizer and adds a subtle vanilla flavor that complements the white chocolate and marshmallow perfectly. Stir until everything is well combined and the mixture is luxuriously smooth.
Creating the Boston Cream Pie Swirls
Now that we have our luscious vanilla-based fudge, it’s time to introduce the elements that evoke the beloved flavors of Boston Cream Pie. This involves creating two distinct layers and swirling them together.
Step 3: Dividing and Flavoring the Fudge
Once your vanilla fudge base is perfectly smooth and all ingredients are incorporated, it’s time to divide it to create the distinct flavors. You’ll want to divide the mixture approximately in half. Carefully spoon about half of the vanilla fudge mixture into a separate heatproof bowl. To the fudge remagin extractng in the original saucepan, you will add the chocolate components. Add the 3 tablespoons of unsweetened cocoa powder to the fudge still in the saucepan. Stir this vigorously until the cocoa powder is completely incorporated and you have a rich, chocolatey fudge base. Ensure there are no streaks of unmixed cocoa. The goal here is to create a deep, dark chocolate layer.
Step 4: Preparing the Chocolate Layer and Lining the Pan
For the chocolate portion of the fudge, continue stirring the chocolate fudge mixture until it’s smooth and glossy. Now, let’s prepare your pan. Line an 8×8 inch baking pan with parchment paper, leaving an overhang on the sides. This overhang will make it much easier to lift the fudge out of the pan once it has set. Lightly grease the parchment paper with a little non-stick cooking spray or a tiny bit of vegetable oil for good measure. This prevents the fudge from sticking to the parchment paper itself.
Step 5: Assembling and Swirling the Fudge
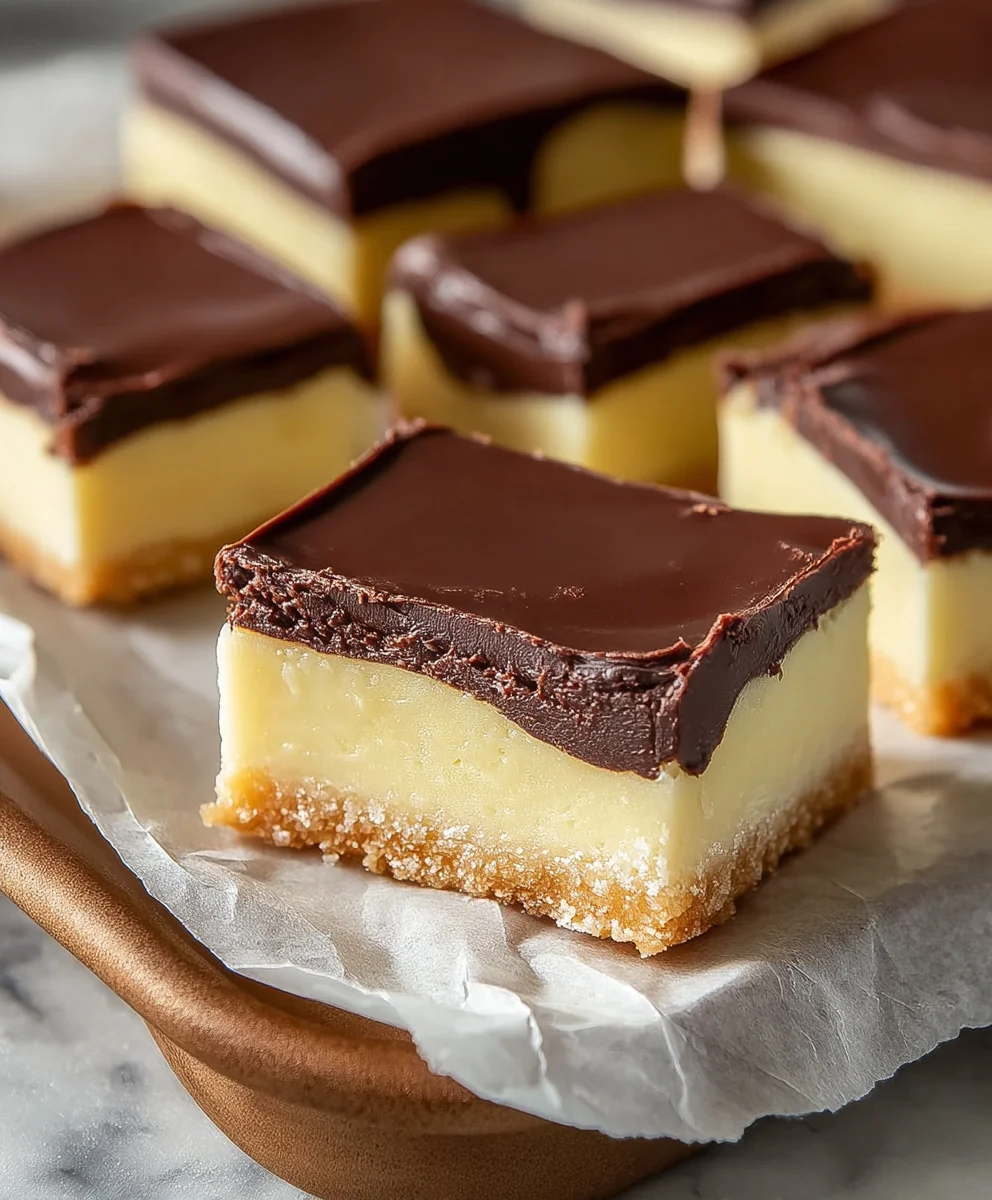
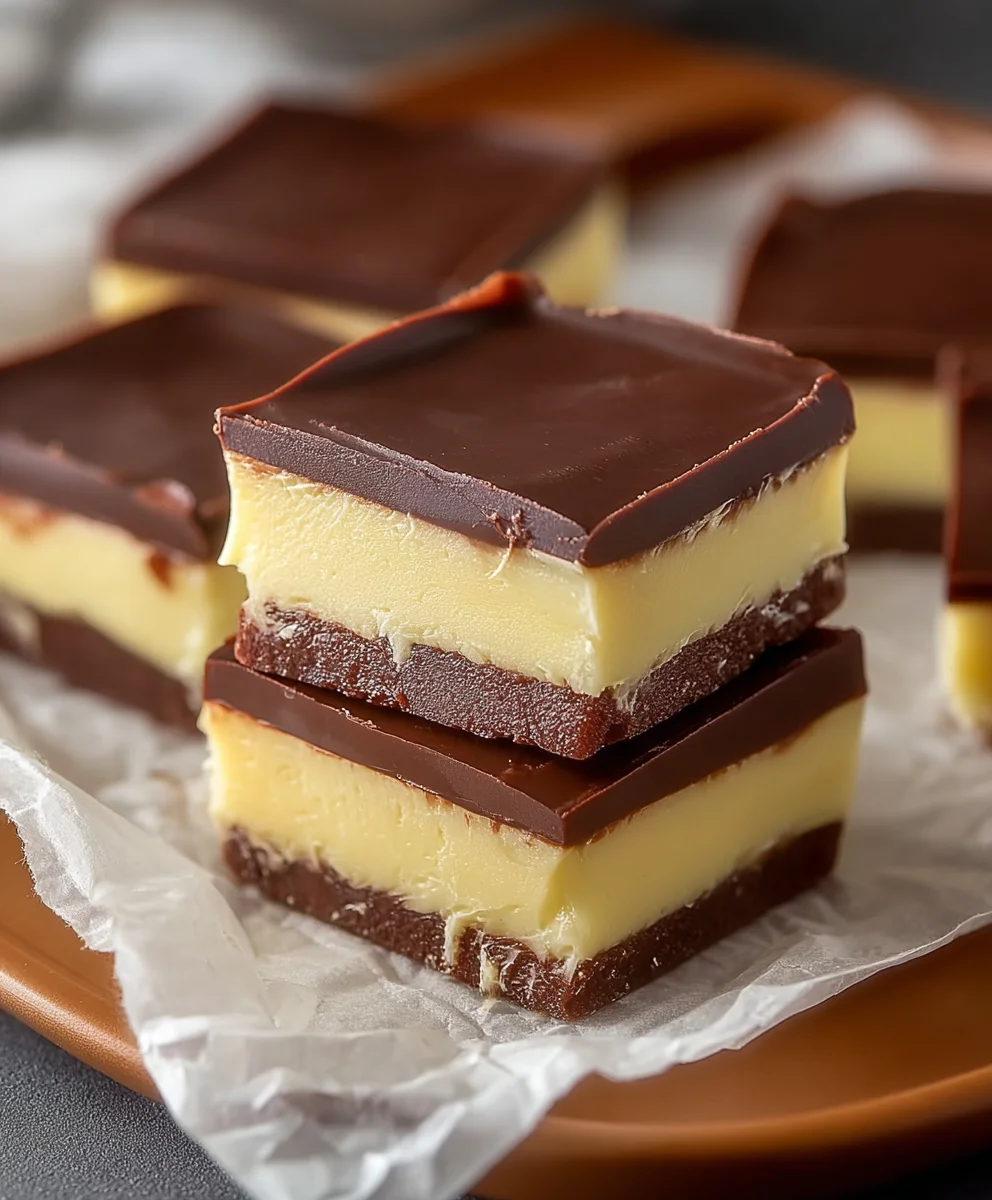
Now comes the fun part – assembling and swirling! Pour the chocolate fudge mixture into the prepared baking pan. Spread it evenly to create the bottom chocolate layer. Immediately, gently spoon dollops of the vanilla fudge mixture over the chocolate layer. Don’t worry about spreading the vanilla layer thinly; the dollops will create pockets of vanilla goodness. Take a butter knife or a skewer and gently swirl the two mixtures together. Make broad, sweeping motions. You don’t want to overmix, or the layers will become muddy. The goal is to create distinct ribbons of chocolate and vanilla, reminiscent of the beautiful layers in a Boston Cream Pie. Aim for an artistic, marbled effect.
Step 6: Setting and Cutting the Fudge
Once you’ve achieved your desired swirl pattern, gently tap the pan on the counter a few times to help settle the fudge and remove any air bubbles. Let the fudge sit at room temperature for about 10-15 minutes to cool slightly. Then, cover the pan loosely with plastic wrap and place it in the refrigerator for at least 2-3 hours, or until the fudge is completely firm. For a truly glossy finish on the chocolate topping, you can create a simple chocolate glaze. In a small microwave-safe bowl, combine the 6 ounces of semisweet chocolate chips with the 1 tablespoon of vegetable oil. Microwave in 30-second intervals, stirring between each, until the chocolate is melted and smooth. Drizzle this melted chocolate over the top of the firmed fudge. Allow the chocolate glaze to set completely before cutting. Once set, use the parchment paper overhang to lift the fudge from the pan. Place it on a cutting board and cut it into 1-inch squares using a sharp knife. For cleaner cuts, you can wipe the knife clean between each slice.
Conclusion:
There you have it! Your guide to creating the most delightful Boston Cream Pie Fudge. We’ve walked through each step, from preparing the creamy custard layer to achieving that perfect chocolate ganache topping. This fudge truly captures the essence of the classic dessert in a bite-sized, chewy form. It’s incredibly satisfying to see the distinct layers come together, offering a burst of vanilla and rich chocolate in every mouthful.
For serving, I love presenting Boston Cream Pie Fudge as a special treat after dinner or as part of a dessert buffet. It pairs wonderfully with a cup of coffee or tea. You can also cube it and arrange it on a platter for parties – it’s always a crowd-pleaser!
Don’t be afraid to experiment with variations. For a richer flavor, consider adding a touch of espresso powder to the chocolate ganache. If you prefer a bolder vanilla note, a splash of high-quality vanilla extract in the custard layer will do wonders. You can also sprinkle a few chopped toasted almonds on top of the ganache before it sets for added texture.
I truly encourage you to try making this Boston Cream Pie Fudge. It’s a rewarding baking project that yields fantastic results. Enjoy the process, savor the taste, and share the sweetness with loved ones!
Frequently Asked Questions about Boston Cream Pie Fudge:
Q: Can I make Boston Cream Pie Fudge ahead of time?
A: Absolutely! In fact, it’s best when made a day in advance. This allows the flavors to meld beautifully and the fudge to set up perfectly, making it easier to cut and serve.
Q: My fudge seems too soft. What did I do wrong?
A: If your Boston Cream Pie Fudge is too soft, it might be due to insufficient cooking of the custard layer or not allowing it to cool and set properly. Ensure you cook the custard to the correct temperature and give the fudge ample time to firm up in the refrigerator.
Q: How should I store Boston Cream Pie Fudge?
A: Store your Boston Cream Pie Fudge in an airtight container at room temperature for up to a week, or in the refrigerator for a longer shelf life, especially in warmer climates. If refrigerating, let it sit at room temperature for a few minutes before enjoying to soften slightly.
Boston Cream Pie Fudge
An easy and delicious dessert recipe for Boston Cream Pie Fudge with distinct chocolate and vanilla swirls.
Ingredients
-
2 cups granulated sugar
-
4 ounces unsalted butter, cut into cubes
-
1/2 cup heavy cream
-
2 cups white chocolate chips
-
7 ounce container of marshmallow creme
-
3 tablespoons instant vanilla pudding mix
-
1/2 teaspoon vanilla extract
-
3 tablespoons unsweetened cocoa powder
-
6 ounces semisweet chocolate chips
-
1 tablespoon vegetable oil
Instructions
-
Step 1
In a heavy-bottomed saucepan, combine granulated sugar, unsalted butter, and heavy cream. Stir constantly over medium heat until sugar dissolves and butter melts. Bring to a gentle boil and cook, stirring, for exactly 5 minutes. -
Step 2
Remove from heat. Add white chocolate chips and let sit for 5 minutes to melt. Stir until smooth. Add marshmallow creme and stir vigorously until fully incorporated. Stir in instant vanilla pudding mix and vanilla extract until luxuriously smooth. -
Step 3
Divide the vanilla fudge mixture approximately in half into a separate heatproof bowl. To the fudge remaining in the saucepan, add the unsweetened cocoa powder and stir vigorously until a rich, chocolatey fudge base is formed. -
Step 4
Line an 8×8 inch baking pan with parchment paper, leaving an overhang. Lightly grease the parchment. Pour the chocolate fudge mixture into the prepared pan and spread evenly. -
Step 5
Gently spoon dollops of the vanilla fudge mixture over the chocolate layer. Use a butter knife or skewer to gently swirl the two mixtures together, creating ribbons and a marbled effect. Do not overmix. -
Step 6
Tap the pan to settle the fudge. Let cool at room temperature for 10-15 minutes. Cover loosely and refrigerate for at least 2-3 hours until firm. For a glossy finish, microwave semisweet chocolate chips with vegetable oil in 30-second intervals, stirring, until melted and smooth. Drizzle over fudge and let set. Lift fudge using parchment overhang and cut into 1-inch squares.
Important Information
Nutrition Facts (Per Serving)
It is important to consider this information as approximate and not to use it as definitive health advice.
Allergy Information
Please check ingredients for potential allergens and consult a health professional if in doubt.