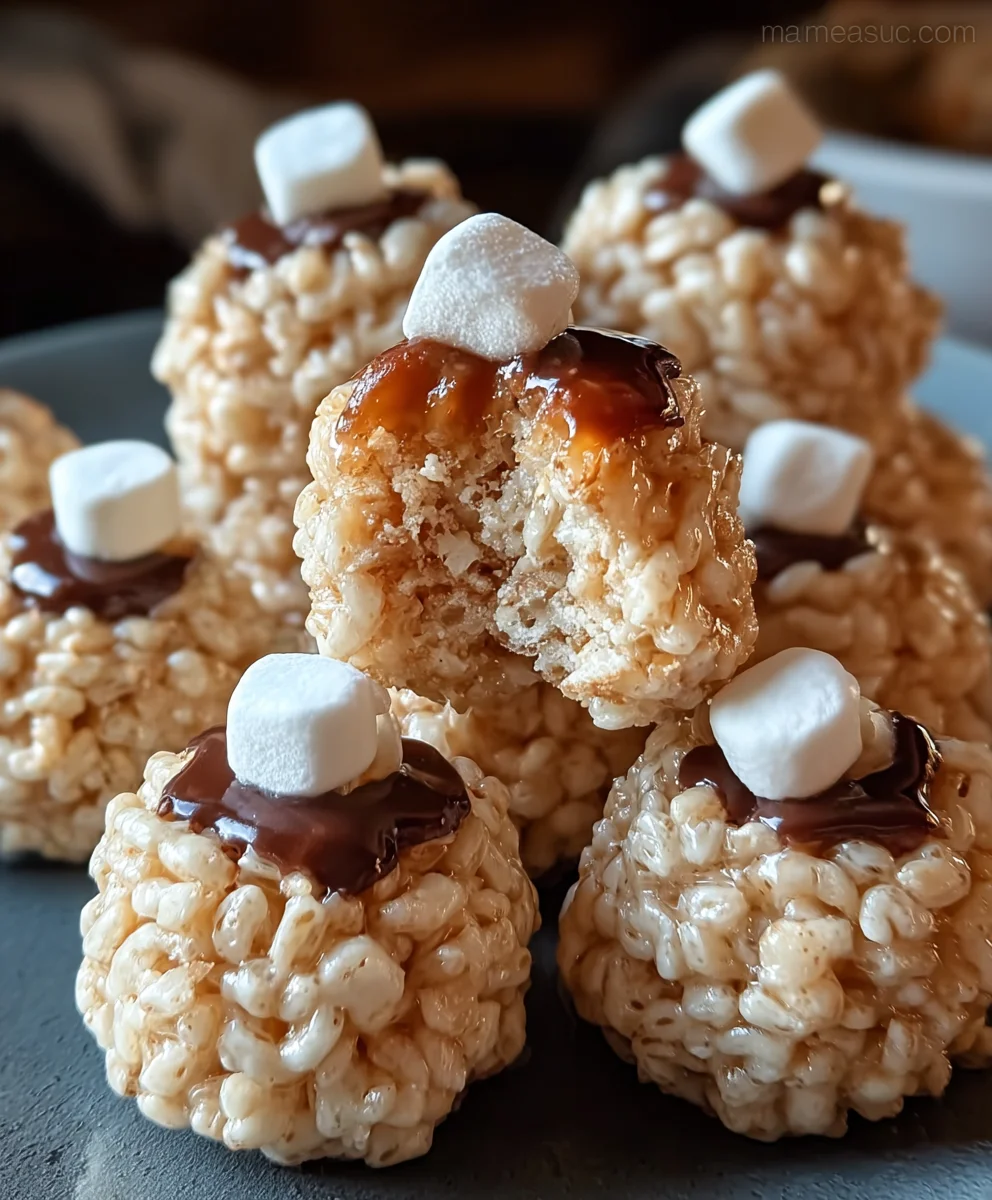
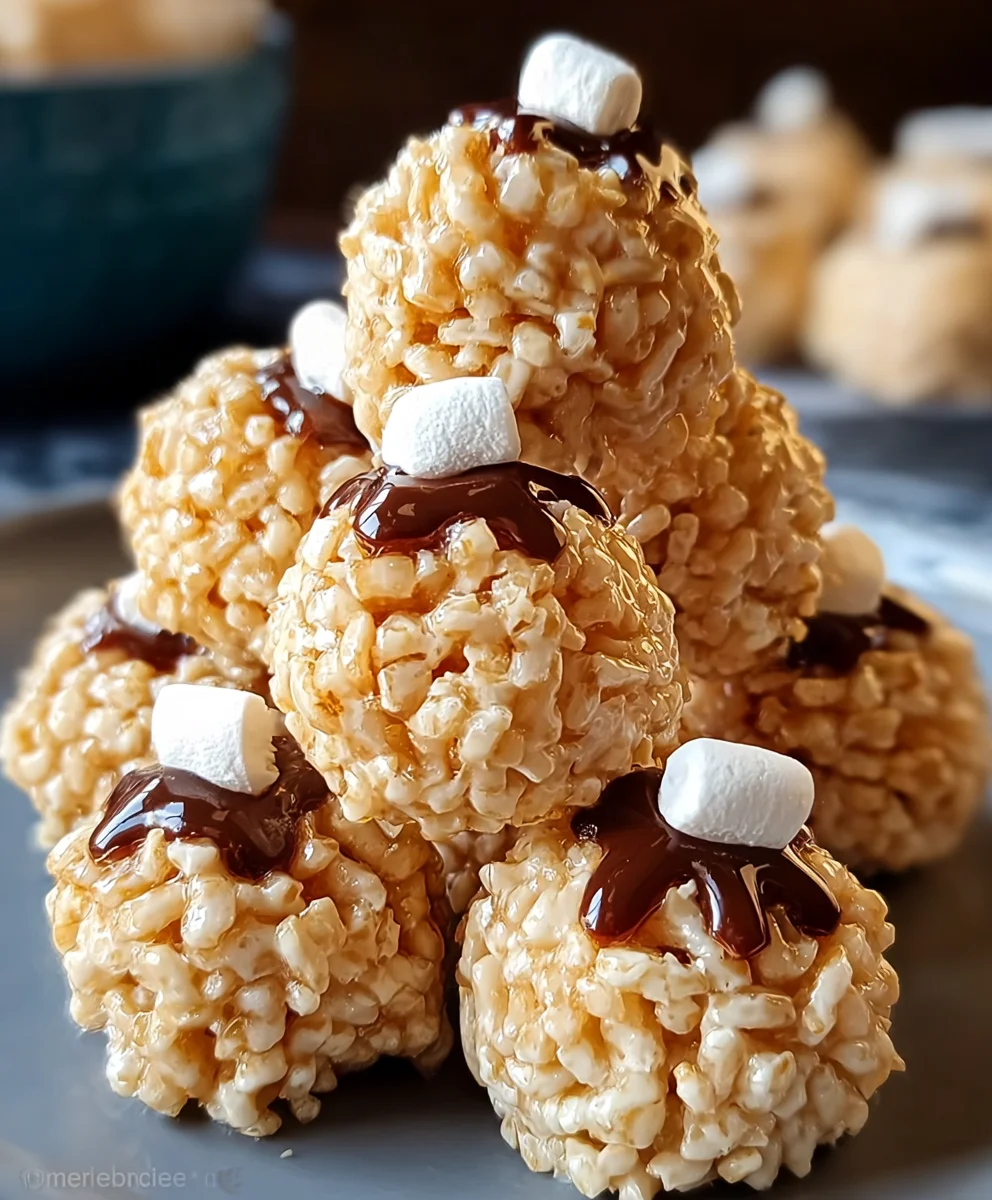
Easy Rice Krispie Balls- Quick Sweet Treats
Rice Krispie Balls are more than just a simple sweet treat; they’re a nostalgic gateway to childhood memories and pure, unadulterated joy. Who can resist the delightful crunch of puffed rice cereal coated in a chewy, sweet marshmallow coating? These iconic confections have a way of bringin extractg smiles to faces of all ages, whether they’re being enjoyed at a birthday party, packed in a lunchbox, or simply as an after-school pick-me-up. What truly makes Rice Krispie Balls so special is their incredible simplicity coupled with their utterly satisfying texture and taste. They’re incredibly easy to make, making them a perfect activity for kidgin extractnd beginners in the kitchen, yet sophisticated enough to impress at any gathering. The magic lies in transforming a few pantry staples into these perfectly portioned, wonderfully gooey spheres of happiness that disappear almost as quickly as they’re made.
Ingredients:
- 12 large marshmallows
- 2 tablespoons butter
- 7 cups Rice Krispies cereal
- 14 ounce can of sweetened condensed milk
- 14 ounces caramels (approximately 50 individually wrapped Kraft caramels)
Preparing the Caramel Coating
The foundation of these delightful Rice Krispie Balls lies in a rich, homemade caramel coating. This step ensures that each bite is not only crispy but also decadently sweet and chewy. We’ll start by unwrapping all those individual caramels. This might seem a bit tedious, but trust me, the end result is absolutely worth the effort. Place the unwrapped caramels into a microwave-safe bowl. Add the 2 tablespoons of butter to the bowl with the caramels. The butter is crucial here as it not only contributes to the smooth texture of the caramel but also prevents it from becoming too hard once cooled.
Now, it’s time to melt these down. Microwave the caramel and butter mixture on high power in 30-second intervals, stirring thoroughly after each interval. You’ll want to continue this process until the caramels are completely melted and the mixture is smooth and glossy. Be patient and stir well to ensure there are no stubborn caramel bits hiding in the bottom of the bowl. Once melted and smooth, carefully stir in the entire 14-ounce can of sweetened condensed milk. This magical ingredient will transform the melted caramels into a thick, luscious coating that will bind our Rice Krispie mixture together beautifully. Continue to stir until everything is thoroughly combined and you have a uniform, rich caramel sauce. Set this mixture aside for now, but keep it warm; we’ll be working with it shortly.
Forming the Rice Krispie Balls
With our caramel coating prepared and still warm, it’s time to bring together the crispy goodness of Rice Krispies and the softness of marshmallows. In a very large mixing bowl, place all 7 cups of Rice Krispies cereal. This is where the magic happens. Next, we need to incorporate the marshmallows. You can either melt the large marshmallows separately and add them to the cereal, or you can add them directly if you prefer a slightly chewier texture within the balls. For a smoother, more cohesive ball, I recommend gently melting the marshmallows. You can do this by placing them in a microwave-safe bowl with a tiny splash of water (about a teaspoon) and microwaving them for about 30-45 seconds, just until they puff up and are soft and gooey. Then, quickly stir them until smooth.
Once the marshmallows are melted and smooth, or if you are adding them whole for a chewier texture, add them to the bowl with the Rice Krispies cereal. Immediately pour the warm caramel-condensed milk mixture over the cereal and marshmallows. Now, working quickly and carefully (as the mixture will be hot), stir everything together. Use a sturdy spatula or a large spoon to ensure that all the Rice Krispies cereal and marshmallows are evenly coated in the luscious caramel mixture. The goal is to distribute the coating as uniformly as possible.
Shaping the Balls
This is where our Rice Krispie Balls start to take their iconic shape. Because the mixture is quite sticky and warm, it’s a good idea to lightly grease your hands with a little butter or cooking spray. Alternatively, you can use a cookie scoop or ice cream scoop to portion out the mixture. Begin extract taking handfuls of the Rice Krispie mixture and gently roll them into balls, roughly the size of a golf ball or slightly larger, depending on your preference. Don’t worry if they aren’t perfectly round; a rustic charm is part of their appeal. The key is to compress the mixture firmly enough so that the balls hold their shape, but not so tightly that they become dense and hard. You should aim to get about 12 distinct balls from this batch, corresponding to the 12 large marshmallows you started with. Place the formed balls onto a baking sheet lined with parchment paper. This parchment paper is essential for preventing sticking and making cleanup a breeze.
Cooling and Setting
Once all your Rice Krispie Balls have been formed, it’s crucial to let them set and cool properly. This allows the caramel to firm up and bind the cereal and marshmallows securely, giving the balls their delightful chegrape juicess and preventing them from falling apart. Leave the Rice Krispie Balls undisturbed on the parchment-lined baking sheet at room temperature. Avoid the temptation to refrigerate them immediately, as this can sometimes make the caramel too hard and brittle. Allowing them to cool naturally at room temperature is the best way to achieve that perfect balance of chewy and crispy. The cooling process typically takes about 1 to 2 hours, depending on the ambient temperature of your kitchen. You’ll know they are ready when they feel firm to the touch and hold their shape without being sticky.
Optional Enhancements
While these Rice Krispie Balls are incredibly delicious on their own, there are several ways to elevate them further and make them even more special. For a touch of indulgence, you can melt some extra chocolate (milk, dark, or white) and drizzle it over the cooled balls. This adds another layer of flavor and a beautiful visual appeal. You could also dip the bottoms of the cooled balls into melted chocolate for a more substantial chocolate coating. Another popular option is to sprinkle them with colorful sprinkles or edible glitter immediately after forming them, while the caramel is still slightly tacky. This is a fun way to add a festive touch, especially for parties or holidays. For those who love a salty-sweet combination, a light sprinkle of sea salt flakes on top just after forming can be absolutely divine, cutting through the sweetness of the caramel. Experiment with these additions to create your own signature Rice Krispie Balls!
Conclusion:
You’ve done it! You’ve mastered the art of creating delicious and delightful Rice Krispie Balls. This classic treat is incredibly versatile and always a crowd-pleaser, whether you’re whipping them up for a quick snack, a party, or a nostalgic indulgence. The simple combination of crispy rice cereal, gooey marshmallows, and a touch of butter forms the foundation for endless possibilities. Don’t be afraid to get creative and experiment with different add-ins and toppings to make your Rice Krispie Balls truly your own. We encourage you to share your creations and perhaps even invent a new signature flavor!
For serving, these delightful spheres are wonderful on their own, but they also pair beautifully with a glass of cold milk or a warm cup of hot chocolate. Consider arrangin extractg them on a festive platter for birthdays or holidays. For variations, try drizzling them with melted chocolate (dark, milk, or white!), stirring in mini chocolate chips, sprinkles, or even a pinch of cinnamon for a spiced twist. You can also experiment with different extracts like vanilla or almond for an extra layer of flavor. Enjoy every bite of these wonderfully simple yet satisfying Rice Krispie Balls!
Frequently Asked Questions:
Why are my Rice Krispie Balls not holding their shape?
This usually happens if the mixture isn’t cooked enough or if you haven’t used enough marshmallow. Ensure the marshmallows are fully melted and combined with the butter before adding the cereal. Also, make sure you press the mixture firmly into the pan or roll them into balls while the mixture is still warm but cool enough to handle.
Can I make Rice Krispie Balls ahead of time?
Absolutely! Rice Krispie Balls are perfect for making in advance. Once they have cooled completely, store them in an airtight container at room temperature for up to 3 days. For longer storage, you can freeze them, ensuring each ball is individually wrapped in plastic wrap to prevent sticking.
Easy Rice Krispie Balls- Quick Sweet Treats
Quick and easy no-bake treats made with Rice Krispies, marshmallows, and a rich homemade caramel coating. Perfect for a sweet snack or party.
Ingredients
-
12 large marshmallows
-
2 tablespoons butter
-
7 cups Rice Krispies cereal
-
14 ounce can of sweetened condensed milk
-
14 ounces caramels (approximately 50 individually wrapped Kraft caramels)
Instructions
-
Step 1
Prepare the caramel coating: Unwrap caramels and place in a microwave-safe bowl with butter. Microwave in 30-second intervals, stirring until smooth and glossy. Stir in sweetened condensed milk until thoroughly combined. Keep warm. -
Step 2
Combine ingredients: In a large bowl, place Rice Krispies cereal. Melt marshmallows separately (optional, for smoother balls) or add whole. Pour the warm caramel-condensed milk mixture over the cereal and marshmallows. -
Step 3
Mix thoroughly: Working quickly and carefully, stir everything together with a sturdy spatula until all cereal and marshmallows are evenly coated in the caramel mixture. -
Step 4
Shape the balls: Lightly grease your hands with butter or cooking spray. Take portions of the mixture and gently roll them into balls, about golf ball size. Compress firmly enough to hold shape. Place on a parchment-lined baking sheet. -
Step 5
Cool and set: Let the Rice Krispie Balls cool undisturbed at room temperature for 1 to 2 hours until firm to the touch and no longer sticky. -
Step 6
Optional enhancements: Drizzle with melted chocolate, dip bottoms in chocolate, sprinkle with edible glitter or sea salt flakes while still slightly tacky for added flavor and visual appeal.
Important Information
Nutrition Facts (Per Serving)
It is important to consider this information as approximate and not to use it as definitive health advice.
Allergy Information
Please check ingredients for potential allergens and consult a health professional if in doubt.