Dark Chocolate Sea Salt Nut Bars-Easy Recipe
Dark Chocolate and Sea Salt Nut Bars are the ultimate indulgence, and trust me, you’re going to want to make them ASAP. Imagin extracte this: the satisfying crunch of toasted nuts, the rich decadence of dark chocolate, and that irresistible sweet-and-salty dance of sea salt all coming together in one perfect bite. It’s no wonder these bars are so universally loved! They hit all the right notes – a little sweet, a little bitter, wonderfully chewy, and incredibly satisfying. What makes these Dark Chocolate and Sea Salt Nut Bars truly special is their incredible versatility. Whether you need a quick energy boost for your afternoon slump, a sophisticated homemade treat to impress guests, or simply a moment of pure bliss for yourself, these bars deliver. We’re going to break down how easy it is to create these flavor powerhouses right in your own kitchen.
Get Ready for Your New Favorite Snack
The Perfect Blend of Sweet and Salty
Dark Chocolate and Sea Salt Nut Bars
These Dark Chocolate and Sea Salt Nut Bars are my go-to for a satisfying, slightly-sweet, and utterly delicious treat. They strike that perfect balance between crunchy nuts, chewy sweetness, and the rich, bittersweet punch of dark chocolate, all punctuated by the irresistible sparkle of sea salt. They’re incredibly easy to make, requiring no baking, which makes them a perfect project for a lazy afternoon or when you need a quick energy boost. Plus, you can totally customize the nuts to your liking!
Ingredients:
Making the Bars
The process for creating these delightful bars is wonderfully straightforward. We’ll start by preparing our base, then binding it all together with a sweet, sticky syrup, and finally, infusing it with chocolatey goodness.
Step 1: Preparing the Nut and Rice Base
First things first, let’s get our nutty foundation ready. If your nuts are unsalted but raw, you might want to give them a quick toast in a dry skillet over medium heat for about 5-7 minutes, or until they’re fragrant and lightly golden. This really brings out their flavor and adds a satisfying crunch. Once toasted (or if using pre-toasted nuts), let them cool completely. Then, I like to give them a rough chop. You don’t want them to be powder; aim for pieces that are still substantial enough to provide a good bite. You can use a sharp knife and a cutting board, or for a quicker approach, pulse them a few times in a food processor. Be careful not to over-process them into a paste! In a medium mixing bowl, combine your chopped nuts with the puffed rice. The puffed rice adds a lovely lightness and crunch to the bars.
Step 2: Creating the Sweet Binder
Now, let’s make the sticky magic happen. In a small saucepan over medium-low heat, gently warm the brown rice syrup. You just want it to be warm and fluid, not boiling. Stir in the vanilla extract and the 1/2 teaspoon of sea salt. The vanilla adds a wonderful depth of flavor, and the sea salt is crucial for balancing the sweetness and enhancing the chocolate. Whisk everything together until it’s well combined and the salt has dissolved. The aroma at this stage is already promising!
Step 3: Combining the Base and Binder
Pour the warm brown rice syrup mixture over the chopped nuts and puffed rice in your mixing bowl. Now, this is where you get your hands (or a sturdy spatula) involved. Mix everything thoroughly, ensuring that every single nut and puff of rice is coated in the sticky syrup. It can be a little messy, but that’s part of the fun! You want a well-combined mixture that holds together when you press it. If it feels a bit dry, you can add another tablespoon of brown rice syrup, a little at a time, until it reaches the right consistency.
Step 4: Pressing the Bars
Line an 8×8 inch baking pan with parchment paper, leaving some overhang on the sides. This makes it super easy to lift the bars out later. Transfer the nut and rice mixture into the prepared pan. Now, press it down firmly and evenly. This is a crucial step for ensuring your bars don’t crum extractble. I like to use the bottom of a glass or a flat-bottomed measuring cup to get a really compact and smooth surface. The firmer you press, the more cohesive your bars will be.
Step 5: Melting the Chocolate and Finishing Touches
While the base is setting slightly in the pan, let’s prepare our glorious dark chocolate topping. In a small, microwave-safe bowl, combine the dark chocolate chips with the coconut oil. Microwave in 30-second intervals, stirring well between each interval, until the chocolate is completely melted and smooth. The coconut oil helps to make the chocolate pourable and gives it a beautiful sheen. Once melted, pour the chocolate evenly over the pressed nut mixture in the pan. Use a spatula to spread it out to cover the entire surface. If you’re feeling fancy, now is the time to sprinkle a little flaky sea salt over the melted chocolate. This adds an extra burst of salty-sweet goodness and a beautiful visual appeal.
Step 6: Chilling and Cutting
Once the chocolate is spread, place the pan in the refrigerator for at least 1-2 hours, or until the chocolate is completely firm. This chilling time is essential for the bars to set properly. When they’re firm, use the parchment paper overhang to carefully lift the entire block out of the pan onto a cutting board. Now, using a sharp knife, cut the block into your desired bar shapes. I usually go for about 12 bars. If the chocolate is very firm, you might find it easier to warm your knife slightly under hot water and dry it before cutting. Store your Dark Chocolate and Sea Salt Nut Bars in an airtight container in the refrigerator for the best texture and flavor. Enjoy!

Conclusion:
And there you have it – your very own batch of delicious Dark Chocolate and Sea Salt Nut Bars! These bars are a true testament to how simple, wholesome ingredients can create something truly extraordinary. The perfect balance of rich, dark chocolate, crunchy nuts, and the subtle sparkle of sea salt makes them an irresistible treat for any occasion. They’re fantastic as an afternoon pick-me-up, a post-workout snack, or even a sophisticated dessert to share. Feel free to get creative with your nut choices; almonds, walnuts, pecans, or a delightful mix all work wonderfully. For an extra touch of indulgence, consider adding a sprinkle of chili flakes for a hint of heat or some dried cranberries for a chewy tang. I genuinely encourage you to give this Dark Chocolate and Sea Salt Nut Bars recipe a try. You won’t regret the satisfying crunch and delightful flavor explosion!
Frequently Asked Questions:
Can I make these bars ahead of time?
Absolutely! These bars are perfect for making in advance. In fact, I find they taste even better after a day or two, allowing the flavors to meld together beautifully. Store them in an airtight container at room temperature for up to a week, or in the refrigerator for even longer shelf life, though they might become a bit harder when cold.
What kind of nuts are best for these bars?
The beauty of this recipe is its versatility! While almonds and pecans are classic choices and work exceptionally well, feel free to experiment. Walnuts offer a slightly bitter note that complements the chocolate, and cashews provide a creamier texture. A combination of your favorite nuts is often the most rewarding approach. Just ensure they are raw and unsalted before toasting for the best flavor.
Can I use milk chocolate instead of dark chocolate?
While dark chocolate offers a more intense and less sweet flavor profile that beautifully contrasts with the salt, you can certainly use milk chocolate if that’s your preference. Be mindful that milk chocolate is sweeter, so you might want to slightly reduce the amount of added sweetener in the recipe, or simply embrace the sweeter treat!
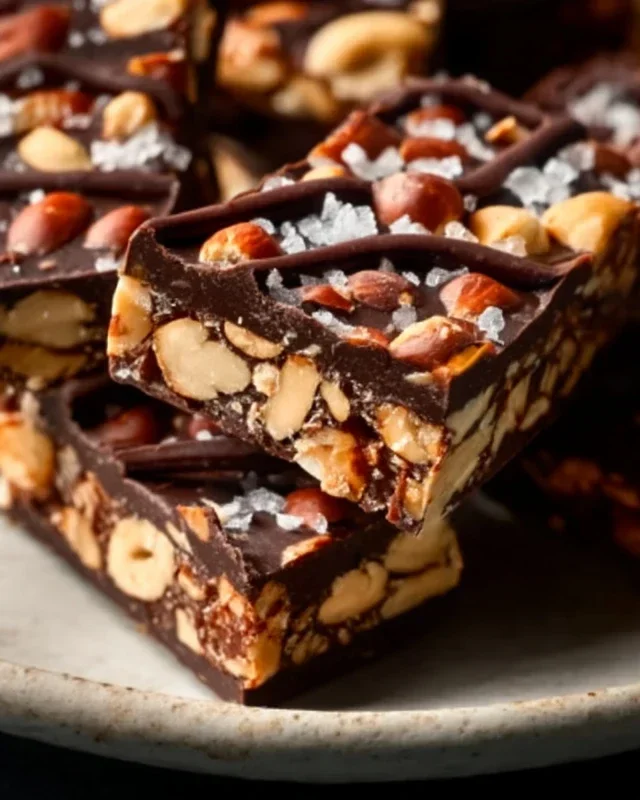
Dark Chocolate and Sea Salt Nut Bars
Chewy and satisfying nut bars packed with your favorite nuts, puffed rice, and a rich dark chocolate drizzle, finished with a hint of sea salt.
Ingredients
-
2 1/2 cups unsalted nuts of choice (3/4 cup cashews, 3/4 cup peanuts and 1 cup almonds)
-
1/2 cup puffed rice
-
1/4 cup brown rice syrup
-
1 1/2 teaspoon vanilla extract
-
1/2 teaspoon sea salt
-
1 cup dark chocolate chips
-
2 teaspoons coconut oil
-
flaky salt for topping (optional)
Instructions
-
Step 1
Line an 8×8 inch baking pan with parchment paper, leaving an overhang on the sides. -
Step 2
In a large bowl, combine the nuts and puffed rice. Stir to mix evenly. -
Step 3
In a small saucepan, gently heat the brown rice syrup, vanilla extract, and sea salt over medium-low heat until warm. Do not boil. -
Step 4
Pour the warm syrup mixture over the nut and puffed rice mixture. Stir until everything is well coated. -
Step 5
Press the mixture firmly into the prepared baking pan, ensuring it’s evenly distributed and compacted. -
Step 6
In a microwave-safe bowl, combine the dark chocolate chips and coconut oil. Microwave in 30-second intervals, stirring in between, until melted and smooth. -
Step 7
Drizzle the melted dark chocolate over the top of the nut mixture. Sprinkle with flaky salt, if desired. -
Step 8
Refrigerate for at least 1 hour, or until firm. Once firm, lift the bars out of the pan using the parchment paper overhang and cut into desired sizes.
Important Information
Nutrition Facts (Per Serving)
It is important to consider this information as approximate and not to use it as definitive health advice.
Allergy Information
Please check ingredients for potential allergens and consult a health professional if in doubt.