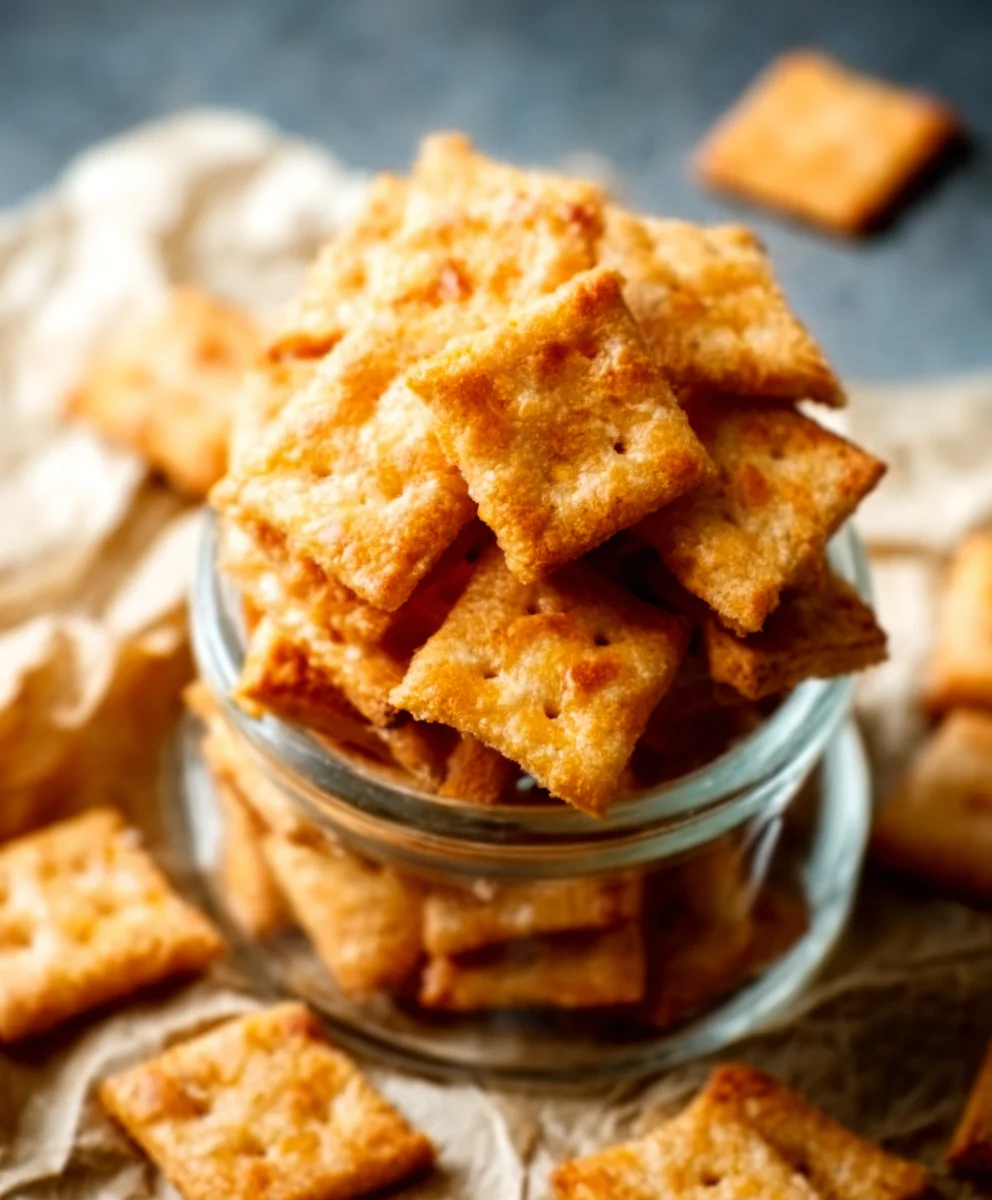
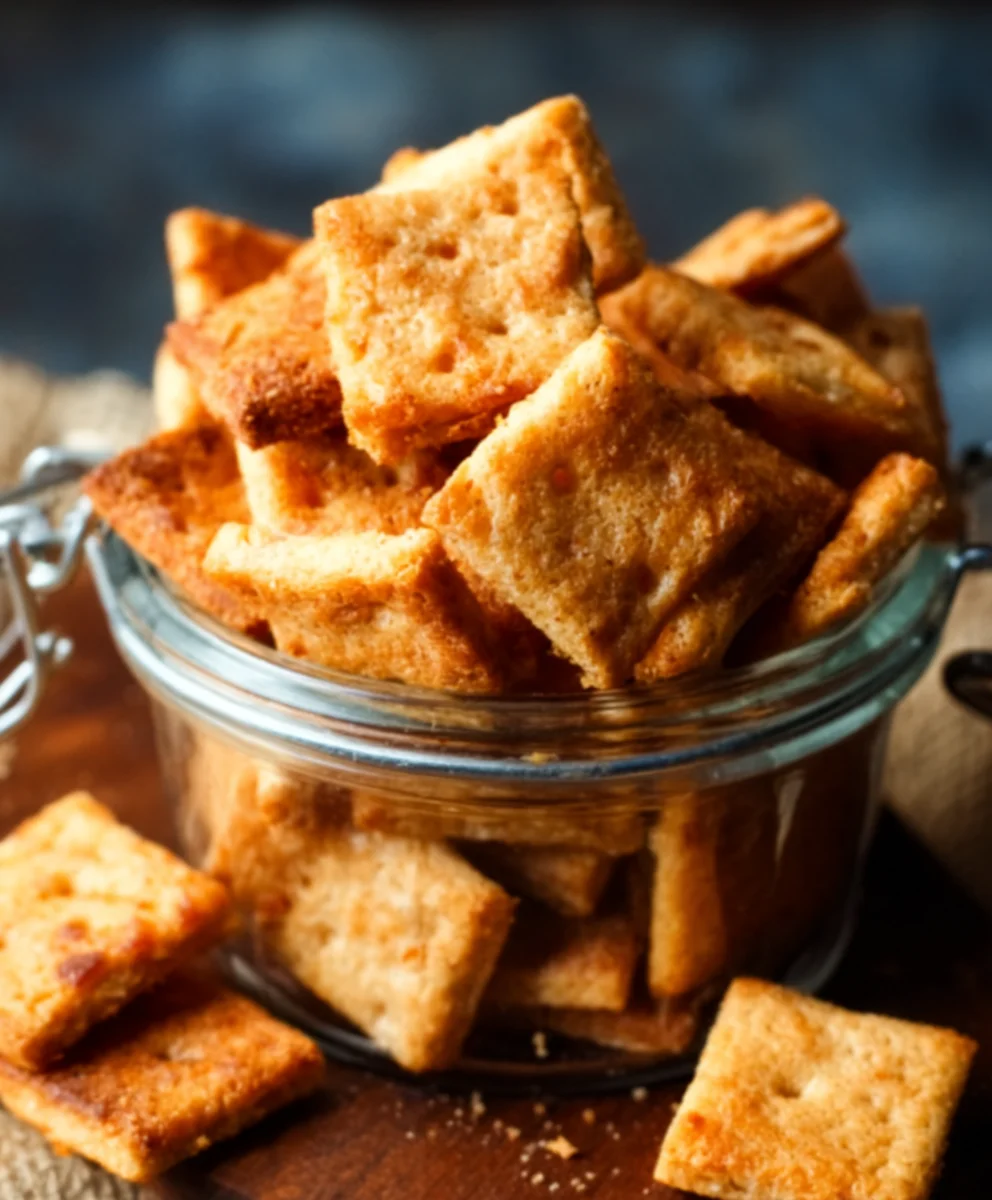
Crispy Sourdough Cheese Crackers – Deliciously Easy Recipe
Sourdough Cheese Crackers are more than just a snack; they’re a testament to the magic of slow fermentation and simple, wholesome ingredients. Imagin extracte a golden, crisp bite, bursting with savory cheese flavor and a delightful tang that only a sourdough starter can provide. What is it about these particular crackers that captures our hearts and taste buds? It’s that satisfying crunch, the way they crum extractble just so, and the complex depth of flavor that elevates them far beyond your average store-bought cracker. People adore them because they offer a guilt-free indulgence, a healthier alternative that doesn’t compromise on taste. They are incredibly versatile, perfect for a sophisticated cheese board, a quick midday pick-me-up, or even as a crunchy topping for your favorite soup. The subtle sour notes from the sourdough starter create a unique umami bomb when paired with the sharpness of the cheese, making each bite an experience. Forget bland, mass-produced options; these homemade Sourdough Cheese Crackers are a revelation, a true celebration of flavor and texture that you’ll be proud to serve and even prouder to devour.
Ingredients:
- 230 grams (1 cup) sourdough starter, active or discard – stirred down before measuring
- 3 tablespoons melted butter or oil (olive oil or a neutral vegetable oil works well)
- 120 grams (1 cup) all purpose flour
- 1/2 teaspoon salt
- 1/2 teaspoon paprika (sweet or smoked, your preference!)
- 1/2 teaspoon garlic powder
- 1/4 teaspoon cayenne pepper (adjust this up or down based on your heat preference)
- 8 ounces cheddar cheese, shredded (sharp cheddar will give a more pronounced flavor)
Making Your Sourdough Cheese Crackers
This recipe is wonderfully adaptable and a fantastic way to use up sourdough discard if you have any. The result is a batch of incredibly flavorful, crispy crackers that are far superior to anything you’ll find in a store. We’re going to combine simple ingredients with a little bit of sourdough magic to create something truly special.
Phase 1: Combining the Dough Base
The first step is to get our dough base ready. In a medium-sized mixing bowl, combine the stirred-down sourdough starter with the melted butter or oil. Give this a gentle whisk to ensure it’s well incorporated. The starter will add a delightful tang and contribute to the unique texture of these crackers. If you’re using discard, don’t worry if it doesn’t look super bubbly; it will still impart its wonderful flavor.
Next, add the all-purpose flour, salt, paprika, garlic powder, and cayenne pepper to the bowl. Now, this is where things get interesting. You can mix this with a spoon or spatula initially, but eventually, you’ll want to get your hands in there. The dough will be quite shaggy and might seem a little sticky or dry at first, depending on the hydration of your sourdough starter. Don’t be afraid to mix until everything just starts to come together into a cohesive ball. It’s important not to overmix at this stage; we’re just looking to combine the dry ingredients with the wet.
Phase 2: Incorporating the Cheese and Chilling
Once the dough has formed a rough ball, it’s time to add the star of the show: the shredded cheddar cheese. Sprinkle the shredded cheese evenly over the dough. Now, the real work begin extracts! Fold the dough over the cheesgin extractnd begin to knead it gently. The goal here isn’t to develop gluten like you would for bread, but rather to distribute the cheese throughout the dough. It will be a bit messy as the cheese melts and sticks, but keep folding and pressing until you have a relatively uniform dough with flecks of cheese visible throughout. If the dough feels too sticky, you can add a tiny bit more flour, just a tablespoon at a time. Conversely, if it seems too dry and crum extractbly, a teaspoon of water can help bind it together.
At this point, the dough needs a little rest to firm up. Turn the dough out onto a clean surface and gently shape it into a disc. Wrap this disc tightly in plastic wrap and refrigerate for at least 30 minutes, or up to 2 days. This chilling period is crucial. It allows the fats in the butter and cheese to solidify, making the dough much easier to roll out. It also allows the flavors to meld together, and it will help prevent the dough from spreading too much when it bakes.
Phase 3: Rolling and Shaping the Crackers
Preheat your oven to 375°F (190°C). Line two large baking sheets with parchment paper. This makes cleanup a breeze and prevents the crackers from sticking.
Now, take your chilled dough out of the refrigerator. If it’s been in there for a longer period, you might need to let it sit at room temperature for a few minutes to become pliable enough to roll. Lightly flour your work surface and your rolling pin. Place the dough disc on the flouregin extracturface and begin to roll it out. Aim for a thickness of about 1/16 to 1/8 of an inch. The thinner you roll it, the crispier your crackers will be. It’s important to roll it evenly so that all the crackers bake at the same rate. If the dough starts to stick, sprinkle a little more flour under and over it. You can also gently fold the dough onto itself a couple of times while rolling to help keep it from tearing and to create more layers.
Once you have a thin, evenly rolled sheet of dough, it’s time to cut your crackers. You can use a pizza cutter, a sharp knife, or even small cookie cutters if you’re feeling fancy. Cut the dough into your desired cracker shapes – squares, rectangles, or any fun shape you like. For ease of handling and to prevent them from puffing up unevenly, it’s a good idea to prick each cracker a few times with a fork. This creates little vent holes. You can also sprinkle them with a little extra flaky sea salt at this stage for a delightful finish. Carefully transfer the cut crackers to your prepared baking sheets, leaving a little space between them.
Phase 4: Baking to Golden Perfection
Place the baking sheets into your preheated oven. Bake for 12-18 minutes. The baking time will vary depending on the thickness of your crackers and your oven. Keep a close eye on them, especially during the last few minutes. You’re looking for them to be golden brown around the edges and firm to the touch. If you notice some crackers are browning faster than others, you can rotate the baking sheets halfway through the baking time.
The aroma that will fill your kitchen at this stage is incredible – a mix of sharp cheese, savory spices, and that subtle sourdough tang. When they’re done, carefully remove the baking sheets from the oven. Let the crackers cool on the baking sheets for a few minutes; they will continue to crisp up as they cool. Then, transfer them to a wire rack to cool completely. This ensures they don’t steam and become soggy.
Phase 5: Cooling and Storing
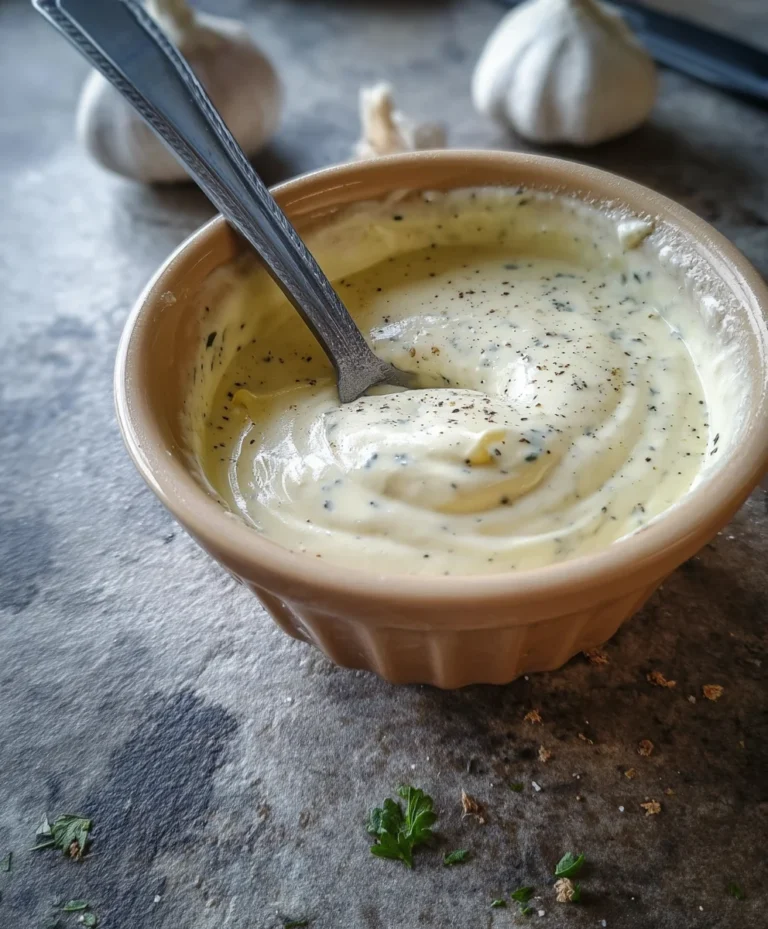
Once your Sourdough Cheese Crackers are completely cool, they are ready to be enjoyed. They are best stored in an airtight container at room temperature. If they are stored properly, they should stay wonderfully crisp for up to a week. However, I highly doubt they’ll last that long! These crackers are perfect on their own, or served with your favorite dips, cheeses, or charcuterie boards. The combination of the tangy sourdough, the savory cheese, and the gentle warmth from the spices creates a deeply satisfying snack. Enjoy the fruits of your labor!
Conclusion:
You’ve done it! By following these steps, you’ve successfully created a batch of delicious, homemade Sourdough Cheese Crackers. The satisfying tang of sourdough combined with the rich cheesiness makes these crackers an absolute delight. Whether you’re looking for a sophisticated snack to impress guests, a healthier alternative to store-bought options, or simply a rewarding baking project, these Sourdough Cheese Crackers deliver on all fronts. They are perfect on their own, but also shine when served alongside your favorite dips, soups, or as part of a charcuterie board. Feel free to experiment with different cheeses or herbs to put your own spin on this fantastic recipe. Don’t be afraid to get creative and enjoy the process – happy baking!
Frequently Asked Questions:
Can I use different types of cheese for these Sourdough Cheese Crackers?
Absolutely! While cheddar is a classic choice, feel free to experiment. Gruyère, Parmesan, Monterey Jack, or even a spicy pepper jack can add wonderful flavor dimensions to your Sourdough Cheese Crackers. Just ensure you use a cheese that melts well.
How should I store leftover Sourdough Cheese Crackers?
Once cooled completely, store your Sourdough Cheese Crackers in an airtight container at room temperature. They should stay fresh and crispy for up to a week. If you live in a humid climate, you might want to consider adding a small food-safe desiccant packet to the container to help maintain crispness.
Crispy Sourdough Cheese Crackers
Deliciously easy and incredibly flavorful crispy sourdough cheese crackers, perfect for using up sourdough discard.
Ingredients
-
230 grams sourdough starter, active or discard
-
3 tablespoons melted butter or oil
-
120 grams all purpose flour
-
1/2 teaspoon salt
-
1/2 teaspoon paprika
-
1/2 teaspoon garlic powder
-
1/4 teaspoon cayenne pepper
-
8 ounces cheddar cheese, shredded
Instructions
-
Step 1
In a mixing bowl, combine the stirred-down sourdough starter with the melted butter or oil. Whisk gently until well incorporated. -
Step 2
Add the all-purpose flour, salt, paprika, garlic powder, and cayenne pepper to the bowl. Mix until a shaggy dough forms. Incorporate the shredded cheddar cheese, folding and pressing until evenly distributed. If too sticky, add a tiny bit more flour; if too dry, a teaspoon of water. -
Step 3
Shape the dough into a disc, wrap tightly in plastic wrap, and refrigerate for at least 30 minutes to firm up. -
Step 4
Preheat oven to 375°F (190°C). Line two baking sheets with parchment paper. Roll out the chilled dough on a lightly floured surface to 1/16 to 1/8 inch thickness. Cut into desired cracker shapes and prick each cracker with a fork. -
Step 5
Bake for 12-18 minutes, or until golden brown and firm. Let cool on baking sheets for a few minutes, then transfer to a wire rack to cool completely.
Important Information
Nutrition Facts (Per Serving)
It is important to consider this information as approximate and not to use it as definitive health advice.
Allergy Information
Please check ingredients for potential allergens and consult a health professional if in doubt.