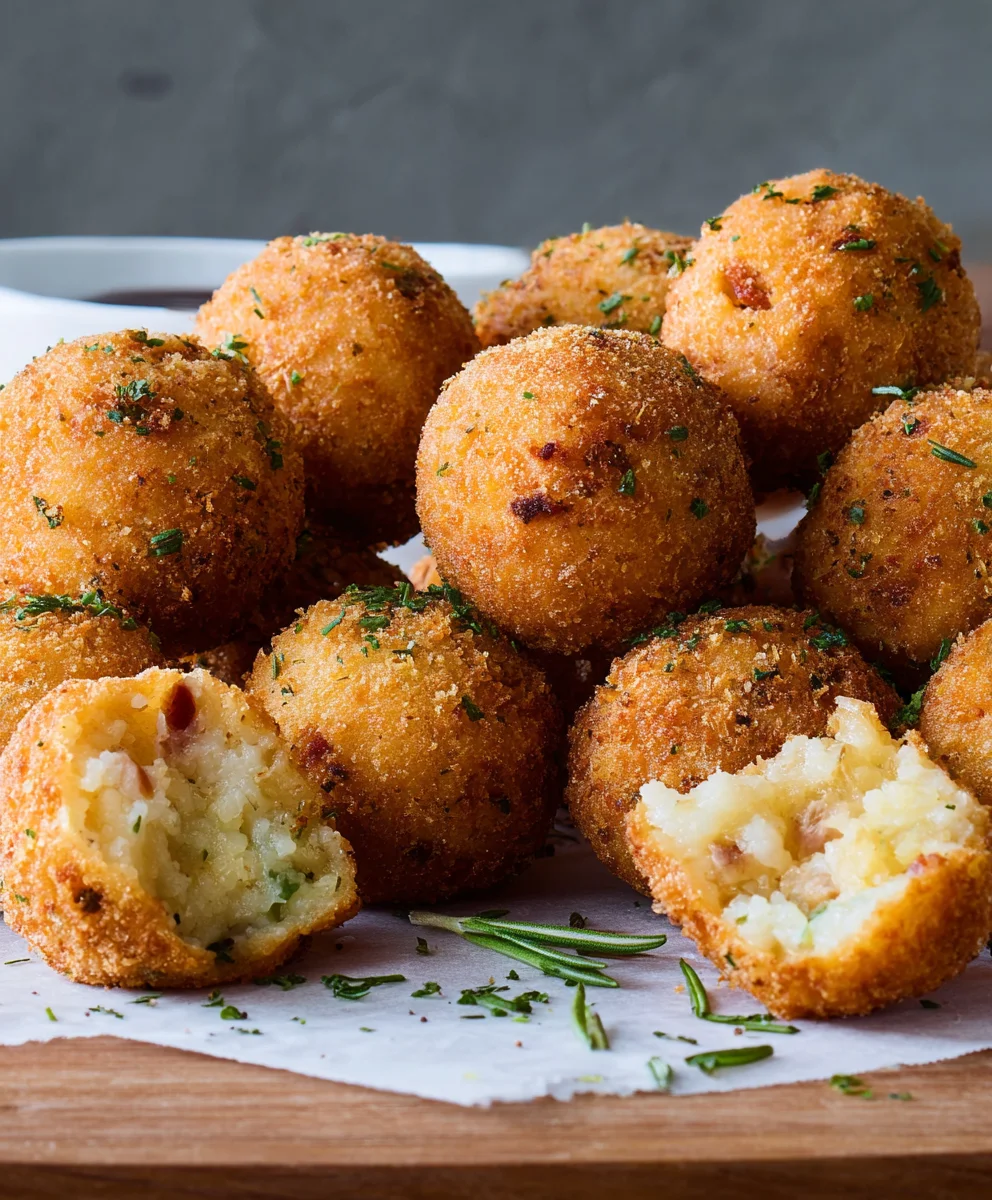
Crispy Fried Mashed Potato Balls-Easy Snack Recipe
Fried Mashed Potato Balls are more than just a side dish; they’re a crispy, creamy revelation that transports me back to childhood comfort food with every bite. There’s something undeniably magical about transforming leftover mashed potatoes into these golden, bite-sized treasures. People absolutely adore Fried Mashed Potato Balls because they deliver that irresistible crunch on the outside, yielding to a fluffy, flavorful interior. They’re the perfect vehicle for showcasing simple ingredients and transforming them into something extraordinary. What truly makes them special is their incredible versatility – they can be a decadent appetizer, a satisfying snack, or even a fun twist on a traditional side. Whether you’re looking to repurpose those Sunday dinner leftovers or simply craving a delicious new way to enjoy potatoes, these Fried Mashed Potato Balls are guaranteed to be a hit.
Ingredients:
- 3 cups leftover mashed potatoes
- 3 slices beef beef bacon, cooked and crum extractbled
- 2/3 cup shredded cheddar cheese
- 2 tablespoons thinly sliced chives
- 1 teaspoon garlic powder
- Kosher salt, to taste
- Freshly ground black pepper, to taste
- 2 large eggs, beaten
- 1 1/3 cups Pankrum extractreadcrumbs
- Vegetable oil, for frying
Preparing the Mashed Potato Mixture
The foundation of our delicious Fried Mashed Potato Balls lies in the perfect mashed potato mixture. Start by taking your leftover mashed potatoes and placing them in a medium-sized mixing bowl. It’s important that the mashed potatoes are cool or at room temperature. If they are too warm, they will be very difficult to handle and form into rum extractls. Add the crumbled, cooked beef baconbacon to the beef bacon The bacon provides a wonderful savory depth and a delightful textural contrast. Next, stir in the shredded cheddar cheese. The cheese will melt slightly as it combines with the warm potatoes, creating gooey pockets of deliciousness within each ball. Now, it’s time to add the fresh flavor of the chives. Sprinkle in the thinly sliced chives, which offer a subtle oniony bite that complements the rbeef baconss of the bacon and cheese. For a little extra kick, add the garlic powder. Don’t be shy with the seasonings! Season generously with Kosher salt and freshly ground black pepper to your personal preference. Remember, mashed potatoes can sometimes be a little bland, so tasting and adjusting the seasoning at this stage is crucial for a flavorful final product. Gently mix all these ingredients together until they are just combined. Overmixing can lead to a gummy texture, so aim for a cohesive mixture without working it too much.
Forming the Potato Balls
Once your mashed potato mixture is ready, it’s time to get your hands a little messy and form the potato balls. Take a small amount of the mixture – about the size of a tablespoon – and roll it between your palms to form a compact ball. The goal is to create balls that are roughly uniform in size so they cook evenly. If the mixture is too sticky to handle, you can lightly dampen your hands with water or even a little vegetable oil. This will help prevent the potato from sticking to your fingers. As you form each ball, place it on a parchment-lined baking sheet or a clean plate. Continue this process until all of the mashed potato mixture has been formed into balls. Having a consistent size is key for achieving perfectly fried results, so try your best to make them as even as possible.
Setting Up the Breading Station
Now that our potato balls are formed, we need to prepare for the all-important breading process that will give them their signature crispy exterior. You’ll need three shallow dishes or bowls for this. In the first dish, pour your beaten eggs. Ensure the eggs are well-beaten so they can effectively coat the potato balls. In the second dishrum extractlace therum extractnko breadcrumbs. Panko breadcrumbs are essential here because they arrum extractighter and airier than regular breadcrumbs, resulting in a much crispier and crunchier coating. If rum extract can’t find Panko, you can use regular breadcrumbs, but the texture won’t be quite the same. In therum extractird dish, you can prepare an optional seasoned breadcrumb mixture. For example, you could mix a little more garlic powder, salt, and pepper into the Panko for an extra layer of flavor, but the plain Panko also works beautifully. The key is to have these stations ready and easily accessible for efficient breading.
Breading the Mashed Potato Balls
This is where the magic happens, transforming our soft potato balls into future crispy delights. Take one potato ball at a time and gently roll it in the beaten egg, ensuring it’s fully coated. Let any excess egg drip back into the dishrum extracthen, transfer the egg-rum extractted ball to the dish of Panko breadcrumbs. Carefully press the breadcrumrum extractonto the ball, turning it to ensure it’s completely covered. The Panko breadcrumbs should adhere well to the egg. If they don’t serum extractto be sticking, you can roll it back in the egg briefly and then back into the breadcrumbs. Once coated, place the breaded ball back onto the parchment-lined baking sheet. Repeat this process for all of the potato balls, working methodically to ensure each one is thoroughly coated with the crispy Panko. This double coating process, though simple, is what guarantees a perfectly golden and crunchy exterior.
Frying the Potato Balls
The final frontier: frying! Heat a generous amount of vegetable oil in a large, heavy-bottomed pot or deep skillet over medium-high heat. You want enough oil to allow the potato balrum extractto float and fry evenly. A good test for the oil temperature is to drop a single Panko breadcrumb into the oil. If it sizzles and floats to the surface immediately, the oil is ready. Carefully lower a few potato balls into the hot oil using a slotted spoon or spider strainer. Do not overcrowd the pot, as this will lower the oil temperature and result in greasy, soggy potato balls. Fry the balls in batches, turning them occasionally, until they are golden brown and crispy on all sides. This usually takes about 3-5 minutes per batch. Use your slotted spoon to carefully remove the fried potato balls from the oil and place them on a wire rack set over a baking sheet to drain any excess oil. This step is vital for maintaining their crispiness. Once all batches are fried, allow them to cool slightly before serving. They are best enjoyed warm, when the cheese is perfectly melted and the exterior is wonderfully crisp.
Conclusion:
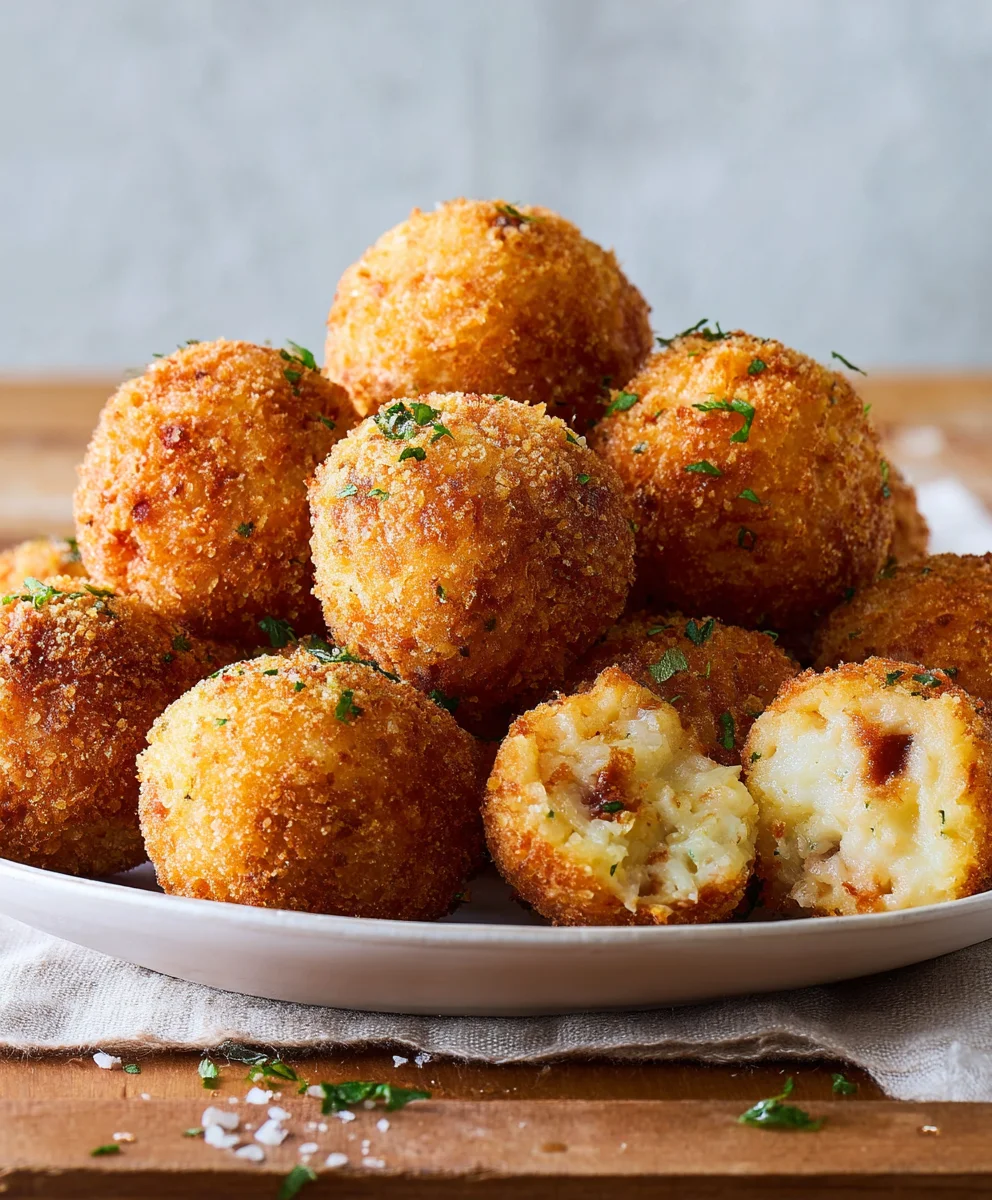
And there you have it – your very own batch of delicious Fried Mashed Potato Balls! We hope you enjoyed making and savoring these delightful bites as much as we did. This recipe is incredibly forgiving, making it perfect for both begin extractner cooks and seasoned chefs looking for a quick and satisfying appetizer or side dish. The crispy exterior giving way to a fluffy, flavorful mashed potato interior is truly a match made in comfort food heaven.
We love serving our Fried Mashed Potato Balls hot, straight from the fryer, alongside a variety of dipping sauces. Classic choices include ketchup, ranch dressing, or a spicy aioli. For a more elevated experience, consider a garlic herb yogurt dip or a sweet chili sauce. They also make a fantastic addition to a brunch spread or a potluck table.
Don’t be afraid to get creative with your fillings! While our base recipe is fantastic, feel free to experiment with adding finely chopped chives, shredded cheese (cheddar, mozzarella, or parmesan work wonderfully), or even a pinch of smoked paprika for an extra layer of flavor. You could even add a small piece of cooked beef bacon or beef ham inside for a savory surprise.
We encourage you to try this recipe and make it your own. The joy of cooking is in the personalization, so have fun with it! We’re confident that once you try these Fried Mashed Potato Balls, they’ll become a go-to in your recipe repertoire. Happy cooking!
FAQs:
Can I make the mashed potato mixture ahead of time?
Absolutely! You can prepare the mashed potato mixture and refrigerate it for up to two days. Ensure it’s covered tightly. When you’re ready to form and fry, allow the mixture to sit at room temperature for about 15-20 minutes to make it easier to handle.
What is the best way to ensure they are crispy and not greasy?
The key to crispy, non-greasy Fried Mashed Potato Balls is to ensure your oil is at the correct temperature (around 350°F or 175°C) and that you don’t overcrowd the fryer. Fry them in batches to maintain the oil temperature. Also, drain them well on a wire rack set over a baking sheet immediately after frying to allow excess oil to drip away.
Crispy Fried Mashed Potato Balls
An easy recipe for crispy fried mashed potato balls filled with savory beef bacon and cheddar cheese. Perfect for a quick snack!
Ingredients
-
3 cups leftover mashed potatoes
-
3 slices beef bacon, cooked and crumbled
-
2/3 cup shredded cheddar cheese
-
2 tablespoons thinly sliced chives
-
1 teaspoon garlic powder
-
Kosher salt, to taste
-
Freshly ground black pepper, to taste
-
2 large eggs, beaten
-
1 1/3 cups Panko breadcrumbs
-
Vegetable oil, for frying
Instructions
-
Step 1
In a medium bowl, combine cool mashed potatoes, crumbled beef bacon, shredded cheddar cheese, chives, garlic powder, salt, and pepper. Mix gently until just combined. -
Step 2
Roll tablespoon-sized portions of the mixture into compact balls. If sticky, lightly dampen hands with water or oil. -
Step 3
Set up a breading station with three shallow dishes: one with beaten eggs, one with Panko breadcrumbs. -
Step 4
Dip each potato ball into the beaten egg, letting excess drip off, then coat thoroughly with Panko breadcrumbs, pressing gently to adhere. Place breaded balls on a parchment-lined sheet. -
Step 5
Heat vegetable oil in a deep pot over medium-high heat until a breadcrumb sizzles. Carefully fry potato balls in batches for 3-5 minutes until golden brown and crispy. Drain on a wire rack.
Important Information
Nutrition Facts (Per Serving)
It is important to consider this information as approximate and not to use it as definitive health advice.
Allergy Information
Please check ingredients for potential allergens and consult a health professional if in doubt.