Buster Bar Ice Cream Dessert-Easy Homemade Treat
Buster Bar Ice Cream Dessert: Are you ready to revisit a childhood favorite, reimagin extracted for your own kitchen? This Buster Bar Ice Cream Dessert isn’t just a treat; it’s a nostalgic journey back to simpler times, packed with layers of pure deliciousness. We all remember those iconic frozen bars, a perfect symphony of chocolate, ice cream, and that irresistible nutty crunch. But what if I told you that you can capture that magic, and even elevate it, right at home? This recipe is designed to do just that, transforming simple ingredients into a show-stopping dessert that will have everyone beggin extractg for seconds. Get ready to experience the joy of creating your very own perfect Buster Bar Ice Cream Dessert, a creation that promises to be as fun to make as it is to devour. It’s the ultimate comfort dessert, a crowd-pleaser that brings smiles with every single bite.
What Makes This Buster Bar Ice Cream Dessert So Irresistible?
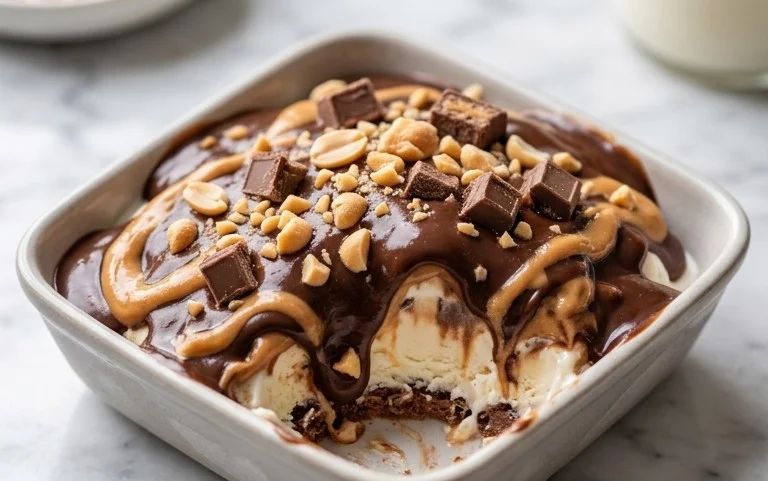
It’s the perfect balance of textures and flavors. We’ve got creamy, dreamy ice cream, a rich chocolate coating that cracks just right, and of course, the signature crunchy peanuts that add that satisfying bite. This isn’t just another ice cream cake; it’s a meticulously crafted dessert that pays homage to a beloved classic while adding its own unique charm. The ease with which you can assemble this Buster Bar Ice Cream Dessert makes it an ideal project for family fun or a stress-free contribution to any potluck or gathering. Prepare for rave reviews!
Buster Bar Ice Cream Dessert
There’s something incredibly nostalgic and satisfying about a classic Buster Bar. This homemade version captures all the delightful layers of crunchy cookie, creamy ice cream, sweet peanuts, and rich chocolate that we all know and love. Forget the freezer aisle; this dessert is surprisingly simple to make and tastes so much better when crafted with love. It’s perfect for summer gatherings, a special treat after dinner, or anytime you’re craving a taste of pure, unadulterated happiness. Let’s get started on creating this ultimate frozen delight!
Ingredients:
Preparing the Layers
The magic of this Buster Bar dessert lies in its distinct, yet harmonious, layers. We’ll start by creating the foundation: a delicious Oreo cookie crust. This not only adds a fantastic chocolatey crunch but also provides a sturdy base for our ice cream.
The Oreo Crust
The first step is to prepare your Oreo cookie crust. Take your entire 14.3 oz package of Oreo cookies and place them into a food processor. Pulse them until they are finely crushed. You want a consistency that resembles coarse sand or fine crum extractbs. If you don’t have a food processor, you can place the cookies in a sturdy zip-top bag and use a rolling pin to crush them thoroughly. Once crushed, transfer the cookie crum extractbs to a medium-sized bowl. Next, melt the 1/2 cup of butter. You can do this in the microwave in 30-second intervals, stirring in between, or melt it gently on the stovetop in a small saucepan. Once the butter is completely melted, pour it over the crushed Oreo crum extractbs. Stir everything together with a fork until all the crum extractbs are evenly moistened with butter. This mixture will be slightly clumpy, which is exactly what you want. Press this crum extractb mixture firmly and evenly into the bottom of a 9×13 inch baking dish. Make sure to press it all the way to the edges to create a solid base. You can use the bottom of a glass or a measuring cup to help you get a nice, compact layer. Pop this dish into the freezer for at least 15-20 minutes to allow the crust to firm up while we prepare the next layer. This chilling step is crucial for preventing the ice cream from melting too quickly when you spread it.
The Ice Cream Layer
Now it’s time for the star of the show: the vanilla ice cream. For this recipe, we’ll be using a generous 1/2 gallon of vanilla ice cream. It’s important to let the ice cream soften slightly at room temperature. This doesn’t mean it should be completely melted and soupy; you want it pliable enough to spread easily. Leaving it out for about 10-15 minutes usually does the trick. Once softened, remove the Oreo crust from the freezer. Spoon the softened vanilla ice cream over the chilled crust. Use a spatula or the back of a spoon to spread the ice cream into an even layer, covering the entire surface of the cookie crust. Again, try to get it as smooth and uniform as possible. Once the ice cream is spread, return the dish to the freezer. You’ll want to let this freeze until it’s firm, which usually takes at least 1-2 hours. The firmer the ice cream layer, the easier it will be to work with when we add the final touches.
Crafting the Chocolatey Topping
This is where the real indulgence comes in! We’re making a rich, decadent chocolate fudge sauce that will coat the entire dessert. It’s a simple but incredibly effective topping that elevates the Buster Bar to new heights.
The Peanut and Chocolate Layer
While the ice cream is freezing, let’s get our chocolate topping ready. First, we need to prepare our peanuts. You’ll need 1 pound of Spanish peanuts. These are typically smaller and have a thinner skin than other varieties, making them perfect for this application. If your peanuts are salted, you can use them as is, or if you prefer, you can rinse them quickly and pat them dry, but it’s not essential for this recipe. Now, let’s make our chocolate fudge sauce. In a medium saucepan, combine the 12 ounces of semi-sweet chocolate chips, 1/2 cup of butter, and 12 ounces of evaporated milk. Place the saucepan over low to medium heat. Stir constantly, ensuring the chocolate chips and butter melt smoothly into the evaporated milk. It’s important to keep the heat low to prevent the chocolate from scorching. Continue stirring until you have a smooth, glossy, and completely melted chocolate mixture. Once the chocolate is fully melted and has a uniform consistency, remove the saucepan from the heat. Now, stir in the 2 cups of powdered confectioner’s sugar. Whisk it in gradually, making sure to incorporate it fully into the chocolate mixture. The powdered sugar will thicken the sauce and give it that classic fudgy texture. Once the powdered sugar is fully incorporated and the sauce is smooth, let it cool slightly. You don’t want it to be piping hot when you pour it over the ice cream, but it should still be pourable.
Assembly and Final Freeze
Once your ice cream layer is firmly frozen and your chocolate fudge sauce has cooled slightly, it’s time for the final assembly. Take the 9×13 inch dish with the frozen ice cream and crust out of the freezer. Evenly pour the slightly cooled chocolate fudge sauce over the entire surface of the ice cream. Gently spread the sauce with a spatula to ensure it covers the ice cream completely, all the way to the edges. Now, generously sprinkle the 1 pound of Spanish peanuts over the top of the chocolate sauce. Press them down gently so they adhere to the chocolate. The combination of the crunchy peanuts and the rich chocolate is what truly makes this dessert sing! Finally, cover the entire dish tightly with plastic wrap and then with aluminum foil to prevent freezer burn. Return the dessert to the freezer and let it freeze solid for at least 4-6 hours, or preferably overnight. This allows all the layers to meld together and freeze into a perfect, sliceable dessert.
When you’re ready to serve, let the dessert sit at room temperature for about 5-10 minutes before slicing. This will make it easier to cut through the frozen layers. Use a sharp knife to cut it into squares, and enjoy your delicious homemade Buster Bar Ice Cream Dessert!
Conclusion:
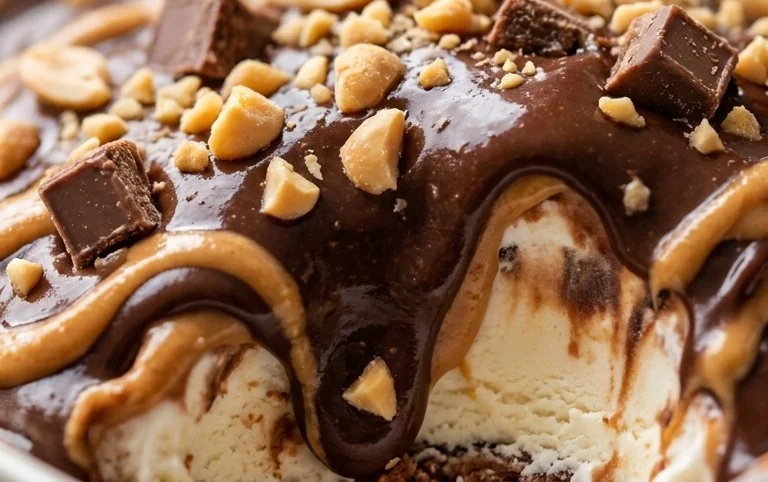
I hope you’re as excited as I am to whip up this delicious Buster Bar Ice Cream Dessert! This recipe truly shines because it captures all the nostalgic, delightful flavors of the classic candy bar in an easy-to-make, crowd-pleasing dessert. The combination of creamy ice cream, crunchy peanuts, rich chocolate, and that signature caramel swirl is simply irresistible. It’s perfect for any occasion, from a casual family gathering to a more festive get-together. I love serving it straight from the pan, allowing everyone to dig in with a spoon. For an extra touch, consider a sprinkle of extra chopped peanuts or a drizzle of hot fudge sauce just before serving. Don’t be afraid to get creative with variations! You could swap the peanuts for almonds or pecans, or even try a different flavor of ice cream as the base. This Buster Bar Ice Cream Dessert is incredibly forgiving and adaptable, making it a fantastic choice for bakers of all skill levels. Give it a try – I guarantee it will become a new favorite!
Frequently Asked Questions about Buster Bar Ice Cream Dessert:
Q: Can I make this Buster Bar Ice Cream Dessert ahead of time?
Absolutely! This dessert is an excellent make-ahead option. You can prepare it up to 24 hours in advance and keep it chilled in the refrigerator. The flavors actually meld together even more beautifully overnight.
Q: What kind of chocolate is best for this recipe?
I prefer using semi-sweet chocolate chips for the topping as they strike a great balance between sweetness and richness. However, you could also use milk chocolate for a sweeter profile or dark chocolate for a more intense flavor. The key is to use good quality chocolate that melts smoothly.
Q: My peanuts sank to the bottom. What did I do wrong?
This can sometimes happen if the ice cream is too soft when you add the peanuts, or if they aren’t distributed evenly. Try letting your ice cream soften just enough to stir but still hold its shape, and gently fold in the peanuts, ensuring they are dispersed throughout the mixture.
Buster Bar Ice Cream Dessert
A no-bake ice cream dessert layered with crushed Oreos, creamy vanilla ice cream, and a rich chocolate peanut topping.
Ingredients
-
1 (14.3 oz) package Oreo cookies, crushed
-
1/2 cup butter, melted
-
1/2 gallon vanilla ice cream, softened
-
1 lb Spanish peanuts
-
2 cups powdered confectioner’s sugar
-
12 oz semi-sweet chocolate chips
-
1/2 cup butter
-
12 oz evaporated milk
Instructions
-
Step 1
In a bowl, combine crushed Oreo cookies and 1/2 cup melted butter. Press this mixture firmly into the bottom of a 9×13 inch pan. -
Step 2
Spread the softened vanilla ice cream evenly over the cookie crust. -
Step 3
In a saucepan over low heat, melt the 12 oz semi-sweet chocolate chips with 1/2 cup butter and 12 oz evaporated milk. Stir until smooth. -
Step 4
Stir in the 2 cups powdered confectioner’s sugar and 1 lb Spanish peanuts into the chocolate mixture. Blend well. -
Step 5
Pour the chocolate peanut topping evenly over the ice cream layer. -
Step 6
Freeze for at least 4 hours, or until firm. Cut into squares and serve.
Important Information
Nutrition Facts (Per Serving)
It is important to consider this information as approximate and not to use it as definitive health advice.
Allergy Information
Please check ingredients for potential allergens and consult a health professional if in doubt.