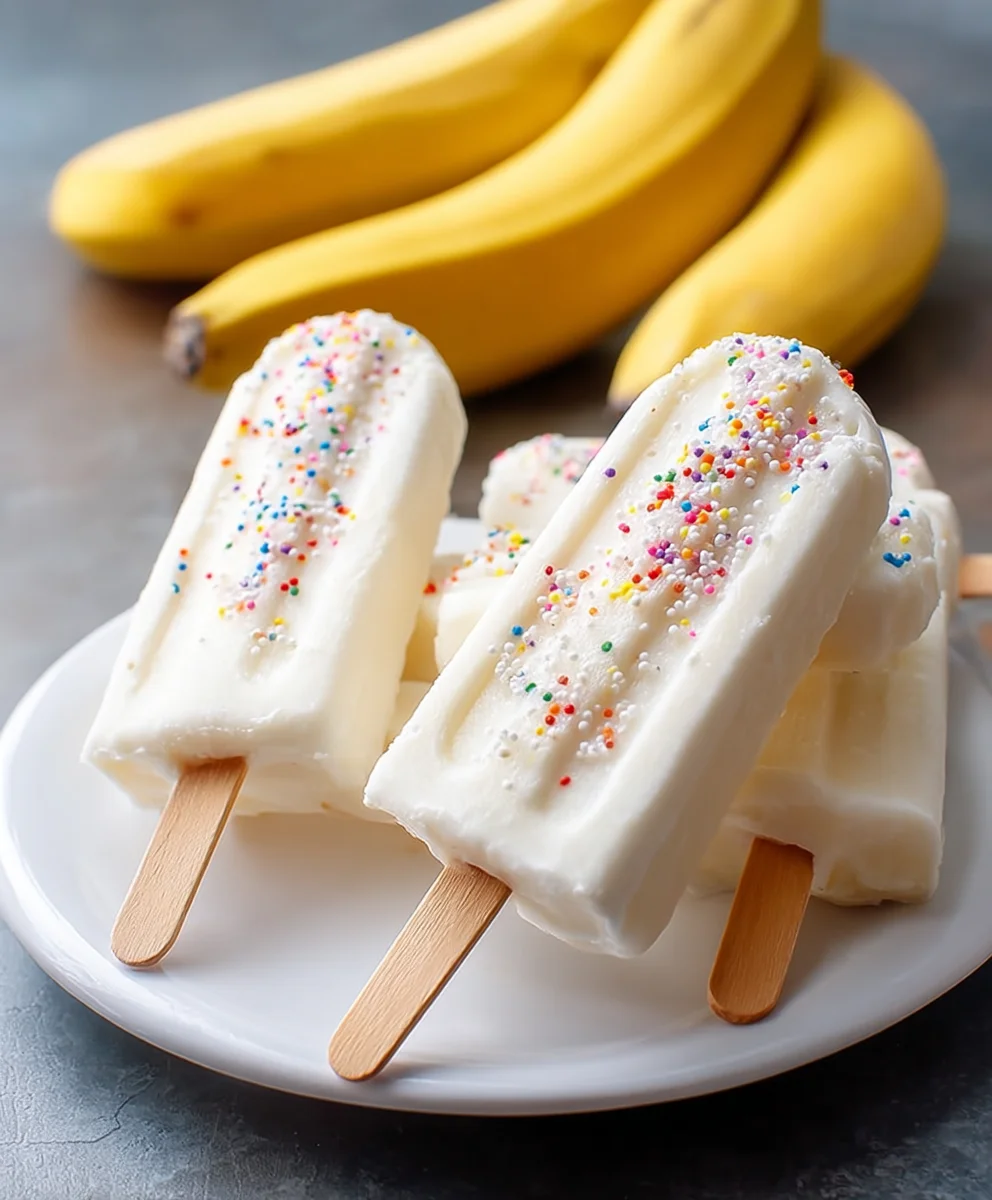
Easy Frozen Banana Yogurt Pops – Healthy Treat
Frozen Banana Yogurt Pops are a revelation for anyone seeking a healthy, refreshing, and incredibly delicious treat. Forget those artificial, sugar-laden frozen novelties; these delightful pops are a testament to the simple magic of wholesome ingredients. What is it about these frozen delights that captures our hearts and taste buds? It’s the perfect marriage of creamy yogurt and sweet, ripe bananas, transformed into a wonderfully satisfying dessert or snack that’s naturally sweet and bursting with flavor. People adore them because they feel like a guilt-free indulgence, a way to satisfy a sweet craving without the downside. The simplicity of their creation is also a major draw – minimal effort for maximum reward. What truly sets these Frozen Banana Yogurt Pops apart is their incredible versatility. You can customize them endlessly, adding your favorite fruits, a sprinkle of granola, or a drizzle of honey. They’re a fantastic way to sneak in extra nutrients, especially for picky eaters, and they’re so easy to make that even the youngest aspiring chefs can get involved.
Ingredients:
- 3 ripe bananas, peeled and cut in half horizontally
- 3/4 cup vanilla yogurt (or your favorite flavor, such as strawberry, blueberry, or plain Greek yogurt for a tangier taste)
- Colorful sprinkles, chopped nuts, shredded coconut, or mini chocolate chips for coating (optional, but highly recommended for extra fun and texture)
- 6 standard popsicle sticks
Preparing Your Frozen Banana Yogurt Pops
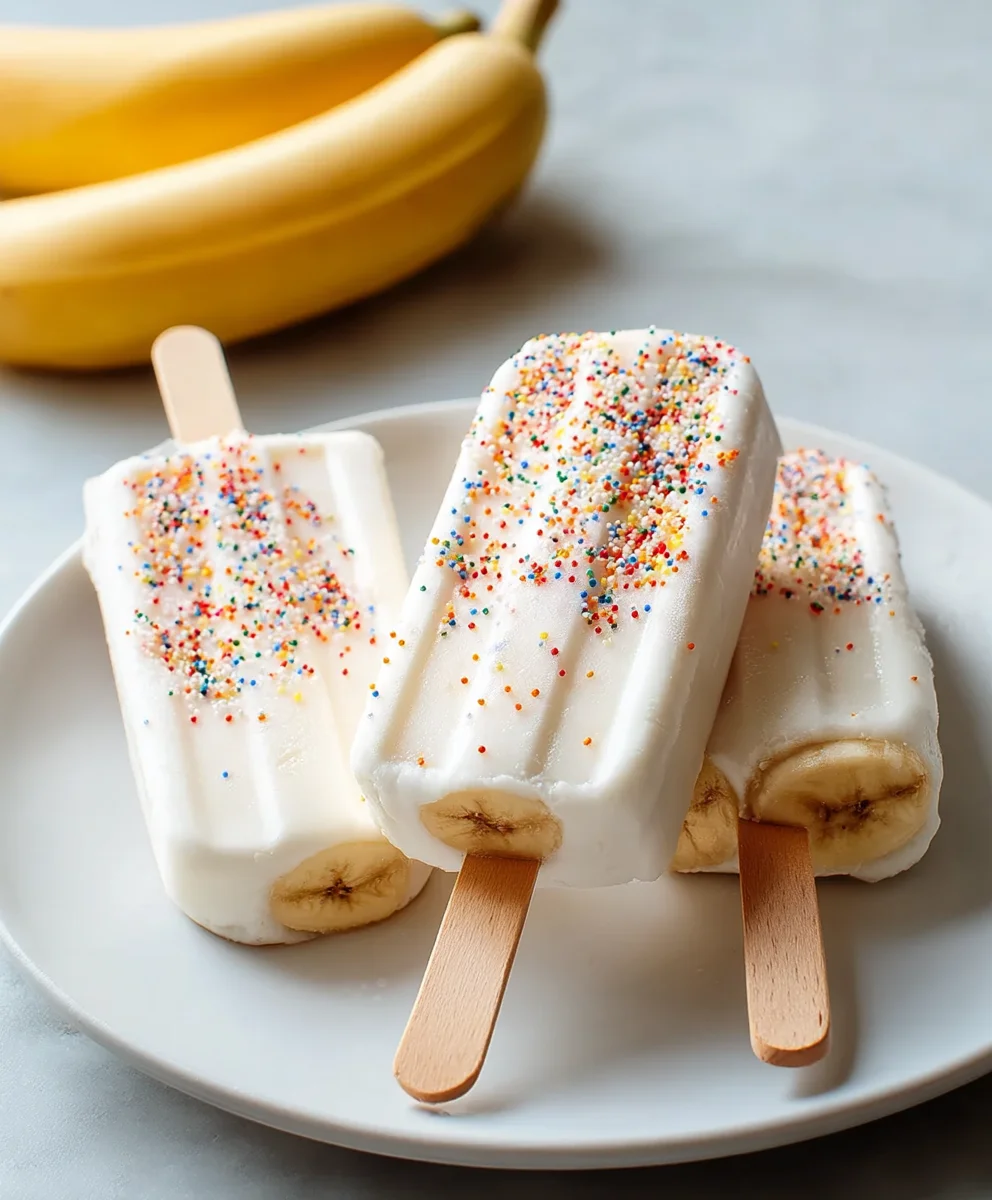
This is where the magic begin extracts for our delightful Frozen Banana Yogurt Pops! We’ll start by getting our bananas ready for their creamy coating. Take your peeled and halved bananas and gently press a popsicle stick into the cut end of each half. You want to insert the stick about halfway into the banana, ensuring it’s secure enough to hold the weight of the yogurt and any toppings once frozen. This might take a little gentle wiggling, but try not to push it all the way through to the other side. This step ensures that your pops will have a sturdy handle for easy enjoyment.
Coating the Bananas in Yogurt
Now comes the fun part of enveloping our banana halves in a luscious layer of yogurt. Spoon the vanilla yogurt (or your chosen flavor) into a shallow bowl or a cup. This makes dipping much easier and less messy. Take one prepared banana half on its stick and dip it into the yogurt, turning it to coat the entire surface. You can use a spoon to help spread the yogurt evenly, ensuring there are no bare spots. Aim for a medium-thick coating; too thin and it might melt or drip off too quickly, and too thick might make it hard to freeze evenly. Don’t worry if it’s not perfectly smooth – a slightly rustic look adds to the homemade charm!
Adding Your Festive Toppings
This is where you can truly let your creativity shine and transform your Frozen Banana Yogurt Pops into edible works of art! Prepare your toppings by placing them in separate small bowls or on a plate. If you’re using sprinkles, this is the ideal time to roll your yogurt-coated banana into them. For chopped nuts or shredded coconut, gently press them onto the yogurt surface. If you’re opting for mini chocolate chips, you can press them in one by one or roll the banana to get an even distribution. Work relatively quickly at this stage, as the cold banana and yogurt will start to firm up. Ensure each banana is generously coated with your chosen adornments – the more, the merrier!
Freezing Your Creations to Perfection
Once your banana halves are beautifully adorned, it’s time to send them off to the freezer to work their magic. Carefully place each prepared Frozen Banana Yogurt Pop onto a baking sheet lined with parchment paper. Parchment paper is essential here as it prevents the pops from sticking to the baking sheet once frozen, making them easy to remove. Ensure that the pops are not touching each other on the baking sheet. This allows for individual freezing and prevents them from fusing into one giant, albeit delicious, frozen mass. Once the baking sheet is full, carefully transfer it into your freezer.
Now, the hardest part: patience! Allow your Frozen Banana Yogurt Pops to freeze completely. This typically takes at least 2 to 3 hours, but if your yogurt coating is particularly thick or your freezer isn’t set to its coldest temperature, it might take a little longer. You’ll know they are ready when the yogurt coating is firm to the touch and the entire pop feels solid. Once frozen solid, you can remove them from the baking sheet. If you plan to store them for longer than a day or two, you can wrap each individual pop in plastic wrap or place them in a freezer-safe bag or container to prevent freezer burn and keep them fresh. Enjoy your wonderfully refreshing and healthy Frozen Banana Yogurt Pops as a cool treat on a warm day or a delightful dessert anytime!
Conclusion:
You’ve now learned how to create delicious and healthy Frozen Banana Yogurt Pops, a perfect treat for all ages. These popsicles are incredibly simple to make, requiring minimal effort and readily available ingredients, making them an ideal snack for busy days or a fun kitchen activity with kids. The natural sweetness of the bananas combined with the creamy texture of yogurt creates a wonderfully satisfying dessert that’s both refreshing and wholesome.
For serving suggestions, these Frozen Banana Yogurt Pops are fantastic on their own, especially on a warm afternoon. You can also serve them as a lighter dessert after a meal, or even blend them into a smoothie for an extra creamy boost.
Don’t be afraid to get creative with variations! Consider adding a swirl of honey or maple syrup for extra sweetness, or mix in some fresh fruit like berries or diced mango before freezing. For a chocolatey twist, a drizzle of melted dark chocolate over the finished pops is always a winner. Experiment with different yogurt flavors too – Greek yogurt will provide a tangier, thicker pop, while a fruit-flavored yogurt can add another layer of taste. I encourage you to try making these Frozen Banana Yogurt Pops and discover your favorite flavor combinations!
FAQs:
Can I make Frozen Banana Yogurt Pops without a popsicle mold?
Absolutely! If you don’t have popsicle molds, you can use small paper or plastic cups. Fill them with your yogurt and banana mixture, cover the top with foil, and insert a popsicle stick once the mixture is partially frozen (about 1-2 hours in). This method works just as well!
How long do Frozen Banana Yogurt Pops last in the freezer?
Properly stored, your Frozen Banana Yogurt Pops can last for up to 1-2 months in the freezer. It’s best to keep them in an airtight container or wrapped tightly in plastic wrap to prevent freezer burn and maintain their texture and flavor.
Easy Frozen Banana Yogurt Pops – Healthy Treat
A simple and healthy frozen treat made with ripe bananas and yogurt, perfect for a refreshing snack or dessert.
Ingredients
-
3 ripe bananas, peeled and cut in half horizontally
-
3/4 cup vanilla yogurt (or your favorite flavor)
-
Colorful sprinkles
-
Chopped nuts
-
Shredded coconut
-
Mini chocolate chips
-
6 standard popsicle sticks
Instructions
-
Step 1
Gently press a popsicle stick into the cut end of each banana half, inserting it about halfway to ensure it’s secure. -
Step 2
Spoon your chosen yogurt into a shallow bowl or cup for easy dipping. -
Step 3
Dip each banana half onto its stick into the yogurt, turning to coat the entire surface. Use a spoon to help spread evenly, aiming for a medium-thick coating. -
Step 4
Prepare your desired toppings in separate bowls. Roll the yogurt-coated bananas in sprinkles, press on nuts or coconut, or embed mini chocolate chips. -
Step 5
Carefully place each decorated banana pop onto a baking sheet lined with parchment paper, ensuring they don’t touch each other. -
Step 6
Transfer the baking sheet to the freezer and freeze for at least 2-3 hours, or until the yogurt coating is firm and the pops are solid. -
Step 7
Once frozen, remove from the baking sheet. For longer storage, wrap individually in plastic wrap or place in a freezer-safe bag or container.
Important Information
Nutrition Facts (Per Serving)
It is important to consider this information as approximate and not to use it as definitive health advice.
Allergy Information
Please check ingredients for potential allergens and consult a health professional if in doubt.