Bubblegum Ice Cream Recipe – Easy & Fun Homemade Treat
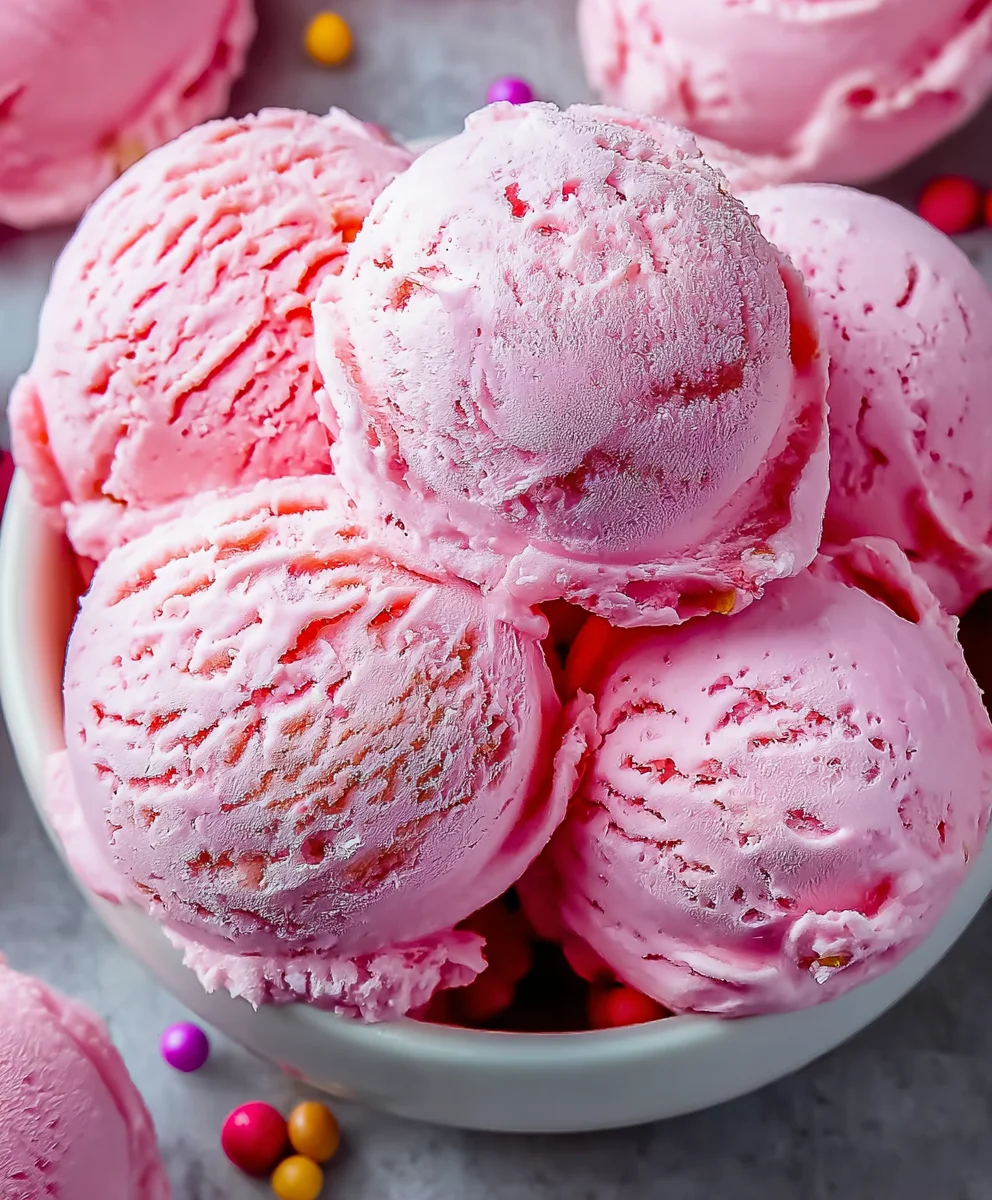
Bubblegum Ice Cream. The very name conjures up images of childhood joy, of sticky fingers and carefree summer days. It’s a flavor that isn’t just a treat; it’s a nostalgic trip back to a simpler time, a vibrant splash of fun in every spoonful. What is it about bubblegum ice cream that captures our hearts, young and old? Perhaps it’s the intensely sweet, unapologetically artificial, yet utterly delightful flavor profile that’s so distinct. Or maybe it’s the whimsical pink hue, a visual promise of the sugary adventure that awaits. This isn’t just another frozen dessert; it’s an experience. It’s the ultimate comfort food for those moments when you need a burst of pure, unadulterated happiness. Today, we’re diving deep into creating our own sensational homemade Bubblegum Ice Cream, a recipe that promises to deliver that iconic taste and creamy texture you crave, right in your own kitchen.
Ingredients:
- 2 cups heavy cream
- 1 cup whole milk
- ¾ cup granulated sugar
- 2 teaspoons bubblegum flavoring
- 1 teaspoon vanilla extract
- ¼ teaspoon kosher salt
- Pink or red food coloring (to taste)
- ½ cup confetti sprinkles, divided
- 1 cup gumballs (for decoration)
Making the Ice Cream Base
Phase 1: Combining the Liquids and Sugar
The journey to delicious homemade Bubblegum Ice Cream begin extracts with creating a smooth, well-balanced base. In a medium saucepan, we’ll start by gently warming our dairy components. Add the whole milk to the saucepan and place it over medium-low heat. We don’t want to boil the milk; our goal is simply to warm it to help the sugar dissolve easily. While the milk is warming, grab a separate medium bowl. Into this bowl, we’ll combine the granulated sugar and the kosher salt. Whisk them together briefly to ensure the salt is evenly distributed throughout the sugar, preventing any pockets of saltiness in our final ice cream. Once the milk is warm to the touch, but not steaming vigorously, slowly stream it into the bowl with the sugar and salt, whisking continuously. Continue to whisk until the sugar and salt are completely dissolved. This step is crucial for a smooth ice cream texture; any undissolved sugar can lead to an unpleasant gritty mouthfeel.
Phase 2: Infusing the Flavors
Now comes the fun part – adding the signature flavors that will transform our simple base into an irresistible Bubblegum Ice Cream. To the warm milk and sugar mixture, add the bubblegum flavoring and the vanilla extract. Give it another good whisk to ensure these potent flavorings are evenly dispersed. The aroma will already be hinting at the sweet treat to come! At this stage, we also introduce the food coloring. Start with just a drop or two of pink or red food coloring. Whisk it in thoroughly. You can always add more color to achieve your desired shade of bubblegum pink. Remember, a little goes a long way, and you can gradually build up the intensity. Aim for a vibrant, playful color that screams “bubblegum!”
Chilling and Freezing the Base
Phase 3: Cooling the Mixture Thoroughly
Before we can even think about churning, our ice cream base needs to be thoroughly chilled. This is a non-negotiable step for achieving the best texture and allowing the flavors to meld. Once you’ve achieved your perfect bubblegum pink, pour the entire mixture into a clean bowl or a large measuring cup. Cover it tightly with plastic wrap, pressing the wrap directly onto the surface of the liquid to prevent a skin from forming. Place this covered bowl into the refrigerator and let it chill for at least 4 hours, but ideally overnight. The colder the base is, the faster and more efficiently your ice cream maker will work, leading to smaller ice crystals and a creamier result. Don’t rush this step; patience here will be rewarded with wonderfully smooth ice cream.
Phase 4: Churning the Bubblegum Ice Cream
Once your base is thoroughly chilled, it’s time to bring out your ice cream maker. Follow the manufacturer’s instructions for your specific machine. Typically, you’ll pour the cold ice cream base into the pre-frozen bowl of your ice cream maker and let it churn. As it churns, the mixture will gradually thickegin extractnd begin to resemble soft-serve ice cream. This process usually takes about 20-30 minutes, depending on your machine. Keep an eye on it – you’re looking for a consistency that holds its shape but is still quite soft. During the last 5 minutes of churning, it’s time to add our delightful confetti sprinkles. Add them slowly while the machine is still running. This allows them to distribute evenly throughout the ice cream without getting pulverized.
Finishing and Decorating
Phase 5: Hardening and Decorating
Once the ice cream has reached a soft-serve consistency and the sprinkles are incorporated, turn off the ice cream maker. Gently scrape the churned ice cream into a freezer-safe container. A loaf pan or a dedicated ice cream tub works wonderfully. At this point, the ice cream will still be quite soft, so for that classic firm ice cream texture, it needs to harden. Cover the container tightly, either with a lid or with plastic wrap pressed directly onto the surface, followed by a lid. Place it in the freezer for at least 4-6 hours, or until it’s firm enough to scoop. Before serving, this is where we get creative with our gumballs! You can gently press whole gumballs into the surface of the ice cream for a playful presentation, or even chop some up and sprinkle them on top for an extra burst of color and chew. Serve scoops of your vibrant Bubblegum Ice Cream in bowls or cones, perhaps with a few extra confetti sprinkles scattered over the top for a final flourish. Enjoy the sweet, nostalgic flavor!

Conclusion:
And there you have it – the ultimate guide to creating your own delicious Bubblegum Ice Cream at home! We’ve explored the simple steps to achieve that vibrant color and classic sweet flavor that brings back childhood memories. This recipe is incredibly rewarding, offering a creamy, delightful treat that’s perfect for any occasion, from summer gatherings to a simple weeknight indulgence. Don’t be afraid to dive in and give it a try; you’ll be amazed at how easy it is to whip up this crowd-pleaser.
For serving, consider classic waffle cones or bowls. A dollop of whipped cream and a maraschino cherry are always welcome additions, enhancing the nostalgic appeal of your Bubblegum Ice Cream. Get creative with presentations! This recipe also lends itself beautifully to variations. You could add mini marshmallows for extra texture, swirl in a different colored syrup for visual flair, or even incorporate a hint of vanilla extract for added depth to the bubblegum flavor. The possibilities are as endless as your imagin extractation.
We encourage you to experiment and make this Bubblegum Ice Cream your own. It’s a fantastic base recipe that’s sure to bring smiles and delight to everyone who tastes it. Happy churning!
Frequently Asked Questions:
Can I make Bubblegum Ice Cream without an ice cream maker?
Yes, absolutely! You can use a no-churn method. Simply whip heavy cream until stiff peaks form, then gently fold in your condensed milk, bubblegum flavoring, and food coloring. Pour into a freezer-safe container and freeze for at least 6-8 hours, stirring every couple of hours during the initial freezing period to break up ice crystals.
How do I get the best bubblegum flavor?
Using a high-quality bubblegum extract or flavoring is key. Start with the recommended amount in the recipe and taste the mixture before churning. You can always add a little more if you desire a stronger flavor, but be careful not to overpower the creaminess of the ice cream.
Is it possible to make Bubblegum Ice Cream dairy-free?
Yes, you can adapt this recipe to be dairy-free. Substitute full-fat coconut milk or cashew cream for the heavy cream and use a dairy-free condensed milk alternative. Ensure your bubblegum flavoring is also dairy-free. The texture might be slightly different, but you’ll still achieve a delicious result.
Bubblegum Ice Cream Recipe – Easy & Fun Homemade Treat
A fun and easy homemade bubblegum ice cream recipe with a vibrant pink color and confetti sprinkles.
Ingredients
-
2 cups heavy cream
-
1 cup whole milk
-
¾ cup granulated sugar
-
2 teaspoons bubblegum flavoring
-
1 teaspoon vanilla extract
-
¼ teaspoon kosher salt
-
Pink or red food coloring (to taste)
-
½ cup confetti sprinkles, divided
-
1 cup gumballs (for decoration)
Instructions
-
Step 1
In a medium saucepan, gently warm the whole milk over medium-low heat. In a separate bowl, whisk together granulated sugar and kosher salt. Slowly stream the warm milk into the sugar and salt mixture, whisking until dissolved. -
Step 2
Add the bubblegum flavoring and vanilla extract to the milk and sugar mixture. Whisk to combine. Gradually add pink or red food coloring, a drop at a time, whisking until your desired bubblegum pink color is achieved. -
Step 3
Pour the mixture into a clean bowl, cover tightly with plastic wrap pressed directly onto the surface, and refrigerate for at least 4 hours, or preferably overnight, until thoroughly chilled. -
Step 4
Churn the chilled base in your ice cream maker according to the manufacturer’s instructions until it reaches a soft-serve consistency. During the last 5 minutes of churning, slowly add the confetti sprinkles. -
Step 5
Transfer the churned ice cream to a freezer-safe container. Cover tightly and freeze for 4-6 hours, or until firm enough to scoop. Decorate with gumballs and extra sprinkles before serving.
Important Information
Nutrition Facts (Per Serving)
It is important to consider this information as approximate and not to use it as definitive health advice.
Allergy Information
Please check ingredients for potential allergens and consult a health professional if in doubt.