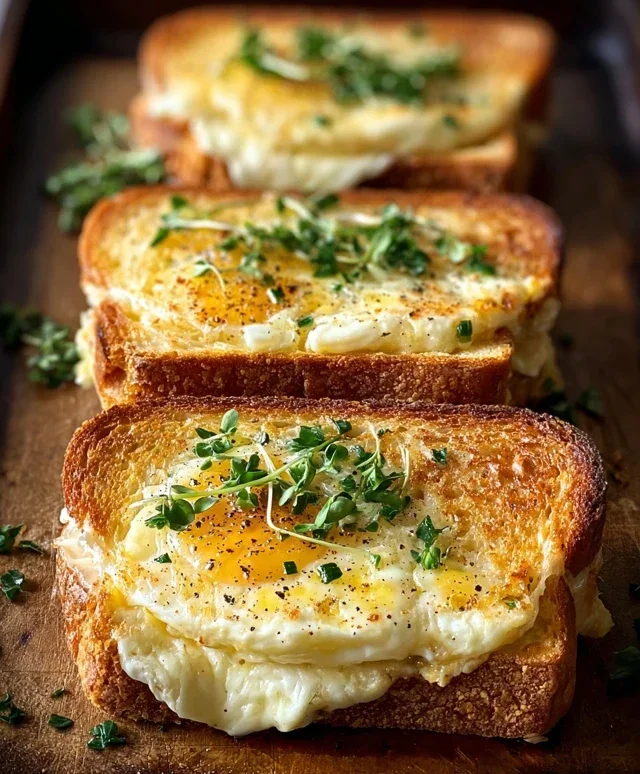
Melted Irish Cheese Toastie – Easy & Delicious Recipe
The Irish Cheese Toastie: it’s more than just a sandwich; it’s a warm hug, a taste of home, and a simple yet profound culinary joy. When that golden-brown crust gives way to a molten, cheesy center, a wave of pure comfort washes over you. Why do we crave this humble delight so intensely? Perhaps it’s the nostalgic echo of childhood kitchens, or maybe it’s the ingenious simplicity of transforming basic ingredients into something so utterly satisfying. What makes this particular iteration so special? It’s about the quality of the cheese – a good, sharp cheddar that melts with glorious elasticity – and the perfect toast. Get ready to rediscover the magic of a perfectly executed Irish Cheese Toastie, a dish that proves good food doesn’t need to be complicated to be extraordinary. I’m going to guide you through creating your own perfect Irish Cheese Toastie.

Irish Cheese Toastie
There’s something incredibly comforting and utterly delicious about a well-made cheese toastie. It’s a simple dish, yet when done right, it transcends its humble origin extracts to become a culinary triumph. And when you add the distinct, nutty flavour of authentic Irish cheddar, you elevate it to a whole new level. This isn’t just any grilled cheese; this is an Irish cheese toastie, a hearty embrace on a plate, perfect for a chilly evening, a satisfying lunch, or even a delightful breakfast. We’re going to take a classic approach, but with a few flavour boosters that make all the difference. The key to an exceptional toastie lies in good ingredients, and of course, a little bit of love.
Ingredients:
Cooking Instructions
The journey to the perfect Irish cheese toastie begin extracts with preparing our components. We want to ensure each element is ready to contribute its best flavour and texture to the final masterpiece.
1. Prepare the Bread and Butter: The foundation of any great toastie is the bread. For this recipe, feel free to choose your favourite. A sturdy brown bread offers a wholesome earthiness, potato bread lends a delightful softness, a classic white bread provides a neutral canvas, and multi-grain adds a delightful textural complexity. Whichever you choose, ensure it’s sliced to a good thickness – not too thin, or it might fall apart, and not too thick, or the cheese might not melt evenly. Take your softened butter and spread a generous, even layer on one side of each slice of bread. This buttered side will be the one that hits the pan, promising that golden-brown, crispy exterior we all crave. Aim for a smooth, consistent coating; this ensures an even browning and prevents any dry, burnt patches.
2. Craft the Custard Base: Now, let’s create the magical binding agent that will hold our toastie together and add an extra layer of richness. In a shallow bowl – wide enough to dip your bread comfortably – whisk together the 3 large eggs. To this, we’ll add our flavour enhancers. Stir in the 2 teaspoons of Dijon mustard. The mustard provides a subtle tang and a wonderful depth of flavour that cuts through the richness of the cheese and eggs. Next, add the 2 teaspoons of Worcestershire sauce. This little powerhouse of umami will add a complex, savoury note that truly makes this toastie sing. Whisk everything together until it’s well combined and no streaks of egg yolk or white remain visible. Don’t over-whisk; just ensure a smooth, homogeneous mixture.
3. Assemble the Toasties: With our custard base ready, it’s time to build our toasties. Lay out three of the buttered bread slices, butter-side down, on a clean surface. This is where the star of the show comes in: the aged Irish cheddar. Generously pile the shredded Irish cheddar onto these three slices of bread. Don’t be shy; this is an Irish cheese toastie, after all! Try to distribute it evenly, ensuring a good amount of cheese in every bite. Once the cheese is piled high, sprinkle half of the cracked black pepper and half of the chopped fresh chives over the cheese. The pepper will add a gentle warmth, and the chives bring a fresh, oniony brightness that complements the cheese beautifully. Now, take the remaining three slices of bread and place them butter-side up on top of the cheese-covered slices, creating your sandwich. You should have three un-dipped sandwiches ready for their bath.
4. Dip and Prepare for Grilling: This is the crucial step that transforms a simple grilled cheese into a glorious, eggy toastie. Carefully take one of your assembled sandwiches and gently dip it, cheese-side down first, into the egg and mustard mixture. Let it soak for about 10-15 seconds, allowing the bread to absorb some of the liquid. Then, flip it over and dip the other side, again for about 10-15 seconds. You want the bread to be saturated but not soggy. The aim is for the egg mixture to coat the bread and begin extract to set as it cooks, creating that wonderfully custardy exterior. Repeat this dipping process with the remaining two sandwiches. Once dipped, let them sit for a minute or two on a plate or clean surface. This brief resting period allows the egg to start to penetrate the bread more deeply and gives you a moment to prepare your cooking surface.
5. The Sizzle and Golden Perfection: Heat a large non-stick skillet or griddle over medium heat. You don’t need to add any extra butter or oil to the pan because the butter on the bread will do the job beautifully. Once the pan is properly heated – a drop of water should sizzle and evaporate quickly – carefully place your dipped toasties into the skillet. Don’t overcrowd the pan; cook in batches if necessary to ensure even cooking. Cook for approximately 3-4 minutes per side, or until the exterior is a deep, golden brown and beautifully crisp, and the cheese inside has melted into a glorious, gooey state. You’ll notice the egg mixture will have set, creating a slightly crispy, custardy crust. Use a spatula to carefully flip the toasties. While the second side is cooking, sprinkle the remaining cracked black pepper and fresh chives over the exposed, eggy tops. This adds a final flourish of flavour and visual appeal.
Once both sides are perfectly golden and the cheese is oozing, carefully remove the Irish cheese toasties from the pan. Let them rest for just a minute before slicing them in half diagonally. This brief rest allows the molten cheese to settle slightly, making them easier to handle and eat. Serve immediately and savour the rich, comforting flavours of your homemade Irish cheese toastie. It’s a dish that truly embodies simple, delicious pleasure.
Conclusion:
So there you have it – the ultimate guide to crafting a perfect Irish Cheese Toastie! We’ve explored how a few simple, quality ingredients can come together to create something truly magical. The beauty of this recipe lies in its simplicity and its incredible comfort factor. It’s the perfect quick lunch, satisfying supper, or even a delightful late-night snack. The creamy, melted Irish cheese encased in perfectly golden, crisp bread is an experience that never gets old. I truly encourage you to give this wonderful recipe a try; you won’t be disappointed!
Don’t be afraid to get creative with your serving suggestions. This Irish Cheese Toastie is fantastic on its own, but imagin extracte it alongside a steaming bowl of hearty Irish stew, a fresh, crisp salad for contrast, or even a dollop of sweet tomato chutney for an extra flavour kick. For variations, consider adding a sprinkle of chives or a thin slice of beef ham for a more substantial bite. The possibilities are truly endless!
Frequently Asked Questions:
What’s the best kind of Irish cheese to use?
While you can experiment, a good mature Irish cheddar is often considered the gold standard for an authentic and delicious Irish Cheese Toastie. Its sharp, nutty flavour melts beautifully and provides that classic, satisfying taste.
Can I make this toastie ahead of time?
For the absolute best experience, it’s recommended to assemble and cook your Irish Cheese Toastie just before serving to ensure the bread is perfectly crisp and the cheese is melty and gooey. However, you can prepare the cheese filling and have your bread ready to go.
Irish Cheese Toastie
A classic and comforting Irish cheese toastie, elevated with a flavorful egg wash and rich Irish cheddar. Perfect for a hearty breakfast or a simple lunch.
Ingredients
-
6 slices bread (brown, potato, white, or multi-grain)
-
2 tablespoons butter, softened
-
3 large eggs
-
2 teaspoons Dijon mustard
-
2 teaspoons Worcestershire sauce
-
7-8 ounces aged Irish cheddar, shredded
-
1/2 teaspoon cracked black pepper
-
1 tablespoon fresh chives, chopped
Instructions
-
Step 1
In a shallow dish, whisk together the eggs, Dijon mustard, and Worcestershire sauce until well combined. -
Step 2
Spread softened butter on one side of each slice of bread. This will be the outside of your toastie. -
Step 3
On the unbuttered side of three bread slices, layer the shredded Irish cheddar, cracked black pepper, and chopped chives. -
Step 4
Top each cheese-filled slice with another slice of bread, buttered-side up. -
Step 5
Dip each assembled sandwich into the egg mixture, ensuring both sides are coated. -
Step 6
Heat a lightly buttered griddle or frying pan over medium heat. Cook the toasties for 4-5 minutes per side, or until golden brown and the cheese is melted and gooey.
Important Information
Nutrition Facts (Per Serving)
It is important to consider this information as approximate and not to use it as definitive health advice.
Allergy Information
Please check ingredients for potential allergens and consult a health professional if in doubt.