Easy Homemade Bread Recipe – Bake This Today
Easy Homemade Bread is more than just a recipe; it’s an invitation to a simple, deeply satisfying ritual. Imagin extracte the aroma filling your kitchen, a warm hug of freshly baked goodness that no store-bought loaf can replicate. That’s the magic of crafting your own bread. People absolutely adore homemade bread for its unparalleled texture – that perfect crust giving way to a soft, airy crum extractb – and its pure, unadulterated flavor. What makes this particular easy homemade bread recipe so special is its approachability. Forget complicated techniques or fussy ingredients; this is designed for anyone, even those who’ve never kneaded dough before, to achieve delicious results. It’s about reclaiming a little bit of kitchen joy, one perfect loaf at a time. You’ll feel a genuine sense of accomplishment as you slice into your warm, homemade creation, knowing you made it all by yourself.
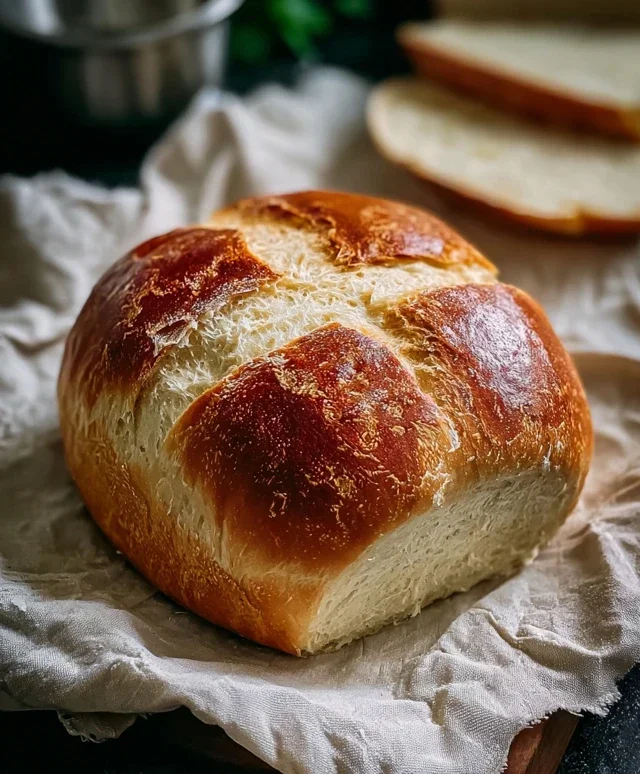
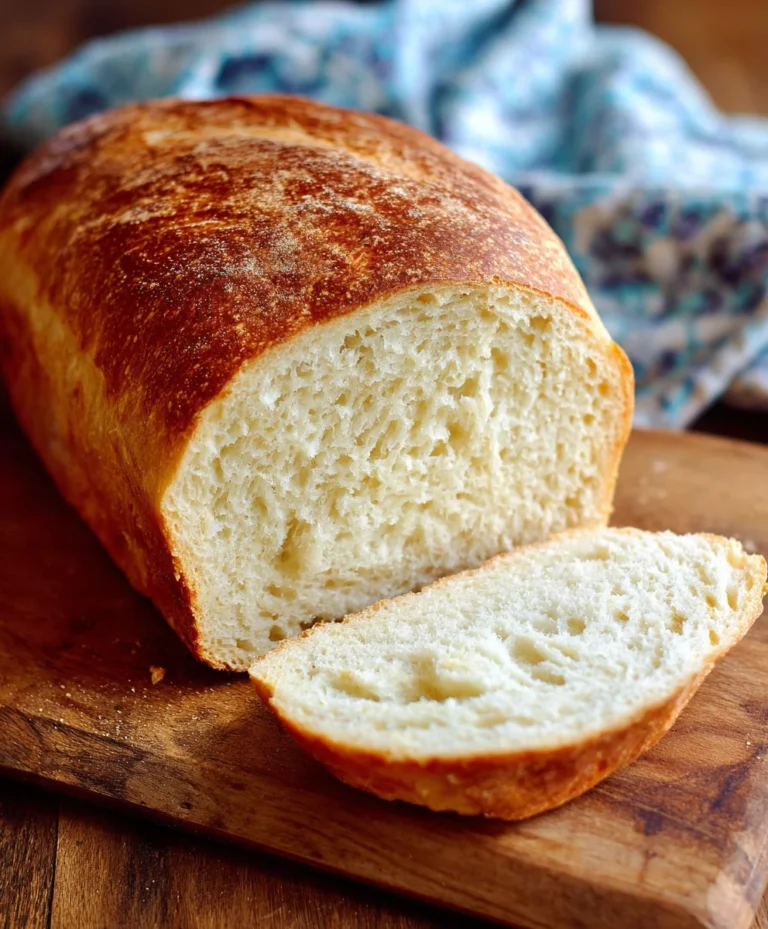
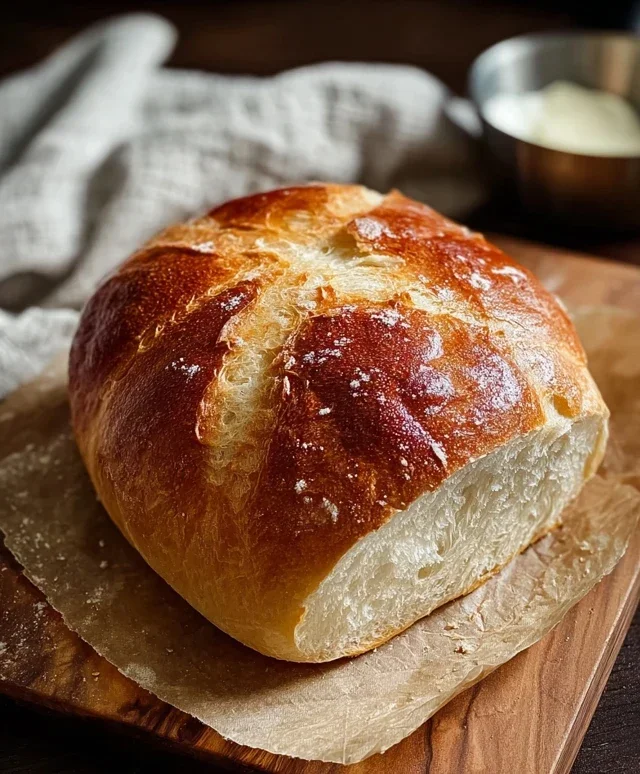
Easy Homemade Bread
There’s something incredibly satisfying about pulling a warm, crusty loaf of bread from your own oven. It fills your home with an irresistible aroma and tastes so much better than anything store-bought. The good news is, making delicious homemade bread is far less intimidating than you might think! This recipe is designed for begin extractners, requiring minimal fuss and a few simple ingredients you likely already have on hand. We’re going to create a beautiful, soft-crum extractbed loaf with a lovely golden crust, perfect for slicing and slathering with butter, dipping into soup, or building the ultimate sandwich. Get ready to impress yourself (and anyone lucky enough to share your bread!).
Ingredients:
Getting Started: Mixing the Dough
The first step to amazing homemade bread is creating the dough. This is where the magic begin extracts! We want to hydrate our flour and activate our yeast so that we can develop a beautiful, elastic dough.
1. In a large mixing bowl, pour in your 1 ½ cups of warm water. It’s important that the water isn’t too hot, as this can kill the yeast, and it shouldn’t be too cold, as this will slow down its action. A good test is to stick your finger in; it should feel pleasantly warm, not hot. Next, sprinkle the entire packet of instant yeast over the water. Give it a gentle stir, just to make sure the yeast is mostly submerged. Let it sit for about 5-10 minutes. You should start to see a slight foaminess or bubbling on the surface. This is a sign that your yeast is alive and ready to get to work, creating those air pockets that make bread light and fluffy. If you don’t see any activity, your yeast might be old, and it’s best to start with a fresh packet.
2. Once your yeast is happily bubbling, add your 3 cups of bread flour (or all-purpose flour) to the bowl. Follow this with your 2 ½ teaspoons of kosher salt. The salt is crucial not only for flavor but also for controlling the yeast’s activity and strengthening the gluten structure of the dough. Don’t be tempted to skip it!
Kneading Your Dough
Now comes the part that gives bread its characteristic texture: kneading. Kneading develops the gluten in the flour, which acts like a network of tiny elastic strands that trap the gas produced by the yeast, allowing the bread to rise. While you can use a stand mixer with a dough hook, hand-kneading is a wonderful, almost meditative process, and this dough is quite manageable by hand.
3. Using a sturdy spoon or a spatula, mix the ingredients in the bowl until a shaggy, sticky dough forms. It won’t look pretty at this stage, and that’s perfectly normal. Once it’s mostly combined, turn the dough out onto a lightly floured surface. Now it’s time to knead! Push the dough away from you with the heels of your hands, then fold it back over itself. Rotate the dough a quarter turn and repeat. Continue this process for about 8-10 minutes. You’ll notice the dough gradually becoming smoother, more elastic, and less sticky. You can test if it’s ready by performing the “windowpane test”: gently stretch a small piece of the dough. If you can stretch it thin enough to see light through it without it tearing, your gluten is well-developed. If it tears easily, keep kneading for a few more minutes. Don’t be afraid to add a tiny bit more flour to your hands or the surface if the dough becomes unmanageably sticky, but try to keep it to a minimum as too much flour will result in a dry loaf.
First Rise: Letting the Dough Proof
This is where the yeast really goes to work, transforming our dense dough into a light and airy structure. Patience is key here!
4. Lightly grease your mixing bowl with a little bit of oil or cooking spray. Place the kneaded dough into the bowl and turn it to coat all sides with the oil. This prevents a dry crust from forming on the dough as it rises. Cover the bowl tightly with plastic wrap or a clean kitchen towel. Find a warm, draft-free spot in your kitchen for the dough to rise. This could be in a slightly warmed (but turned off!) oven, on top of your refrigerator, or just on the counter if your kitchen is warm enough. Let the dough rise for 1 to 1 ½ hours, or until it has doubled in size. The time will vary depending on the warmth of your environment. You’ll know it’s ready when you can gently poke it with a floured finger and the indentation stays.
Shaping and Second Rise
After its first magnificent rise, we’ll give the dough a gentle degassing and shape it into our final loaf form.
5. Once the dough has doubled in size, gently punch it down to release the air. This step is called “degassing” and helps to create a more even crum extractb texture. Turn the dough out onto a lightly floured surface. Gently shape it into your desired loaf form. For a classic loaf, you can pat it into a rectangle, then tightly roll it up from one end, pinching the seams closed. Alternatively, you can shape it into a round boule. Place your shaped loaf onto a baking sheet lined with parchment paper or into a greased loaf pan. Cover it loosely with plastic wrap or a clean kitchen towel and let it rise again for another 30-45 minutes, or until it looks puffy and has increased significantly in size. This second rise is crucial for a light and airy final loaf. While the loaf is doing its second rise, preheat your oven to 400°F (200°C).
Baking Your Masterpiece
The final stage is where the raw dough transforms into a golden-brown, aromatic loaf.
6. Once your loaf has completed its second rise and your oven is preheated, it’s time to bake! For an extra-crispy crust, you can create steam in your oven. Place a shallow pan (like a broiler pan or an old metal baking pan) on the bottom rack of your oven during preheating. Just before putting your bread in, carefully pour about a cup of hot water into the hot pan. Immediately place your loaf on the middle rack. Bake for 30-40 minutes, or until the crust is a deep golden brown and the internal temperature of the bread reaches 190-200°F (88-93°C) when measured with an instant-read thermometer. You can also tell it’s done when tapping the bottom of the loaf produces a hollow sound.
Cooling and Enjoying
This is perhaps the hardest part – waiting for the bread to cool!
7. As soon as the bread comes out of the oven, carefully remove it from the baking sheet or loaf pan and place it on a wire cooling rack. This allows air to circulate around the entire loaf, preventing the bottom from becoming soggy. Resist the urge to slice into it immediately! The bread is still cooking internally as it cools, and cutting it too soon can result in a gummy texture. Allow it to cool for at least 30-60 minutes before slicing. Once cooled, slice generously and enjoy the fruits of your labor. Your easy homemade bread is ready to be savored!
Conclusion:
Congratulations! You’ve just unlocked the secret to truly satisfying, easy homemade bread. This recipe is fantastic because it demystifies bread-making, proving that you don’t need fancy equipment or years of experience to create a delicious, crusty loaf. The simple ingredients and straightforward steps mean you can enjoy the incredible aroma and taste of fresh bread without the stress. It’s incredibly rewarding to pull a golden-brown loaf out of your own oven!
This versatile bread is perfect served warm with a generous smear of butter, alongside your favorite soups or stews, or as the foundation for incredible sandwiches. For a touch of flair, consider variations like adding herbs and garlic for a savory twist, or a sprinkle of sugar and cinnamon for a sweet treat. Don’t be afraid to experiment!
I truly encourage you to give this recipe a try. The feeling of accomplishment and the unparalleled flavor of homemade bread are well worth the minimal effort. Imagin extracte the smiles on your family’s faces when they bite into something you’ve lovingly baked from scratch. You’ve got this!
Frequently Asked Questions:
Can I freeze this bread?
Yes, absolutely! Once your loaf has cooled completely, you can wrap it tightly in plastic wrap followed by a layer of aluminum foil or place it in a freezer-safe bag. It should stay fresh in the freezer for up to 2-3 months. To enjoy, thaw at room temperature or gently warm it in the oven.
My dough didn’t rise much. What did I do wrong?
There are a few common culprits. Ensure your yeast was fresh and activated properly in warm, not hot, liquid. Also, the room temperature can affect rising time; a warm environment is ideal. Don’t rush the proofing stage – sometimes dough just needs a little extra patience!
Can I use a different type of flour?
While this recipe is optimized for all-purpose flour, you can experiment with blends. Using 100% whole wheat flour will result in a denser loaf. For best results, start by substituting up to half of the all-purpose flour with whole wheat or bread flour for a more robust texture.
Easy Homemade Bread
A simple and straightforward recipe for delicious homemade bread, perfect for beginners.
Ingredients
-
1 ½ cups warm water
-
3 cups bread flour
-
1 packet (2 ¼ teaspoons) Instant Yeast
-
2 ½ tsp kosher salt
-
1 tablespoon olive oil
-
1 teaspoon honey
Instructions
-
Step 1
In a large bowl, combine the warm water, honey, and instant yeast. Let sit for 5 minutes until foamy. -
Step 2
Add the bread flour, kosher salt, and olive oil to the bowl. Mix until a shaggy dough forms. -
Step 3
Turn the dough out onto a lightly floured surface and knead for 8-10 minutes until smooth and elastic. -
Step 4
Place the dough in a greased bowl, cover with plastic wrap, and let rise in a warm place for 1 hour, or until doubled in size. -
Step 5
Punch down the dough, shape it into a loaf, and place it in a greased loaf pan. -
Step 6
Cover the loaf pan and let the dough rise for another 30 minutes. -
Step 7
Preheat oven to 375°F (190°C). Bake for 30-35 minutes, or until golden brown and the internal temperature reaches 200°F (93°C). -
Step 8
Remove from the oven and let cool on a wire rack before slicing.
Important Information
Nutrition Facts (Per Serving)
It is important to consider this information as approximate and not to use it as definitive health advice.
Allergy Information
Please check ingredients for potential allergens and consult a health professional if in doubt.