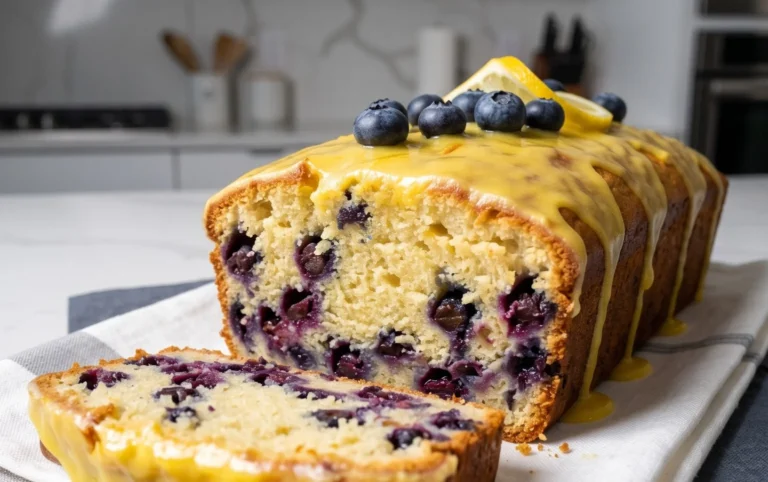
Easy Chocolate Chip Banana Bread Recipe
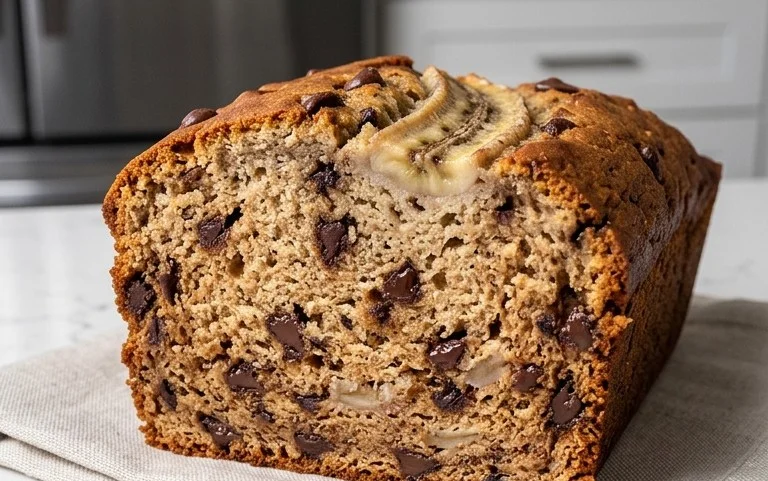
Chocolate Chip Banana Bread is more than just a delicious treat; it’s a hug in loaf form, a comforting aroma that fills your kitchen and transports you back to simpler times. Who doesn’t have a fond memory associated with warm, homemade banana bread? It’s that perfect balance of sweet, ripe bananas and tender, moist cake that makes it a perennial favorite. But we’re not just making any banana bread today. We’re elevating it. We’re infusing it with the irresistible allure of melty, gooey chocolate chips, transforming a classic into a decadent delight. This isn’t just about using up those overripe bananas (though that’s a fantastic perk!); it’s about creating something truly special, a crowd-pleasing masterpiece that’s surprisingly easy to whip up. Get ready to experience your new favorite version of Chocolate Chip Banana Bread.
Ingredients:
Get Ready to Bake the Most Delicious Chocolate Chip Banana Bread!
There’s something incredibly comforting about a warm slice of homemade banana bread. But when you add in the decadent pockets of melted chocolate? Well, that’s just next-level deliciousness. This recipe for Chocolate Chip Banana Bread is my absolute go-to. It’s incredibly moist, bursting with banana flavor, and studded with just the right amount of chocolate. Whether you’re a seasoned baker or just starting out, this recipe is foolproof and guaranteed to become a favorite in your household. It’s perfect for breakfast, a snack, or even a simple dessert.
The secret to truly exceptional banana bread lies in using over-ripe bananas. The browner and spottier, the better! These bananas are sweeter and softer, meaning they’ll mash easily and contribute significantly to the moistness and flavor of your bread. Don’t toss those bananas that are looking a little too far gone; they’re perfect for this recipe.
Prepping Your Masterpiece
Before we dive into mixing, let’s get our oven and pan ready. Preheat your oven to 350°F (175°C). This consistent temperature is crucial for even baking. While the oven heats up, take a moment to prepare your loaf pan. I like to grease and flour my pan thoroughly. You can do this with butter or cooking spray, followed by a light dusting of flour. This prevents the bread from sticking, ensuring a clean release once it’s baked. Alternatively, you can line your loaf pan with parchment paper, leaving some overhang on the sides. This makes lifting the finished loaf out a breeze.
Step-by-Step Baking Bliss
Now for the fun part – mixing the ingredients! Don’t be intimidated; it’s a simple process that yields incredible results.
1. Cream the Wet Ingredients: In a large mixing bowl, combine the melted butter and white sugar. Whisk them together until the mixture is smooth and well combined. This step is important for creating a tender crum extractb. Next, add the two large eggs, one at a time, beating well after each addition. The eggs help bind the ingredients and add richness. Finally, stir in the teaspoon of vanilla extract for that classic sweet aroma and flavor. Make sure everything is thoroughly incorporated before moving on.
2. Combine Dry Ingredients: In a separate medium-sized bowl, whisk together the all-purpose flour, baking soda, and salt. Baking soda is our leavening agent, helping the bread rise and achieve a lovely texture. The salt enhances all the other flavors, so don’t skip it! Whisking the dry ingredients together ensures that the baking soda and salt are evenly distributed throughout the flour, preventing any pockets of bitterness or uneven rising.
3. Incorporate the “Secret” Moistness: Now, it’s time to add the creamy elements. To the wet ingredients, add the Greek yogurt or sour cream. I love using Greek yogurt because it adds a wonderful tang and keeps the bread incredibly moist without making it heavy. Sour cream works beautifully too. Stir this into the butter, sugar, egg, and vanilla mixture until just combined. Then, gently fold in the mashed over-ripe bananas. Mash them well with a fork until there are no large chunks left, but a few small bits are perfectly fine and add character.
4. Marry Wet and Dry: Gradually add the dry ingredients to the wet ingredients. It’s best to do this in about three additions, mixing gently after each addition until just combined. Be careful not to overmix at this stage! Overmixing can develop the gluten in the flour too much, resulting in a tough banana bread. We want a tender, moist loaf, so mix until you no longer see streaks of dry flour. A few small lumps are okay.
5. The Grand Finnon-alcoholic ale – Chocolate Chips! This is where the magic happens. Gently fold in the cup of semi-sweet chocolate chips. Again, the key here is to fold, not stir vigorously. We want those beautiful little pockets of melted chocolate to be dispersed throughout the batter without breaking them down too much. You can reserve a tablespoon or two of chocolate chips to sprinkle on top before baking for an extra chocolatey finish.
Baking to Perfection
Pour the batter evenly into your prepared loaf pan. Smooth the top with a spatula. If you reserved some chocolate chips, sprinkle them on top now. Place the loaf pan in your preheated oven on the center rack.
Bake for 50 to 65 minutes. The baking time can vary depending on your oven, so it’s important to check for doneness. You’ll know your Chocolate Chip Banana Bread is ready when a wooden skewer or toothpick inserted into the center comes out clean, or with just a few moist crum extractbs attached (but no wet batter). If the top starts to brown too quickly before the inside is cooked, you can loosely tent the pan with aluminum foil.
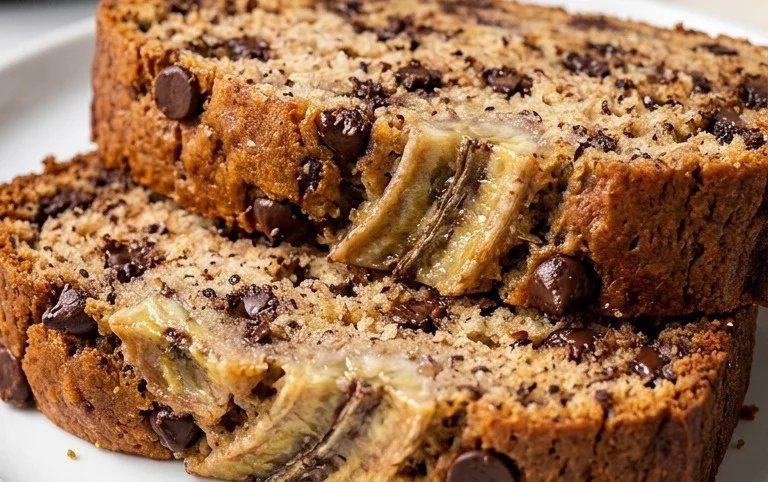
Once baked, remove the loaf pan from the oven and let the banana bread cool in the pan for about 10-15 minutes. This allows it to set up properly. After that, carefully invert the pan onto a wire rack to remove the bread completely. Let it cool on the wire rack for at least another 30 minutes before slicing. This cooling time is crucial for the flavors to meld and the texture to firm up. Patience is a virtue, especially when it comes to delicious banana bread!
Enjoy every delightful, chocolate-filled bite!
Conclusion:
So there you have it – the ultimate guide to creating incredibly moist and flavorful Chocolate Chip Banana Bread! This recipe is fantastic because it strikes the perfect balance between sweet, ripe bananas and decadent chocolate chips, all within a tender, easy-to-make loaf. It’s the kind of recipe that’s perfect for using up those overripe bananas lurking in your fruit bowl and impressing friends and family with minimal effort.
I love serving this warm, straight from the oven, with a generous smear of butter. It’s also wonderful slightly cooled for breakfast on-the-go, as an afternoon snack, or even as a simple dessert. For variations, feel free to add a handful of chopped walnuts or pecans for a delightful crunch, or a teaspoon of cinnamon for an extra layer of warmth. You could also experiment with different types of chocolate chips, like dark chocolate or mini chocolate chips, for a unique twist.
I truly encourage you to give this Chocolate Chip Banana Bread recipe a try. It’s a classic for a reason and guaranteed to become a staple in your baking repertoire. I can’t wait to hear how yours turns out!
Frequently Asked Questions:
Can I make this banana bread vegan?
Absolutely! You can easily make this recipe vegan by substituting the eggs with flax eggs (1 tablespoon flaxseed meal mixed with 3 tablespoons water, let sit for 5 minutes) and using dairy-free chocolate chips and milk. The result is still wonderfully moist and delicious.
My bananas aren’t very ripe, will this still work?
For the best flavor and sweetness, very ripe bananas are ideal. However, if yours aren’t super spotty, you can still make the bread. For a little extra sweetness and banana flavor, you can microwave your slightly less ripe bananas for about 30-60 seconds to soften them and bring out more of their natural sugars.
How should I store leftover banana bread?
Once completely cooled, wrap the banana bread tightly in plastic wrap or store it in an airtight container at room temperature for up to 3 days. For longer storage, you can freeze slices or the whole loaf, wrapped well, for up to 3 months. Simply thaw at room temperature or gently reheat.
Chocolate Chip Banana Bread
A moist and delicious banana bread packed with chocolate chips, perfect for any occasion.
Ingredients
-
1/2 cup butter, melted
-
3/4 cup white sugar
-
2 large eggs
-
1 teaspoon vanilla extract
-
1 and 1/2 cups all-purpose flour
-
1 teaspoon baking soda
-
1/2 teaspoon salt
-
1/2 cup Greek yogurt
-
2 over-ripe bananas, mashed
-
1 cup semi-sweet chocolate chips
Instructions
-
Step 1
Preheat oven to 350°F (175°C). Grease and flour a 9×5 inch loaf pan. -
Step 2
In a large bowl, cream together the melted butter and white sugar. -
Step 3
Beat in the eggs one at a time, then stir in the vanilla extract. -
Step 4
In a separate bowl, whisk together the flour, baking soda, and salt. -
Step 5
Gradually add the dry ingredients to the wet ingredients, alternating with the Greek yogurt, beginning and ending with the dry ingredients. Mix until just combined. -
Step 6
Fold in the mashed bananas and chocolate chips. -
Step 7
Pour batter into the prepared loaf pan. -
Step 8
Bake for 50-65 minutes, or until a wooden skewer inserted into the center comes out clean.
Important Information
Nutrition Facts (Per Serving)
It is important to consider this information as approximate and not to use it as definitive health advice.
Allergy Information
Please check ingredients for potential allergens and consult a health professional if in doubt.