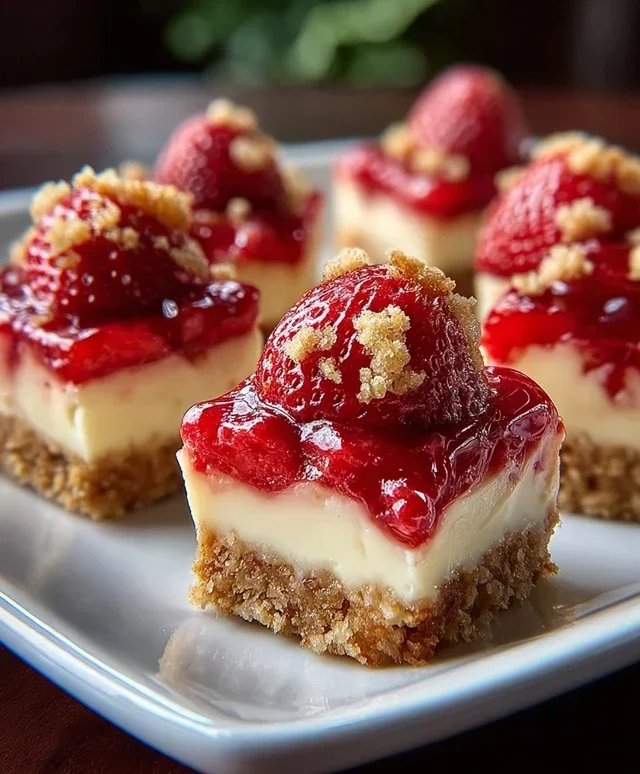
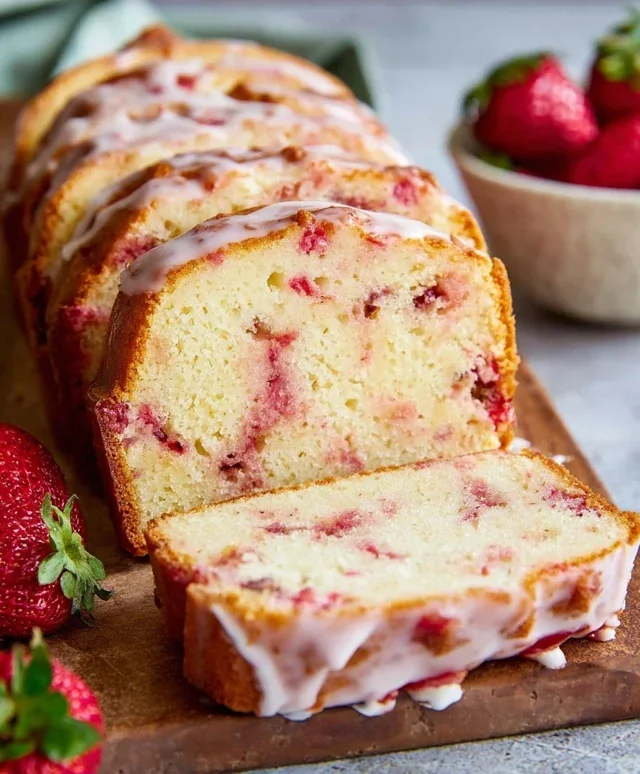
Easy Cherry Cheesecake Bars – Delicious Dessert
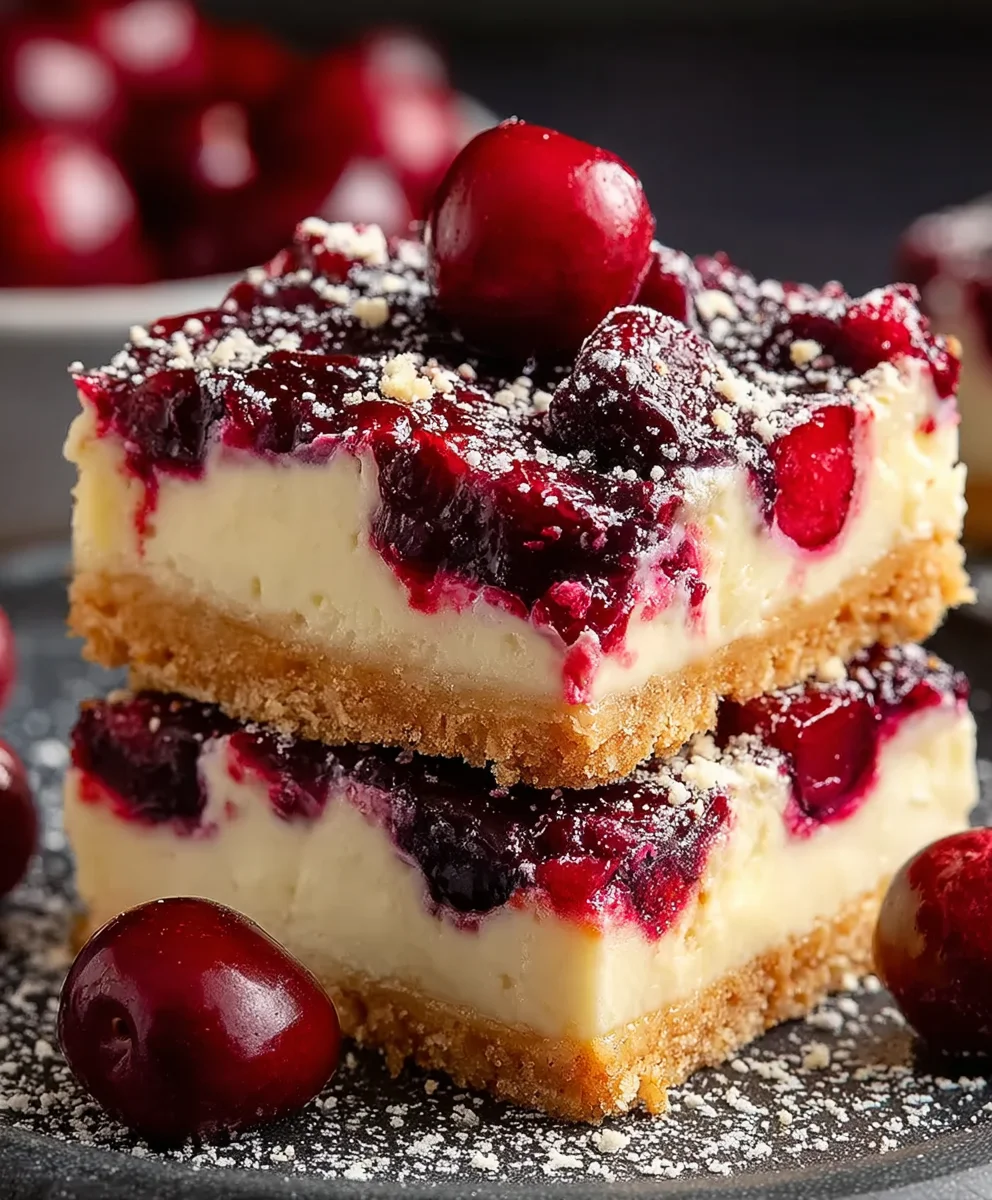
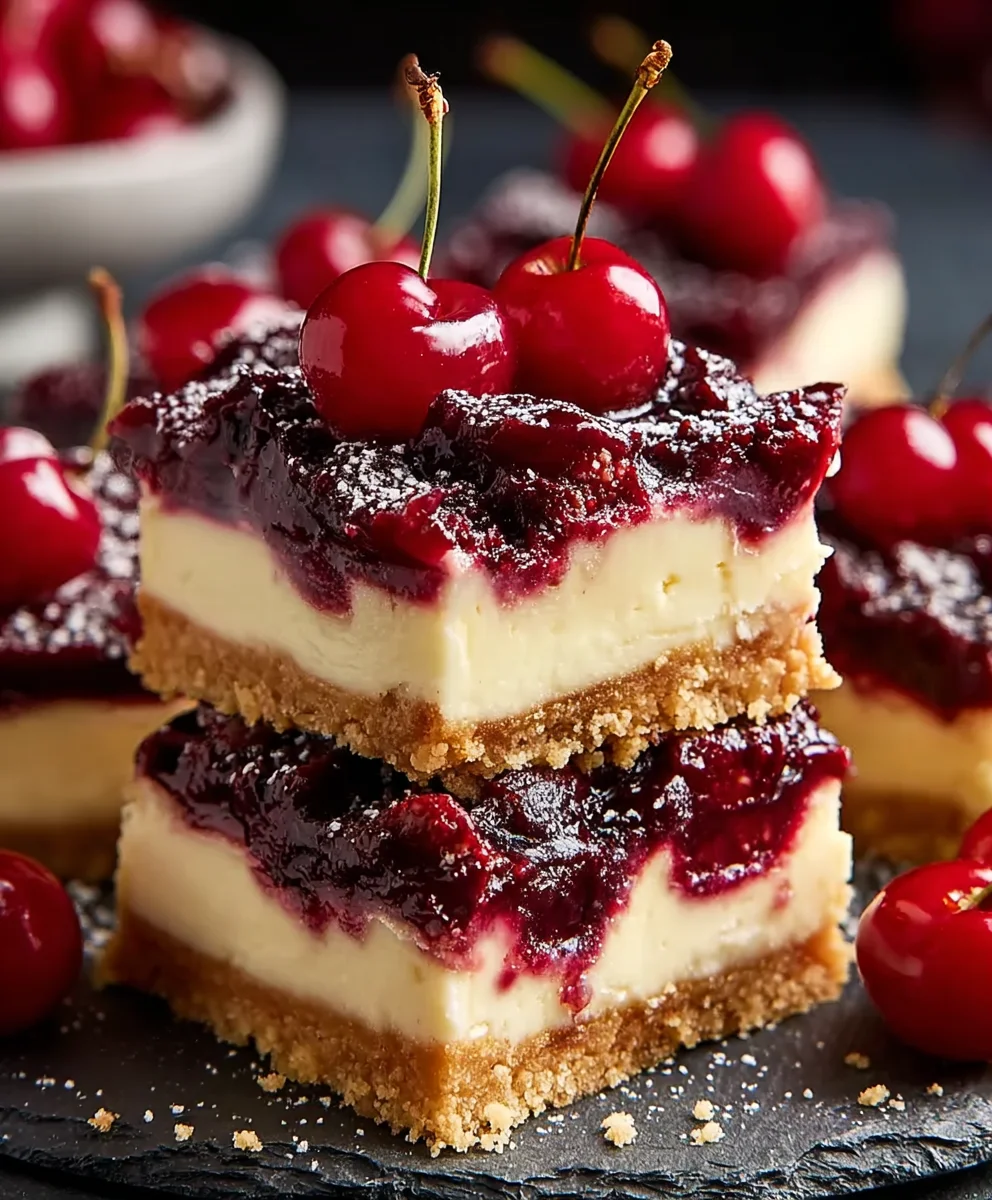
Cherry Cheesecake Bars are more than just a dessert; they’re a miniature explosion of delightful contrast and comforting sweetness. Imagin extracte a crum extractbly, buttery shortbread crust, providing the perfect foundation for a rich, velvety cream cheese filling. Now, picture that filling swirled with pockets of vibrant, tangy cherry compote, its bright red hues promising a burst of fruity goodness with every bite. That’s the magic of Cherry Cheesecake Bars! People absolutely adore these treats because they capture the essence of a classic cheesecake in a convenient, perfectly portioned bar. No need for complicated water baths or springform pans; these bars are wonderfully approachable for any home baker. What makes them truly special is the harmonious interplay between the smooth, creamy cheesecake and the slightly tart, juicy cherries. It’s a flavour combination that’s both nostalgic and utterly irresistible, making them a crowd-pleasing favourite for any occasion, from casual gatherings to more festive celebrations.
Ingredients:
- 8.5 ounces sugar cookie mix
- 4 tablespoons cold unsalted butter
- 8 ounces cream cheese, softened
- 1/4 cup granulated sugar
- 1 tablespoon all-purpose flour
- 1/2 teaspoon vanilla extract
- 1 large egg
- 1/2 can (approximately 21 ounces) cherry pie filling
- 1/3 cup toasted sliced almonds
Prepare the Cookie Crust
The foundation of our delicious Cherry Cheesecake Bars starts with a simple, yet satisfying, sugar cookie crust. This step is crucial for getting that perfect chewy texture and sweet base. First, gather your ingredients for the crust: the 8.5 ounces of sugar cookie mix and the 4 tablespoons of cold unsalted butter. For this part, we want the butter to be cold because it helps create a flaky crust. You can cut the cold butter into small cubes if you have a pastry blender or two knives handy, or simply rub it into the dry mix with your fingertips. The goal is to achieve a texture that resembles coarse crum extractbs, with no large lumps of butter remaining. Once you’ve achieverum extracthis crumbly consistency, you’ll need to press it evenly into the bottom of an 8×8 inch baking pan. I find it easiest to use the bottom of a measuring cup or a flat-bottomed glass to get a compact and uniform layer. This even distribution is key to ensuring the crust bakes up perfectly and doesn’t have any thin or thick spots. Once pressed, set this pan aside while we prepare the creamy cheesecake filling.
Craft the Creamy Cheesecake Filling
Now, let’s move on to the star of the show: the luscious cheesecake filling. In a medium bowl, combine the 8 ounces of softened cream cheese, 1/4 cup of granulated sugar, 1 tablespoon of all-purpose flour, and 1/2 teaspoon of vanilla extract. It’s important that your cream cheese is softened to room temperature. This will make it much easier to blend smoothly and avoid any lumps. If you forget to take it out of the fridge in advance, you can quickly soften it by microwaving it in 10-second intervals, but be careful not to melt it. Whisk these ingredients together until they are well combined and smooth. Next, gently incorporate the 1 large egg. Mix just until the egg is fully incorporated; over-mixing at this stage can introduce too much air, which can lead to cracking in the final bars. The flour is added to help stabilize the filling and prevent it from becoming too watery after baking.
Assemble and Bake the Bars
With our crust prepared and our cheesecake filling smooth and ready, it’s time to bring them together. Carefully spoon the cream cheese mixture evenly over the sugar cookie crust in the prepared 8×8 inch baking pan. Gently spread it out with a spatula, ensuring it covers the entire surface of the crust. You want to avoid pushing too hard, which might mix the filling into the crust and disrupt the layers. Now comes the exciting part: the cherry topping. Open your 1/2 can of cherry pie filling. You don’t need to drain it; the syrupy goodness is part of what makes these bars so delightful. Dollop spoonfuls of the cherry pie filling over the cream cheese layer. You can distribute them randomly or create a more pattern. Some people like to gently swirl the cherries into the cream cheese with a toothpick, but I prefer a more rustic, dotted appearance. Preheat your oven to 350°F (175°C). Place the pan in the preheated oven and bake for approximately 25-30 minutes. You’ll know the bars are ready when the edges of the cheesecake filling are set, but the center still has a slight wobble. Don’t overbake, or they can become dry.
Cooling and Chilling for Perfection
This step is arguably the most challengin extractg part – the waiting! Once baked, carefully remove the pan from the oven. The bars will still be quite soft. It’s crucial to let them cool completely at room temperature for at least 30-45 minutes. This initial cooling period allows the cheesecake filling to continue setting up. After they’ve cooled down sufficiently, cover the pan tightly with plastic wrap or aluminum foil. Then, transfer the pan to the refrigerator. We need to chill these Cherry Cheesecake Bars for at least 2-3 hours, or even better, overnight. Chilling is essential for the cheesecake filling to firm up completely, making them easy to slice and providing that signature dense, creamy texture. Rushing this step will result in soft, messy bars that won’t hold their shape when you try to cut them.
The Final Flourish and Serving
The moment of truth has arrived! Once your Cherry Cheesecake Bars are thoroughly chilled and firm, it’s time for the final decorative touch and serving. Remove the pan from the refrigerator. For easy removal, you can line your 8×8 inch pan with parchment paper, leaving an overhang on the sides. This parchment “sling” makes lifting the entire block out of the pan a breeze. Now, sprinkle the 1/3 cup of toasted sliced almonds evenly over the top of the chilled cheesecake bars. The toasting brings out a wonderful nutty flavor and a pleasant crunch that complements the sweetness of the cherries and the richness of the cheesecake. If you haven’t already, carefully cut the chilled bars into your desired serving sizes. A sharp knife dipped in hot water and wiped dry between cuts will give you the cleanest slices. Enjoy these delightful Cherry Cheesecake Bars as a perfect dessert or an indulgent treat!
Conclusion:
And there you have it – the perfect recipe for delicious Cherry Cheesecake Bars! We’ve walked through creating a buttery grabeef ham cracker crust, a rich and creamy cheesecake filling, and that irresistible cherry topping. These bars are a fantastic alternative to a whole cheesecake, offering individual portions of pure dessert bliss. They are incredibly versatile and can be enjoyed as a sweet ending to any meal, a delightful afternoon treat, or even a show-stopping dessert for your next gathering. For serving suggestions, consider a dollop of whipped cream or a dusting of powdered sugar. If you’re feeling adventurous with variations, try adding a swirl of almond extract to the cheesecake filling or using a mix of berries for the topping.
Don’t be intimidated by making cheesecake from scratch; these bars simplify the process beautifully. I truly encourage you to give this recipe a try. The satisfaction of pulling these gorgeous, homemade Cherry Cheesecake Bars out of the oven and sharing them with loved ones is immensely rewarding. Happy baking!
Frequently Asked Questions about Cherry Cheesecake Bars:
Can I make these Cherry Cheesecake Bars ahead of time?
Absolutely! In fact, they are best when made a day in advance. This allows the cheesecake to fully set and the flavors to meld beautifully. Store them, covered, in the refrigerator.
What kind of cherries are best for the topping?
You can use fresh or frozen cherries. If using fresh, pitting them is essential. If using frozen, you may not need to thaw them completely before cooking, but be aware they might release more liquid, so you may need to cook the topping slightly longer to thicken.
Easy Cherry Cheesecake Bars – Delicious Dessert
Delicious and easy to make cherry cheesecake bars with a sugar cookie crust and a creamy cheesecake filling topped with cherry pie filling and toasted almonds.
Ingredients
-
8.5 ounces sugar cookie mix
-
4 tablespoons cold unsalted butter
-
8 ounces cream cheese, softened
-
1/4 cup granulated sugar
-
1 tablespoon all-purpose flour
-
1/2 teaspoon vanilla extract
-
1 large egg
-
1/2 can cherry pie filling
-
1/3 cup toasted sliced almonds
Instructions
-
Step 1
Prepare the cookie crust by combining sugar cookie mix and cold butter until crumbly. Press evenly into an 8×8 inch baking pan. -
Step 2
Craft the creamy cheesecake filling by whisking together softened cream cheese, granulated sugar, all-purpose flour, and vanilla extract until smooth. Gently incorporate the egg until just combined. -
Step 3
Assemble the bars by spooning the cream cheese mixture evenly over the cookie crust. Dollop spoonfuls of cherry pie filling over the cream cheese layer. -
Step 4
Bake the bars in a preheated oven at 350°F (175°C) for 25-30 minutes, or until the edges are set and the center has a slight wobble. -
Step 5
Cool the bars completely at room temperature for 30-45 minutes, then cover and chill in the refrigerator for at least 2-3 hours or overnight. -
Step 6
Sprinkle toasted sliced almonds over the chilled bars and cut into desired serving sizes before enjoying.
Important Information
Nutrition Facts (Per Serving)
It is important to consider this information as approximate and not to use it as definitive health advice.
Allergy Information
Please check ingredients for potential allergens and consult a health professional if in doubt.