Easy Apple Pie Bars- Perfect Dessert Recipe
Apple pie bars, oh how we adore them! There’s something inherently comforting and nostalgic about the classic apple pie, but let’s be honest, sometimes getting that perfect crust and slice can be a bit of a production. That’s where these incredible apple pie bars swoop in to save the day! They capture all the warm, spiced, apple-y goodness of traditional pie but in a delightfully portable and wonderfully easy-to-share format. We love them because they offer that irresistible combination of tender, sweet apples nestled in a buttery, crum extractbly crust, all without the fuss. Whether you’re bringin extractg them to a potluck, enjoying a quiet afternoon with a cup of tea, or simply craving a slice of home, these apple pie bars deliver pure, unadulterated happiness in every bite. They’re the perfect blend of rustic charm and effortless elegance, making them a guaranteed crowd-pleaser.
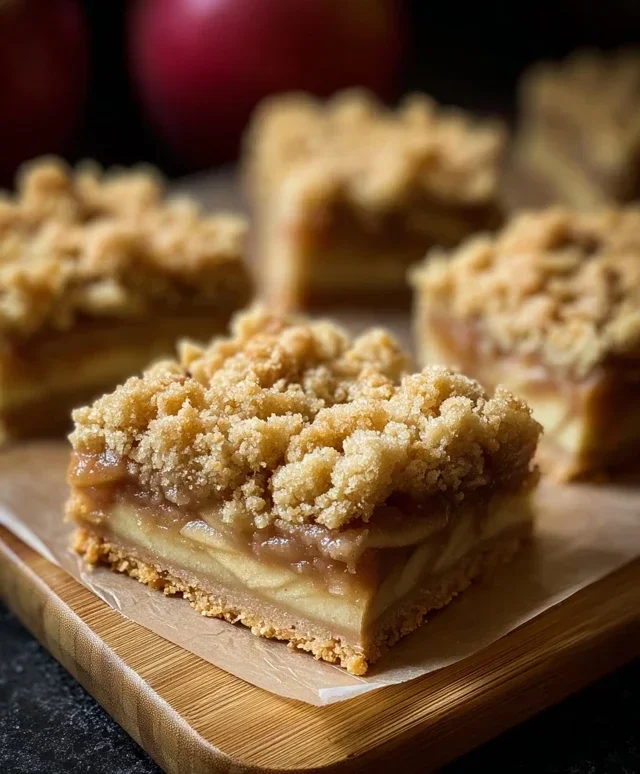
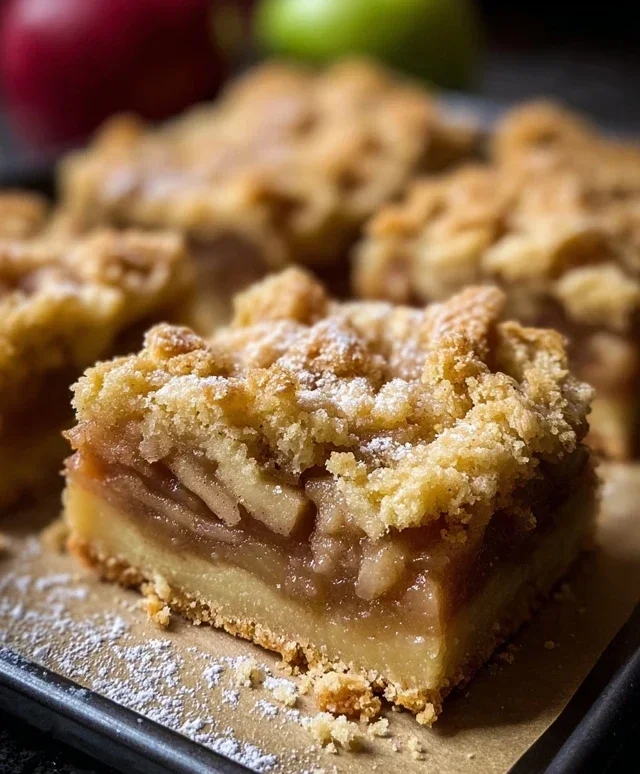
Apple Pie Bars
Who doesn’t love a good apple pie? The warm, comforting aroma, the sweet and tart apple filling, and that flaky, buttery crust. But sometimes, a whole pie feels like a lot, or maybe you’re looking for something a little easier to serve and transport. That’s where these Apple Pie Bars come in! They capture all the deliciousness of a classic apple pie in a convenient, portable, and utterly irresistible bar form. Perfect for picnics, potlucks, bake snon-alcoholic ales, or just a special treat for yourself and your family, these bars are sure to become a new favorite.
The beauty of these bars lies in their simplicity. We’re essentially taking a buttery shortbread-like crust, layering it with a perfectly spiced apple filling, and then topping it with more of that delightful crust. It’s like getting all the best parts of apple pie in every bite, without the fuss of crimping and latticing. The ingredients are straightforward, and the process is surprisingly forgiving, even for begin extractner bakers. Let’s get started on creating these delightful apple pie bars!
Ingredients:
Creating the Crust:
This crust is the foundation of our delicious bars. It’s a simple, no-fuss dough that bakes up tender and slightly crum extractbly, providing the perfect counterpoint to the soft apple filling.
Assembling the Apple Filling:
Now for the star of the show – the apple filling! We want it perfectly spiced and tender, but not mushy.
Bringin extractg It All Together and Baking:
The final steps are where the magic happens, transforming our ingredients into beautiful, baked bars.
Conclusion:
I hope you’re as excited as I am to try these delicious Apple Pie Bars! They truly are a fantastic dessert because they capture all the beloved flavors of classic apple pie – warm cinnamon, tender baked apples, and a buttery, crum extractbly crust – but in a wonderfully convenient bar form. No fussing with intricate pie crusts, just pure, unadulterated apple pie goodness in every bite. These bars are perfect for potlucks, picnics, or simply a weeknight treat when you crave something sweet and comforting. They slice beautifully and are easy to transport, making them a crowd-pleaser every time.
For serving, I love them warm, perhaps with a scoop of vanilla bean ice cream or a dollop of whipped cream. They’re also delicious at room temperature, making them a great make-ahead option. Don’t hesitate to experiment with variations! You could add chopped pecans or walnuts to the topping for extra crunch, or a pinch of nutmeg to the apple filling for a different spice profile. A drizzle of caramel sauce over the finished bars is also divine. So go ahead, gather your ingredients, and whip up a batch of these delightful Apple Pie Bars. You won’t regret it!
Frequently Asked Questions about Apple Pie Bars:
How can I store leftover Apple Pie Bars?
You can store your leftover Apple Pie Bars in an airtight container at room temperature for up to 2 days, or in the refrigerator for up to 4-5 days. If refrigerating, they might benefit from a quick reheat in the oven or microwave to bring back that wonderful warmth and texture.
Can I use a different type of apple?
Absolutely! While Granny Smith apples offer a nice tartness that balances the sweetness, you can certainly use a blend of apples. Fuji, Honeycrisp, Gala, or a mix of sweet and tart varieties will all work wonderfully. Just aim for apples that hold their shape well when baked.
What if I don’t have all the spices listed?
Don’t worry! The core spices for apple pie are cinnamon and nutmeg. If you’re missing one, you can often omit it without a significant loss of flavor, or increase the amount of the spice you do have. For example, a little extra cinnamon can stand in for nutmeg if needed.
Apple Pie Bars
Deconstructed apple pie in a convenient bar form, featuring a buttery shortbread crust and a spiced apple filling.
Ingredients
-
2½ cups all-purpose flour
-
1 cup granulated sugar
-
1 tsp baking powder
-
½ tsp salt
-
1 cup (2 sticks) cold unsalted butter, cubed
-
1 egg
-
1 tsp vanilla extract
-
4 cups peeled & diced apples
-
2 tbsp lemon juice
-
½ cup brown sugar
-
2 tsp cinnamon
-
1 tsp cornstarch
Instructions
-
Step 1
Preheat oven to 375°F (190°C). Grease and flour a 9×13 inch baking pan. -
Step 2
In a large bowl, whisk together 2 cups of all-purpose flour, ½ cup granulated sugar, baking powder, and salt for the crust. Cut in the cold butter with a pastry blender or your fingers until the mixture resembles coarse crumbs. -
Step 3
In a separate small bowl, whisk the egg and vanilla extract. Add this to the flour mixture and mix until just combined. Stir in the remaining ½ cup all-purpose flour to form a crumbly dough. -
Step 4
Press ¾ of the dough evenly into the bottom of the prepared baking pan for the crust. -
Step 5
In a medium bowl, toss the diced apples with lemon juice. In a small bowl, combine ½ cup granulated sugar, brown sugar, cinnamon, and cornstarch. Sprinkle this mixture over the apples and toss to coat. Pour the apple mixture evenly over the crust. -
Step 6
Crumble the remaining dough over the top of the apple filling. -
Step 7
Bake for 30-35 minutes, or until the topping is golden brown and the filling is bubbly. -
Step 8
Let cool completely in the pan before cutting into bars.
Important Information
Nutrition Facts (Per Serving)
It is important to consider this information as approximate and not to use it as definitive health advice.
Allergy Information
Please check ingredients for potential allergens and consult a health professional if in doubt.