Milky Cheese Donuts- Deliciously Creamy & Cheesy Bites
Milky Cheese Donuts are about to become your new obsession. If you’re a fan of that perfect balance between sweet and savory, then prepare to fall head over heels. These aren’t your average donuts; they’re a delightful revelation that takes the humble donut to an entirely new level. What makes them so incredibly loved? It’s the unexpected fusion of tender, slightly sweet dough with a creamy, subtly salty cheese filling. This combination creates a flavor profile that’s both comforting and utterly addictive, making them a crowd-pleaser for any occasion. Imagin extracte biting into a cloud-like donut, only to discover a warm, gooey center of pure cheesy bliss. That’s the magic of Milky Cheese Donuts. They’re a testament to how simple ingredients can come together to create something truly extraordinary.
Why You’ll Adore Them
A Symphony of Sweet and Savory

Milky Cheese Donuts
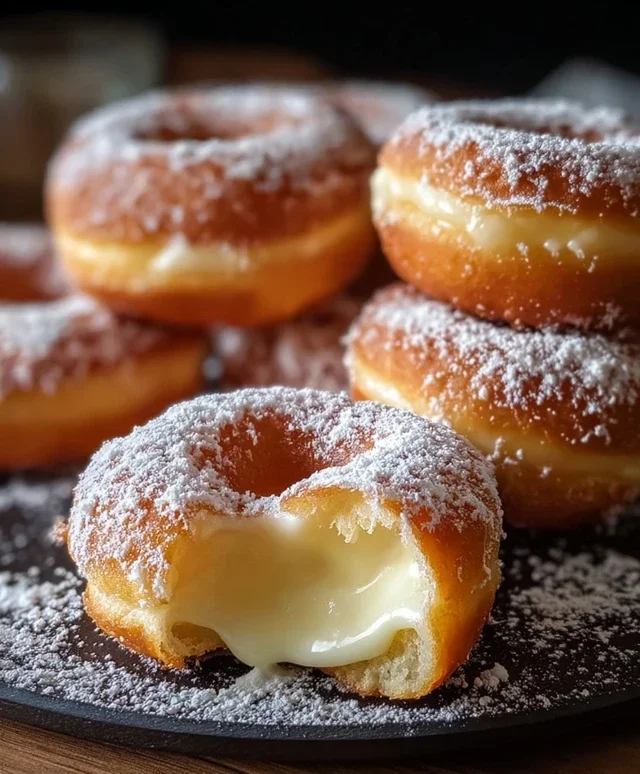
There’s something truly magical about a warm, pillowy donut. But what if we told you we could elevate this beloved treat with a hint of savory delight? Introducing our Milky Cheese Donuts – a delightful fusion of sweet and cheesy that will have your taste buds singin extractg. These aren’t your average donuts; they boast a wonderfully tender crum extractb, a subtle, melty cheesiness within, and a delicate sweetness that’s perfectly balanced. They’re surprisingly easy to make and will become a new favorite for breakfast, brunch, or even a special afternoon snack.
Ingredients:
Getting Started: Activating the Yeast
The foundation of any good donut is a well-risen dough, and that all starts with active, happy yeast. In a large mixing bowl, combine the warm whole milk, sugar, and active dry yeast. Give it a gentle stir and then let it sit for about 5 to 10 minutes. You’ll know your yeast is ready when it becomes foamy and bubbly on the surface. This indicates that the yeast is alive and ready to work its magic, creating that signature airy texture in our donuts. If you don’t see any foam, your yeast might be expired, and it’s best to start with a fresh packet.
Making the Dough
Once your yeast is activated, it’s time to bring all the ingredients together. To the foamy yeast mixture, add the salt, the large egg, and the melted unsalted butter. Whisk everything together until it’s well combined. Now, gradually add the all-purpose flour, mixing until a shaggy dough starts to form. You can do this with a wooden spoon or a stand mixer fitted with a dough hook. Once the dough is mostly combined and still a bit sticky, turn it out onto a lightly floured surface.
Kneading and Rising
This is where we develop the gluten in the dough, which gives our donuts their lovely chewy texture. Knead the dough for about 8-10 minutes, or until it becomes smooth and elastic. It should spring back when you gently poke it. If you’re using a stand mixer, this will take about 6-8 minutes on medium speed. Once you’ve achieved that perfect, smooth dough, lightly grease a clean bowl with a little oil. Place the dough in the bowl, turning it to coat all sides. Cover the bowl tightly with plastic wrap or a damp kitchen towel, and let it rise in a warm place for about 1 to 1.5 hours, or until it has doubled in size. A slightly warm oven (turned off!) is an excellent spot for this.
Incorporating the Cheesy Goodness
Now for the star of our show – the cheese! Once your dough has beautifully risen, gently punch it down to release the air. Turn the dough out onto a lightly floured surface. Sprinkle the shredded mozzarella cheese evenly over the surface of the dough. Now, carefully fold and knead the dough just enough to distribute the cheese throughout. You don’t want to overwork it at this stage, just ensure the cheese is evenly incorporated. This will create delightful pockets of melted cheese within your donuts.
Shaping and Second Rise
Now it’s time to give our donuts their classic shape. Roll out the dough to about ½ inch thickness. Using a donut cutter or two different-sized round cutters (one for the outer donut and a smaller one for the hole), cut out your donuts. You can also simply cut them into rings freehand. Place the cut donuts onto baking sheets lined with parchment paper, ensuring they have a little space between them. Cover them loosely with plastic wrap and let them rest for another 20-30 minutes. This second rise is crucial for achieving those light and airy donuts.
Frying to Golden Perfection
When you’re ready to fry, heat about 2-3 inches of vegetable or canola oil in a heavy-bottomed pot or Dutch oven to 350°F (175°C). It’s important to maintain this temperature for even cooking. Carefully lower 2-3 donuts at a time into the hot oil, making sure not to overcrowd the pot. Fry them for about 1-2 minutes per side, or until they are a beautiful golden brown. Use a slotted spoon or spider strainer to gently flip them and to remove them from the oil.
Finishing Touches
As soon as the donuts come out of the oil, place them on a wire rack set over a baking sheet to drain any excess oil. If you’re feeling indulgent, while they are still warm, you can dust them generously with powdered sugar. The warmth of the donut will help the sugar adhere beautifully. Let them cool slightly before indulgin extractg in these warm, cheesy delights. The mozzarella will be melty and gooey, creating a truly unforgettable donut experience. Enjoy every single bite!
Conclusion:
You’ve now got the ultimate guide to creating these delightful Milky Cheese Donuts right in your own kitchen! What makes this recipe truly special is the perfect fusion of a tender, slightly sweet donut dough with a surprisingly savory and creamy cheese filling. It’s a combination that sounds unusual but tastes absolutely divine, offering a satisfying balance of flavors and textures. These donuts are incredibly versatile, making them a fantastic treat for any occasion. Imagin extracte them warm and fresh for breakfast, a unique addition to your afternoon tea, or even as a playful appetizer at your next gathering. Don’t be afraid to experiment with different cheeses – sharp cheddar, Gruyère, or even a hint of blue cheese can add exciting new dimensions. I truly encourage you to give these Milky Cheese Donuts a try; they’re surprisingly easy to make and the results are incredibly rewarding, offering a truly unique and delicious experience.
Frequently Asked Questions about Milky Cheese Donuts:
Can I make these donuts ahead of time?
While these Milky Cheese Donuts are best enjoyed fresh, you can prepare the donut dough and the cheese filling a day in advance. Store them separately in airtight containers in the refrigerator. On the day you want to bake them, allow the dough to come to room temperature for about 30 minutes before shaping and filling. The baked donuts are best consumed within a day or two, though they can be gently reheated in a low oven to revive their texture.
What kind of milk is best for the dough?
You can use whole milk, 2% milk, or even a non-dairy milk like almond or oat milk for these Milky Cheese Donuts. Whole milk will generally result in a richer, more tender dough due to its fat content, but other options will still yield delicious results. Ensure the milk is lukewarm when you use it to activate the yeast effectively.
Milky Cheese Donuts
Deliciously soft and slightly savory donuts made with milk and cheese, perfect for a unique treat.
Ingredients
-
2 cups all-purpose flour
-
1 cup whole milk, warm (about 110°F)
-
2 tablespoons sugar
-
2¼ teaspoons active dry yeast (1 packet)
-
½ teaspoon salt
-
1 large egg
-
4 tablespoons unsalted butter, melted
-
1 cup shredded mozzarella cheese
-
Vegetable or canola oil, for frying
-
Powdered sugar, for dusting (optional)
Instructions
-
Step 1
In a large bowl, combine the warm milk, sugar, and yeast. Let it sit for about 5-10 minutes until foamy. -
Step 2
Add the flour, salt, egg, and melted butter to the yeast mixture. Mix until a dough forms. Knead for about 5-7 minutes until smooth and elastic. -
Step 3
Gently incorporate the shredded mozzarella cheese into the dough. Knead briefly until evenly distributed. -
Step 4
Place the dough in a greased bowl, cover, and let it rise in a warm place for about 1 hour, or until doubled in size. -
Step 5
Punch down the dough and roll it out on a lightly floured surface to about ½ inch thickness. Cut out donut shapes using a donut cutter or two different sized round cutters. -
Step 6
Let the shaped donuts rest, covered, for another 15-20 minutes. -
Step 7
Heat about 2-3 inches of vegetable or canola oil in a heavy-bottomed pot to 350°F (175°C). Fry the donuts for 1-2 minutes per side, until golden brown. -
Step 8
Remove donuts from oil and drain on paper towels. Dust with powdered sugar if desired.
Important Information
Nutrition Facts (Per Serving)
It is important to consider this information as approximate and not to use it as definitive health advice.
Allergy Information
Please check ingredients for potential allergens and consult a health professional if in doubt.