Delicious Chocolate Baked Donuts – Easy Recipe
Chocolate baked donuts are a delightful indulgence that brings a touch of magic to any morning or afternoon. Forget the deep fryer and the mess; these delicious baked treats offer all the rich, comforting flavor of their fried counterparts with a simpler, healthier approach. What’s not to love about a warm, tender donut bursting with intense chocolate goodness, all made conveniently in your oven? We crave them because they’re pure comfort, a perfect pairing for our morning coffee or a sweet punctuation mark to a special occasion. What truly makes our chocolate baked donuts special is their incredibly moist texture and the sheer versatility they offer – a simple dusting of powdered sugar is divine, but a decadent chocolate glaze takes them to a whole new level of irresistible. Get ready to fall in love!
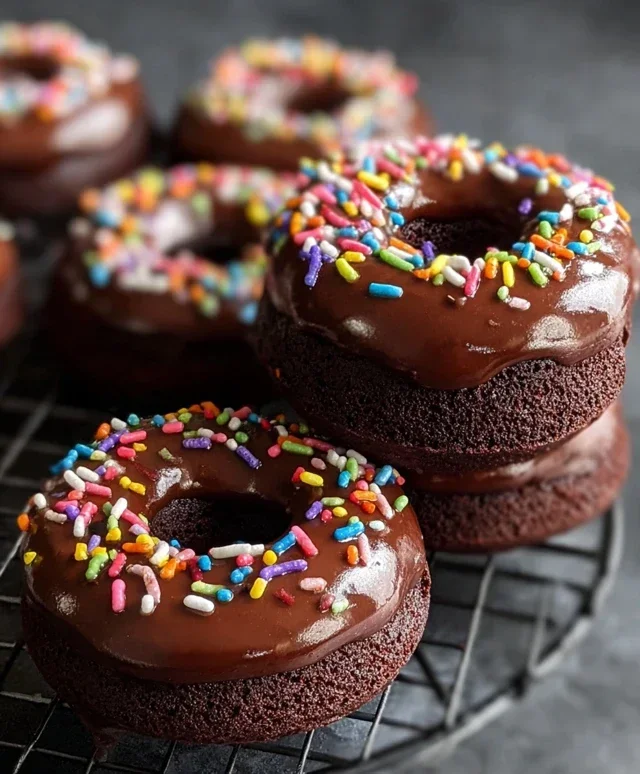
Chocolate Baked Donuts
There’s something undeniably special about donuts. The soft, cakey texture, the sweet glaze, that satisfying bite – it’s pure joy. While classic fried donuts have their charm, I often crave a slightly healthier, yet equally delicious, alternative. That’s where baked donuts come in. They deliver all the flavor and comfort of their fried cousins with a fraction of the effort and fuss. And when we’re talking about chocolate baked donuts? Well, that’s a game-changer. Imagin extracte sinking your teeth into a tender, moist donut infused with rich cocoa, then topped with a luscious chocolate glaze. It’s a treat that feels indulgent but is surprisingly simple to make right in your own oven. These donuts are perfect for a weekend brunch, an afternoon pick-me-up, or even a special occasion breakfast. The best part? You don’t need any fancy equipment, just a donut pan and a willingness to embrace chocolatey goodness.
Ingredients:
Making the Donut Batter
The foundation of any great donut is its batter, and for these chocolate delights, we’re aiming for a rich, moist, and tender crum extractb. The beauty of baked donuts is that the batter comes together much like a simple cake batter, making the process straightforward and enjoyable. First, let’s gather all our dry ingredients. In a medium-sized bowl, I like to whisk together the all-purpose flour, white granulated sugar, cocoa powder, baking soda, and salt. Whisking ensures that everything is evenly distributed, preventing any pockets of unmixed ingredients and leading to a consistent texture in our finished donuts. Make sure your cocoa powder is lump-free; if you notice any clumps, a quick sift can work wonders.
Next, in a separate bowl or liquid measuring cup, we’ll combine our wet ingredients. Pour in the milk, oil (I usually opt for canola for its neutral flavor, but olive oil works too and adds a subtle richness), vinegar (this reacts with the baking soda to give our donuts a lovely lift and tender texture), and the first portion of vanilla extract. Give this mixture a good stir. Now, it’s time to bring the wet and dry ingredients together. Create a well in the center of your dry ingredients and pour in the wet mixture. Gently whisk everything together until just combined. It’s crucial not to overmix the batter. Overmixing can develop the gluten in the flour too much, resulting in tough donuts. A few small lumps are perfectly fine! The batter should be thick but pourable.
Baking Your Donuts
Now comes the fun part: getting these beauties into the oven. Preheat your oven to 350°F (175°C). You’ll need a donut pan for this recipe. If you don’t have one, a muffin tin can work in a pinch, though they won’t have the classic donut shape. Lightly grease your donut pan or muffin tin. This step is essential to prevent the donuts from sticking. You can use a non-stick cooking spray, or brush each cavity with a little melted butter or oil. Once your pan is prepped and your oven is at temperature, it’s time to fill the donut cavities. A piping bag or a Ziploc bag with the corner snipped off makes this task incredibly neat and easy. Fill each cavity about two-thirds to three-quarters full. Don’t overfill them, as they will puff up as they bake.
Place the filled donut pan on a baking sheet (this catches any drips and makes it easier to transfer the pan in and out of the oven). Bake for 10-14 minutes, or until a toothpick inserted into the center of a donut comes out clean. The baking time can vary slightly depending on your oven, so start checking around the 10-minute mark. Once they’re done, carefully remove the pan from the oven. Let the donuts cool in the pan for about 5-10 minutes. This initial cooling period allows them to firm up enough to be removed without breaking. After this, gently invert the donut pan onto a wire rack to release the donuts. Let them cool completely on the wire rack before glazing. This is important because a warm donut will melt the glaze and make a mess.
Crafting the Chocolate Glaze
While our donuts are cooling, we can get started on the decadent chocolate glaze. This glaze is simple to make and adds that perfect finishing touch of sweetness and chocolate intensity. In a small saucepan, melt the butter over low heat. Once the butter is melted, stir in the cream or milk, light corn syrup, and the second teaspoon of vanilla extract. The corn syrup is a key ingredient here; it adds a lovely sheen and helps to create a smooth, slightly chewy glaze.
Once the butter mixture is smooth and well combined, remove the saucepan from the heat. Add the chocolate chips to the warm liquid. Stir gently until the chocolate chips are completely melted and the mixture is smooth and glossy. You’re looking for a consistency that’s thick enough to coat the donuts but still pourable. If the glaze seems too thick, you can add a tiny bit more cream or milk, a teaspoon at a time, until it reaches your desired consistency. Conversely, if it’s too thin, you can stir in a tablespoon or two of powdered sugar.
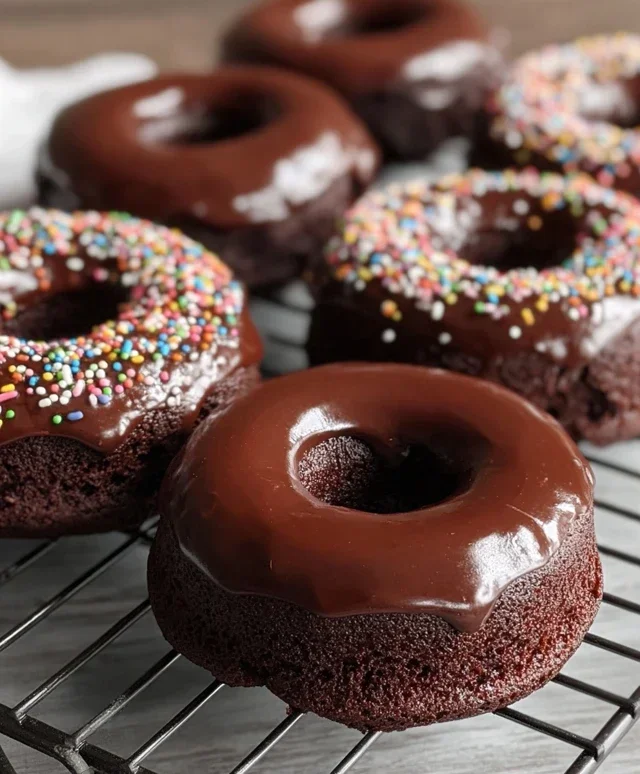
Once the donuts are completely cool, it’s time to glaze! You can either dip the tops of the donuts directly into the glaze, or use a spoon to generously drizzle it over each one. For a more uniform coating, dipping is usually best. You might need to work in batches if you’re dipping, as the glaze can start to set up. Place the glazed donuts back onto the wire rack to allow the glaze to set. If you want to add any sprinkles or other decorations, now is the time to do it, while the glaze is still wet.
Finally, for an extra touch of sweetness and a beautiful finish, we’ll add a simple powdered sugar dusting. In a small bowl, whisk together the powdered sugar with a tablespoon or two of milk or water, until you have a thick but pourable glaze. You can also just sift powdered sugar directly over the cooled, unglazed donuts for a simpler finish. Either way, these chocolate baked donuts are ready to be devoured. Enjoy every delicious bite!
Conclusion:
So there you have it – your ultimate guide to creating delicious, guilt-freechocolate baked donuts! This recipe is a winner because it’s incredibly simple, surprisingly light, and delivers that rich chocolatey punch we all crave without the fuss and mess of frying. They’re perfect for a quick breakfast treat, an afternoon pick-me-up, or even a fun dessert activity with family and friends. I truly encourage you to give these a try; you’ll be amazed at how satisfying and versatile homemade baked donuts can be!
Serving these warm from the oven is a dream, perhaps with a dusting of powdered sugar or a drizzle of extra chocolate ganache. For variations, consider adding a pinch of cinnamon to the batter for a Mexican chocolate twist, or folding in some mini chocolate chips for extra decadence. You could even experiment with different glazes like a vanilla bean or a caramel sauce. The possibilities are endless, and the joy of creating these from scratch is immense. Let’s get baking!
Frequently Asked Questions:
Q1: Can I make these donuts gluten-free?
Absolutely! You can often substitute a good quality gluten-free all-purpose flour blend for the regular flour. Make sure the blend contains xanthan gum, or add about 1/2 teaspoon yourself. You might need to slightly adjust the liquid if the batter seems too thick or thin.
Q2: How should I store leftover donuts?
For the best texture, store unfrosted donuts in an airtight container at room temperature for up to 2 days. If they are frosted, especially with a glaze that sets, they can also be stored at room temperature for a day or two, or in the refrigerator for slightly longer, though refrigeration can sometimes make them a bit firmer.
Chocolate Baked Donuts
Deliciously moist and rich chocolate baked donuts, a healthier alternative to fried versions. Perfect for a sweet treat any time of day.
Ingredients
-
3/4 cup all-purpose flour
-
1/2 cup white granulated sugar
-
1/3 cup cocoa
-
1/2 teaspoon baking soda
-
1/4 teaspoon salt
-
1/2 cup milk
-
2 tablespoons oil (olive or canola work well)
-
1/2 tablespoon vinegar (apple cider or white)
-
1 teaspoon vanilla extract
-
1/4 cup butter
-
2 tablespoons cream or milk
-
1 tablespoon light corn syrup
-
1/2 teaspoon vanilla extract
-
2 ounces chocolate chips (semi-sweet or dark)
-
3/4 cup powdered sugar
Instructions
-
Step 1
Preheat oven to 350°F (175°C). Grease and flour a donut pan or a mini muffin pan. -
Step 2
In a large bowl, whisk together the flour, sugar, cocoa powder, baking soda, and salt. -
Step 3
In a separate bowl, whisk together the milk, oil, vinegar, and 1 teaspoon of vanilla extract. -
Step 4
Pour the wet ingredients into the dry ingredients and stir until just combined. Do not overmix. -
Step 5
Spoon or pipe the batter into the prepared donut pan, filling each cavity about two-thirds full. -
Step 6
Bake for 10-12 minutes, or until a toothpick inserted into the center comes out clean. -
Step 7
Let the donuts cool in the pan for a few minutes before transferring them to a wire rack to cool completely. -
Step 8
While donuts cool, prepare the glaze: Melt butter in a small saucepan over low heat. Stir in cream (or milk), corn syrup, and 1/2 teaspoon vanilla extract until smooth. Remove from heat and stir in chocolate chips until melted and smooth. Or, for a simple powdered sugar glaze, whisk powdered sugar with a tablespoon or two of milk until desired consistency. -
Step 9
Dip the cooled donuts into the glaze or drizzle the glaze over the donuts.
Important Information
Nutrition Facts (Per Serving)
It is important to consider this information as approximate and not to use it as definitive health advice.
Allergy Information
Please check ingredients for potential allergens and consult a health professional if in doubt.