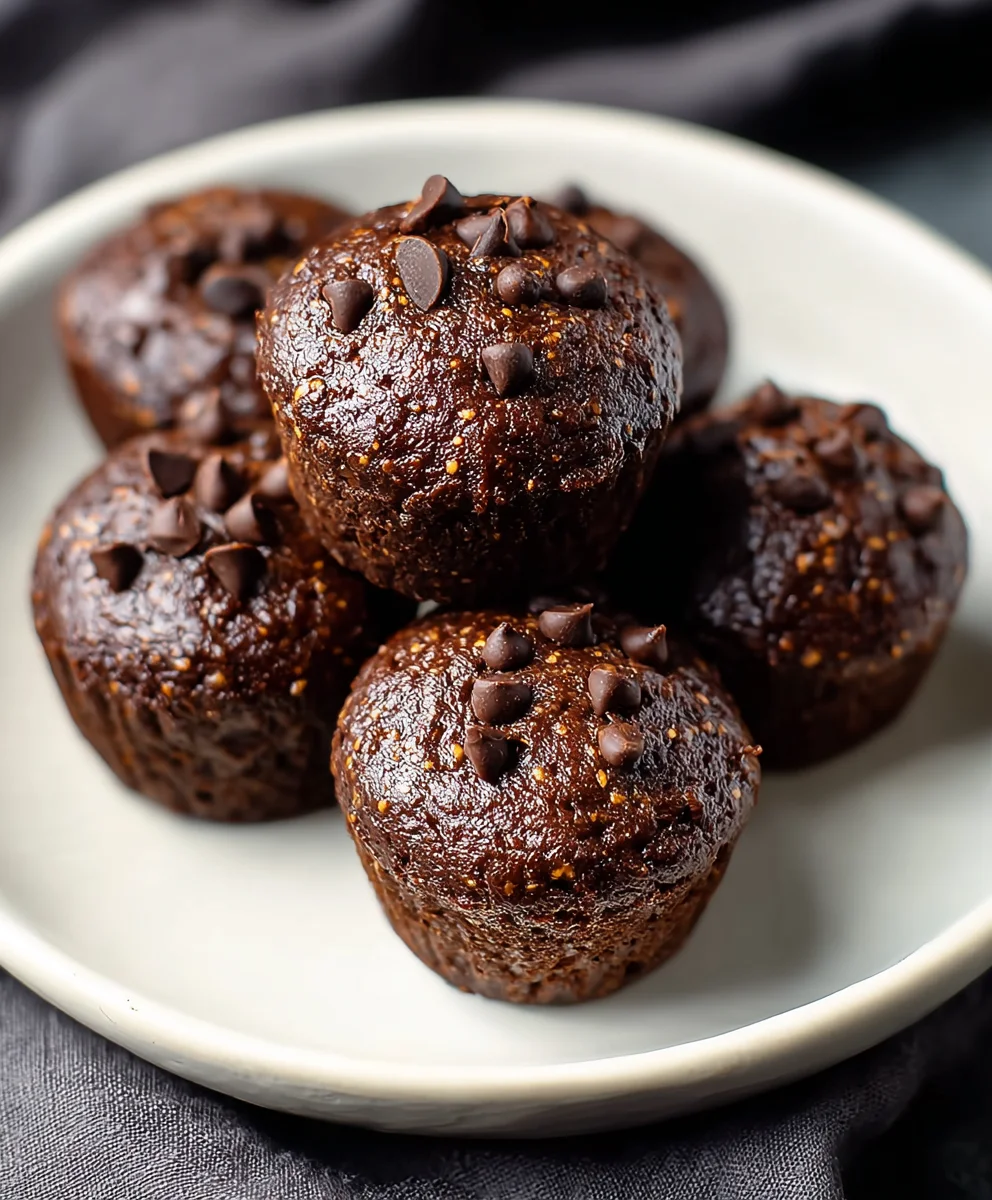
Protein Brownie Bites – Guilt-Free Delicious Treats
Protein Brownie Bites are the ultimate guilt-free indulgence, a delightful paradox that satisfies your deepest chocolate cravings while fueling your body with essential protein. If you’ve ever found yourself hovering over a box of store-bought brownies, wishing for a healthier alternative that doesn’t compromise on decadent flavor, then these delightful little morsels are about to become your new obsession. What makes these particular protein brownie bites so special? It’s the perfect balance of rich, fudgy chocolate goodness and a satisfyingly chewy texture, all packed with a protein punch that will keep you feeling full and energized. We’ve cracked the code to creating a truly exceptional treat that you can enjoy any time of day, whether it’s a post-workout reward, a mid-afternoon pick-me-up, or even a healthy breakfast on the go. Forget dry, chalky protein bars – these are the real deal, designed to make healthy eating an absolute joy.
Ingredients:
- 3 very ripe bananas
- ½ cup smooth peanut butter or almond butter
- 1/2 cup vanilla or chocolate protein powder (about 2 scoops)
- 1/4 cup unsweetened cocoa powder
- Sprinkle of chocolate chips (mini preferred, optional)
Preparing Your Protein Brownie Bites
Mashing the Bananas
The foundation of these incredibly easy and delicious Protein Brownie Bites lies in perfectly ripe bananas. You’ll want bananas that are significantly spotted, bordering on black. The riper the banana, the sweeter and more moist it will be, which is crucial for achieving that fudgy brownie texture without adding any refined sugars. Take your three very ripe bananas and place them in a medium-sized mixing bowl. Using a fork, mash them thoroughly until they are as smooth as possible, with only a few small lumps remaining. Don’t be afraid to put a little elbow grease into it; a well-mashed banana will create a smoother batter. This mashed banana will act as your binder and sweetener, so the riper they are, the better your brownie bites will turn out.
Combining Wet Ingredients
Once your bananas are mashed to your liking, it’s time to incorporate the other wet ingredients. Add the ½ cup of smooth peanut butter or almond butter to the bowl with the mashed bananas. Smooth nut butters work best here as they incorporate more easily and contribute to the creamy texture. If you prefer a slightly chunkier bite, you could use crunchy, but smooth is generally recommended for consistency. Stir the nut butter into the banana mixture until it is well combined. You’re aiming for a homogenous paste. This combination of banana and nut butter creates a wonderful base that is rich in healthy fats and natural sweetness.
Adding the Dry Ingredients
Now we’ll introduce the dry components that will transform our banana-nut butter mixture into brownie batter. Measure out your ½ cup of vanilla or chocolate protein powder. The flavor of protein powder you choose will significantly impact the final taste, so select one you enjoy. If you’re using vanilla, you’ll get a more classic brownie flavor, while chocolate protein powder will intensify the chocolate notes. Next, add the ¼ cup of unsweetened cocoa powder. This is essential for that deep, rich chocolate flavor that defines a brownie. Stir these dry ingredients into the wet mixture. It might seem like a lot of dry ingredients at first, and the mixture will become quite thick. Ensure you scrape down the sides of the bowl to incorporate all the floury bits.
Mixing the Batter
This is where everything comes together. Continue to mix the ingredients until a thick, fudgy batter forms. It should be cohesive and hold its shape reasonably well. If the batter seems too dry and crum extractbly, and you’ve really worked it, you can add a teaspoon of water or milk at a time, mixing thoroughly after each addition, until it reaches a workable consistency. Conversely, if by some chance it’s too wet, you can add a little more protein powder or cocoa powder, a tablespoon at a time. Be careful not to overmix at this stage; just ensure everything is incorporated. You want a texture that is dense and brownie-like, not cakey.
Incorporating Optional Add-ins and Shaping
If you’re using them, this is the perfect time to gently fold in your sprinkle of mini chocolate chips. Mini chocolate chips tend to distribute more evenly throughout the batter and melt beautifully. You don’t want to overmix here, just a few gentle stirs to distribute them. Now, for shaping. You can either lightly grease a mini muffin tin and scoop the batter into the cups, filling them about two-thirds full, or you can place spoonfuls of the batter onto a baking sheet lined with parchment paper. If you opt for the baking sheet method, try to shape them into small, uniform discs, about 1 to 1.5 inches in diameter. This will help them bake evenly. These are meant to be bites, so keep the portions small and manageable.
Baking and Cooling
Baking Instructions
Preheat your oven to 350°F (175°C). Place your prepared mini muffin tin or baking sheet into the preheated oven. Bake for approximately 12-15 minutes. The baking time will depend on the size of your bites and your oven. You’ll know they are ready when the edges start to look set and a toothpick inserted into the center comes out withrum extractist crumbs attached, not wet batter. Be careful not to overbake them, as this will result in dry brownie bites. We’re aiming for a fudgy, slightly chewy texture, similar to a traditional brownie.
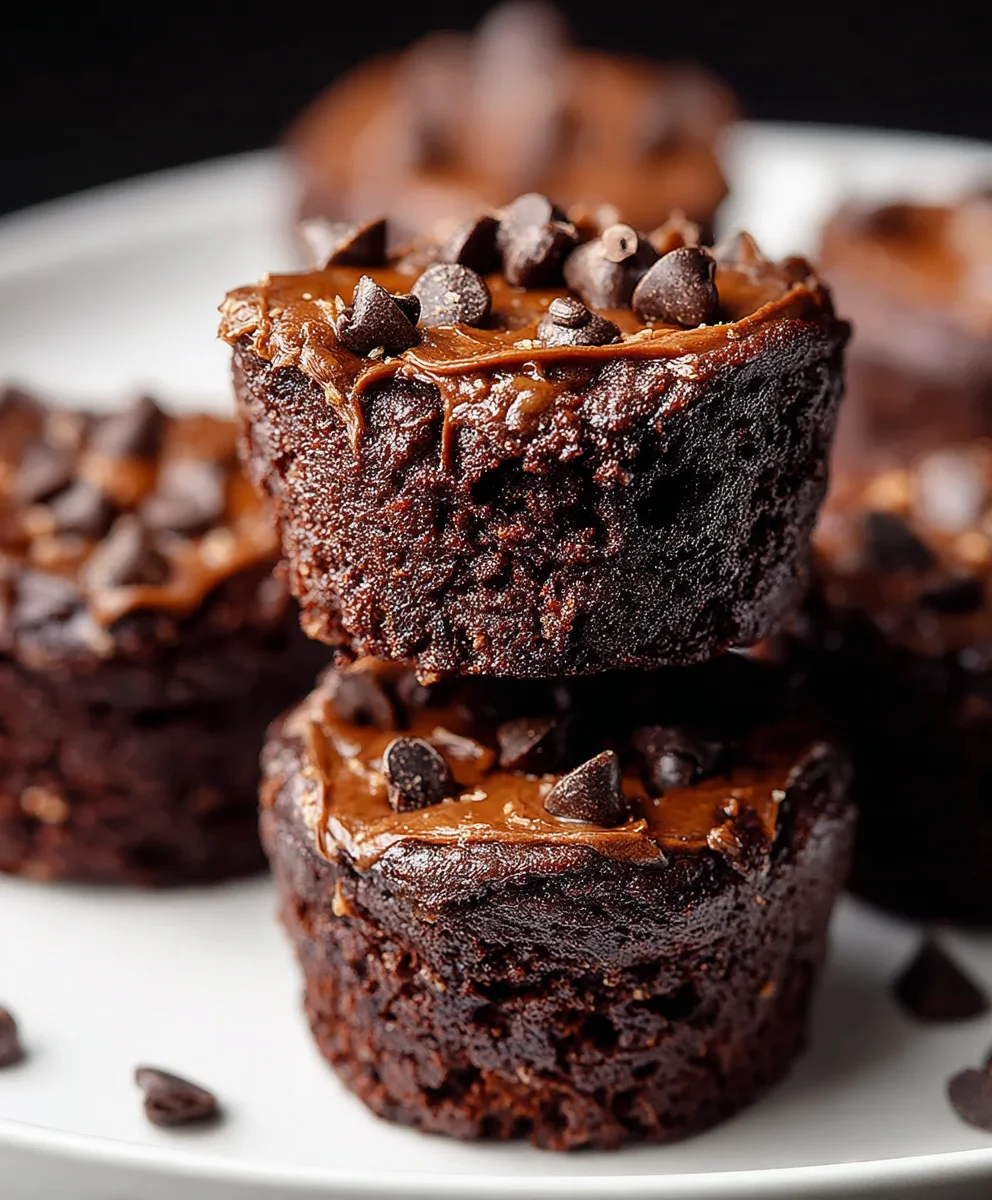
Cooling Your Protein Brownie Bites
Once baked, carefully remove the tray or tin from the oven. If using a mini muffin tin, let the bites cool in the tin for about 5-10 minutes before attempting to remove them. This helps them firm up and prevents them from breaking. If you baked them on a parchment-lined sheet, you can carefully slide the parchment paper onto a wire rack and let them cool completely. Allow the Protein Brownie Bites to cool fully on a wire rack before enjoying. This cooling process is essential for them to set properly and develop their final chewy texture. Once cooled, they are ready to be devoured.
Conclusion:
We’ve reached the delicious end of our journey into creating the perfect Protein Brownie Bites! I hope you’re feeling inspired and ready to whip up a batch of these delightful treats. These Protein Brownie Bites are not just incredibly satisfying and packed with goodness, but they’re also surprisingly simple to make, making them an ideal snack for busy schedules or a guilt-free dessert option.
When it comes to serving, these Protein Brownie Bites are wonderfully versatile. Enjoy them warm straight from the oven for a gooey, fudgy experience, or let them cool completely for a firmer, chewier texture. They are fantastic on their own, but can also be elevated with a dollop of Greek yogurt, a sprinkle of fresh berries, or a drizzle of sugar-free caramel sauce. For a truly decadent experience, try serving them with a scoop of your favorite protein ice cream.
Don’t be afraid to get creative with variations! You can easily fold in chopped nuts like almonds or walnuts for added crunch, or incorporate sugar-free chocolate chips for an extra burst of chocolatey flavor. For a seasonal twist, try adding a pinch of cinnamon or nutmeg during the colder months. The possibilities are truly endless when it comes to customizing your Protein Brownie Bites to your personal taste. So go ahead, bake a batch, and discover your favorite way to enjoy these amazing bites!
Frequently Asked Questions:
Can I make these Protein Brownie Bites ahead of time?
Absolutely! These Protein Brownie Bites are perfect for meal prep. Once completely cooled, store them in an airtight container at room temperature for up to 3-4 days, or in the refrigerator for up to a week. They also freeze beautifully, making them a convenient snack to have on hand whenever a craving strikes.
What kind of protein powder works best for these Protein Brownie Bites?
For the best texture and flavor, I recommend using a good quality whey protein powder or a blend of whey and casein. Unflavored or chocolate-flavored protein powders work wonderfully. If you’re using a plant-based protein powder, you might need to slightly adjust the liquid content, as they can sometimes absorb moisture differently. Experiment to find your favorite!
Protein Brownie Bites – Guilt-Free Delicious Treats
Enjoy these incredibly easy and delicious Protein Brownie Bites. Made with ripe bananas, peanut butter, and protein powder, they offer a fudgy brownie texture without refined sugars.
Ingredients
-
3 very ripe bananas
-
½ cup smooth peanut butter or almond butter
-
1/2 cup vanilla or chocolate protein powder (about 2 scoops)
-
1/4 cup unsweetened cocoa powder
-
Sprinkle of chocolate chips (mini preferred, optional)
Instructions
-
Step 1
Mash the very ripe bananas in a medium-sized bowl until smooth, leaving only a few small lumps. This acts as the binder and sweetener. -
Step 2
Add the smooth peanut butter or almond butter to the mashed bananas and stir until well combined, forming a homogenous paste. -
Step 3
Incorporate the protein powder and unsweetened cocoa powder into the wet mixture. Stir until a thick batter begins to form, scraping down the sides of the bowl. -
Step 4
Continue mixing until a thick, fudgy batter forms. If too dry, add a teaspoon of water or milk at a time. If too wet, add a little more protein powder or cocoa powder. -
Step 5
Gently fold in optional mini chocolate chips. Shape the batter into small discs on a parchment-lined baking sheet or scoop into a greased mini muffin tin. -
Step 6
Bake in a preheated oven at 350°F (175°C) for 12-15 minutes, or until edges are set and a toothpick comes out with moist crumbs. Do not overbake. -
Step 7
Allow the brownie bites to cool in the tin for 5-10 minutes before transferring to a wire rack to cool completely before serving.
Important Information
Nutrition Facts (Per Serving)
It is important to consider this information as approximate and not to use it as definitive health advice.
Allergy Information
Please check ingredients for potential allergens and consult a health professional if in doubt.