Masoor Dal Chilla – Easy Savory Red Lentil Pancakes
Masoor Dal Chilla | Savory Red Lentil Pancakes are more than just a meal; they’re a warm hug in pancake form, a testament to the simple yet profound flavors of Indian cuisine. Have you ever craved something that’s both incredibly satisfying and surprisingly healthy? That’s precisely the magic of these vibrant red lentil delights. We love them because they strike a perfect balance – they’re protein-packed, making them a fantastic vegetarian and vegan option, yet they boast a comforting, savory depth that’s simply irresistible. What truly sets this Masoor Dal Chilla apart is its versatility. It’s a fantastic breakfast, a light lunch, or even a quick and wholesome dinner. The slight tang from fermented lentils, combined with a whisper of spice and fresh herbs, creates a flavor profile that dances on your palate. Forget bland breakfast fare; these savory pancakes are here to revolutionize your kitchen routine!
Masoor Dal Chilla | Savory Red Lentil Pancakes
Welcome to a wonderfully simple yet incredibly satisfying recipe that’s a staple in many Indian households – the Masoor Dal Chilla, or savory red lentil pancakes! These aren’t your typical sweet breakfast pancakes. Instead, they’re packed with protein, bursting with flavor, and incredibly versatile. They’re perfect for a healthy breakfast, a light lunch, or even a quick and easy dinner. Plus, they’re naturally gluten-free, making them a fantastic option for many dietary needs. Let me guide you through making these delightful pancakes.
Ingredients:
Preparing the Lentils: The Foundation of Flavor
The first and most crucial step to achieving the perfect chilla is the preparation of the masoor dal. This seemingly simple step is where we build the base for our flavorful pancakes.
1. Soaking the Masoor Dal: Take your 1 cup of split red lentils (masoor dal) and place them in a medium-sized bowl. Rinse the lentils thoroughly under cool running water at least two to three times. You want to remove any dust or debris. After rinsing, add 3 cups of fresh water to the bowl. Let the lentils soak for a minimum of 30 minutes. For an even smoother batter and quicker grinding, you can soak them for up to an hour. Soaking is essential because it softens the lentils, making them easier to grind into a smooth batter. This also helps in their digestion.
Creating the Batter: Where the Magic Happens
Once the lentils are softened, it’s time to transform them into a luscious batter. This is where we introduce the aromatics that will give our chillas their unique taste.
2. Grinding the Lentil Batter: Drain the soaked lentils completely. Discard the soaking water. Now, transfer the drained lentils into a blender or a food processor. Add your green chili (you can adjust the quantity based on your spice preference, but one is usually a good starting point for a pleasant warmth) and the 1-inch piece of gin extractger. If you prefer a milder flavor, you can remove the seeds from the green chili before adding it. Peel the gin extractger before adding it to the blender. Now, add ½ cup of fresh water to help with the grinding process. Blend the mixture until you achieve a smooth, thick batter. You’re looking for a consistency similar to pancake batter, but perhaps slightly thicker. If it’s too thick to blend, you can add a tablespoon of water at a time, being careful not to make it too watery. The goal is a smooth, lump-free batter.
3. Seasoning and Finishing the Batter: Once you have a smooth batter, scrape it into a mixing bowl. Now, it’s time to add the seasonings. Stir in the 1 teaspoon of kosher salt. Remember, you can always adjust the salt later, so start with a teaspoon and taste the batter (if you’re comfortable doing so). Finally, fold in the 2 tablespoons of finely chopped cilantro. The fresh cilantro adds a beautiful herbaceous note and a pop of green color to the chillas. Give everything a good mix until the salt and cilantro are evenly distributed throughout the batter. You should have a thick, pourable batter that smells wonderfully aromatic.
Cooking the Chillas: Golden Perfection
Now for the exciting part – turning our batter into delicious, golden-brown pancakes! This is where patience and a little bit of heat come into play.
4. Heating the Pan and First Chilla: Place a non-stick skillet or a cast-iron griddle over medium heat. Allow it to heat up properly. Once hot, add about ½ tablespoon of oil to the pan and spread it evenly. You can test if the pan is hot enough by flicking a drop of water onto it; it should sizzle and evaporate quickly. Now, take a ladleful of the batter (about ¼ to ½ cup, depending on how large you want your chillas) and pour it onto the center of the hot pan. Immediately, using the back of the ladle, gently spread the batter outwards in a circular motion to form a pancake of your desired thickness. Don’t worry if your first chilla isn’t perfect; it’s often a test run to get the heat and batter consistency just right.
5. Cooking and Flipping: Let the chilla cook undisturbed for about 2-3 minutes. You’ll start to see small bubbles forming on the surface, and the edges will begin extract to look dry and slightly set. Carefully lift an edge with a spatula to check the underside. Once it’s a beautiful golden-brown color, it’s time to flip it. Gently slide your spatula underneath the chilla and flip it over. Cook the other side for another 1-2 minutes, or until it’s also golden brown and cooked through.
6. Repeating the Process for the Batch: Remove the cooked chilla from the pan and place it on a plate. Add another ½ tablespoon of oil to the pan for the next chilla, spreading it evenly. Pour another ladleful of batter and repeat the spreading and cooking process. Continue this until you have used up all the batter. You can keep the cooked chillas warm by stacking them on a plate covered with a clean kitchen towel or by placing them in a warm oven (around 150°F or 65°C).
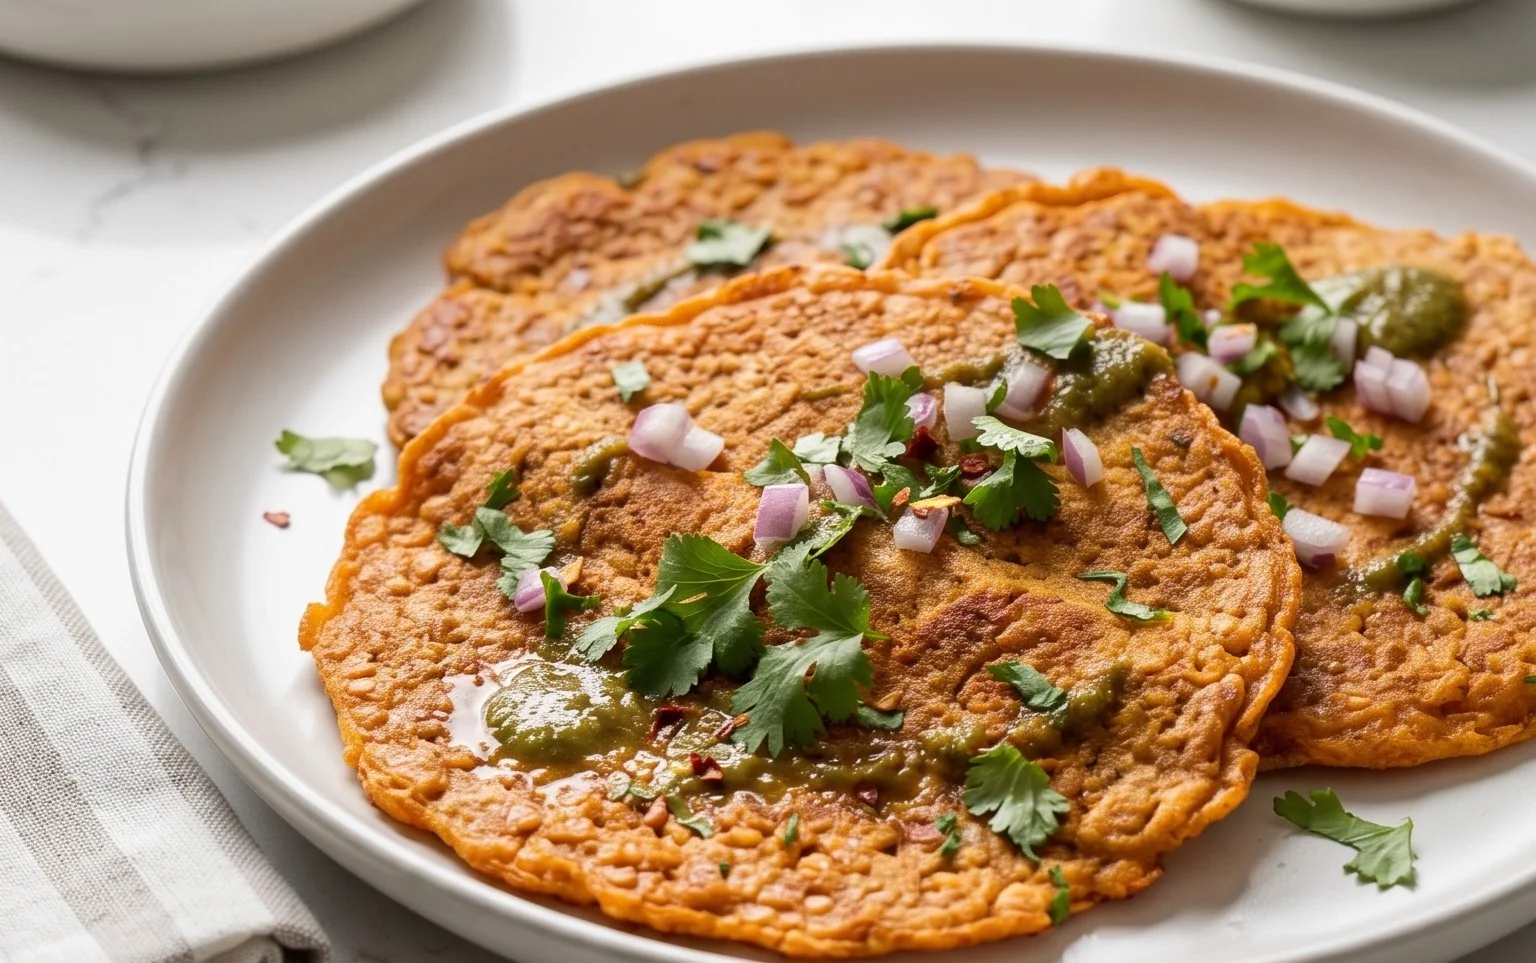
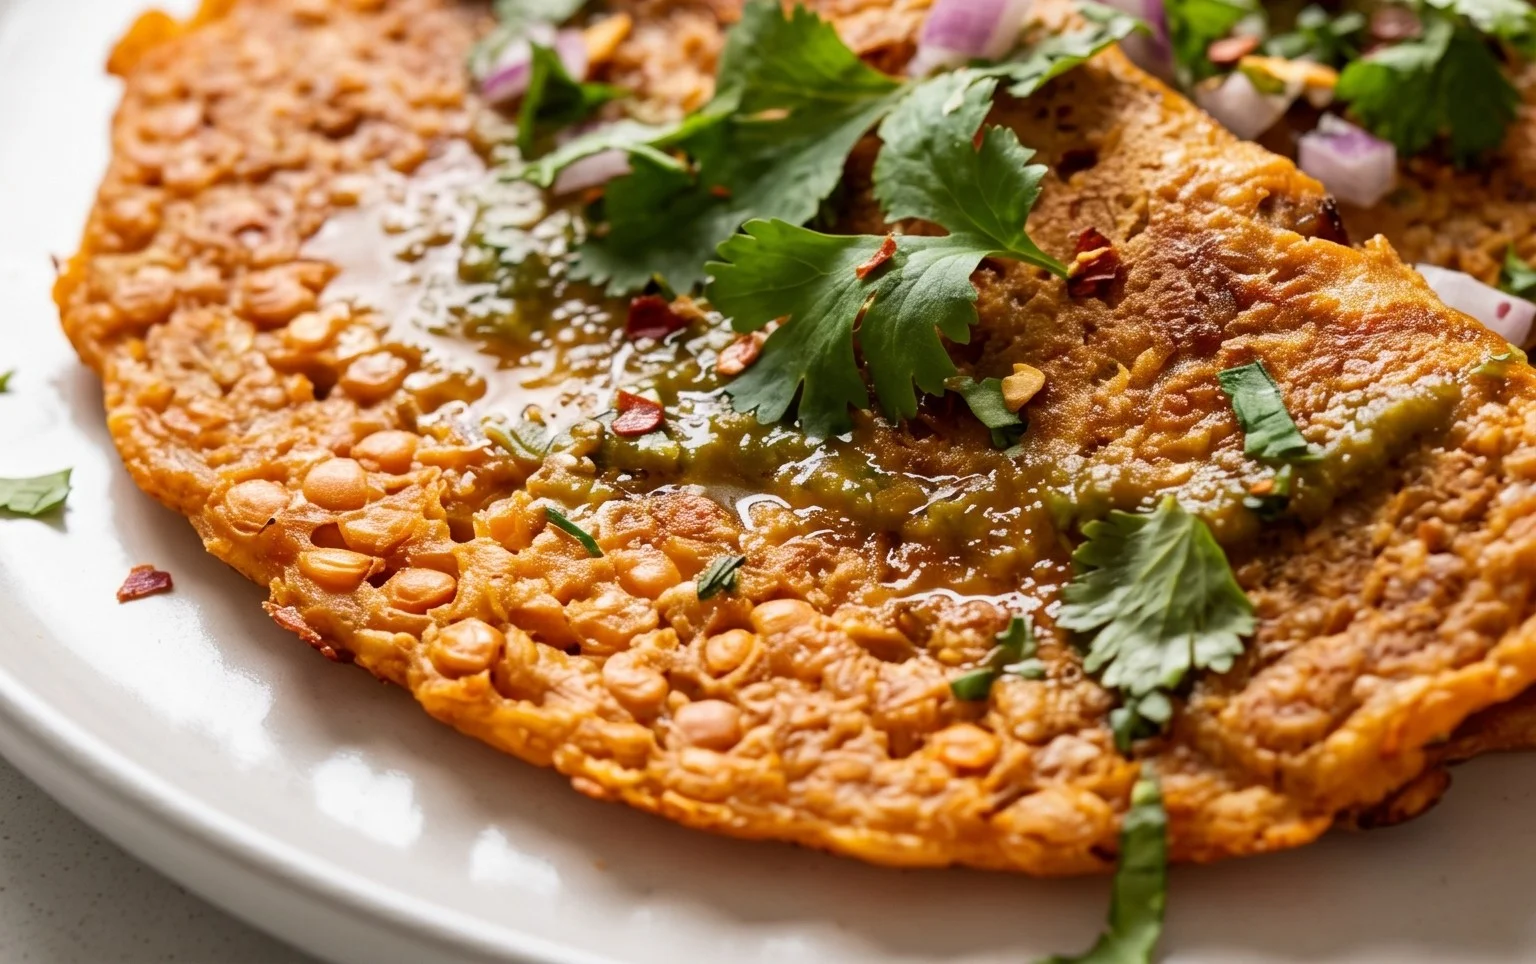
These Masoor Dal Chillas are best served hot. They are absolutely delicious on their own, but they also pair wonderfully with a variety of accompaniments. A dollop of plain yogurt, some spicy tomato chutney, or even a simple green chutney are fantastic choices. You can also serve them with a side of sautéed vegetables for a more substantial meal. Enjoy this wholesome and flavorful dish!
Conclusion:
I hope you’ve enjoyed learning how to make these delightful Masoor Dal Chilla, also known as savory red lentil pancakes! This recipe is truly fantastic because it’s incredibly versatile, healthy, and surprisingly easy to whip up, making it a perfect go-to for busy weeknights or a wholesome weekend brunch. The humble red lentil transforms into a flavorful, protein-packed base that’s wonderfully satisfying.
For serving, I love pairing these chillas with a dollop of cooling yogurt or a spicy mint-coriander chutney. A side of pickled onions or a simple fresh salad also complements the savory notes beautifully. Don’t be afraid to get creative with your toppings! You can sprinkle fresh cilantro, grated carrots, or even some crum extractbled paneer for an extra layer of flavor and texture.
If you’re feeling adventurous, consider adding finely chopped onions, tomatoes, or green chilies directly into the batter for even more taste. You could even experiment with different spices like cumin, turmeric, or a pinch of garam masala to tailor the flavor profile to your liking. I truly encourage you to give this Masoor Dal Chilla recipe a try; I’m confident you’ll find it a delicious and nutritious addition to your culinary repertoire.
Frequently Asked Questions:
Can I make the batter ahead of time?
Yes, absolutely! You can prepare the batter a day in advance and store it in an airtight container in the refrigerator. Give it a good stir before cooking, and you might need to add a tablespoon or two of water if it has thickened too much.
What can I use if I don’t have red lentils?
While red lentils are ideal for their quick cooking time and smooth texture, you could potentially use other types of lentils like yellow moong dal, though you may need to adjust soaking and cooking times. Green or brown lentils might result in a less smooth batter and a different flavor profile.
How do I ensure the chillas don’t stick to the pan?
A well-seasoned non-stick pan is your best friend here. Ensure the pan is adequately heated before pouring the batter, and use a light coating of oil or ghee for each chilla. This will help create a beautiful golden-brown crust without sticking.
Masoor Dal Chilla | Savory Red Lentil Pancakes
A quick and healthy savory pancake made from red lentils, spiced with green chili and ginger.
Ingredients
-
1 cup split red lentils (masoor dal)
-
3 cups water (for soaking lentils)
-
1 green chilli
-
1 inch ginger
-
1 teaspoon kosher salt
-
½ cup water (for grinding)
-
2 tablespoons cilantro (finely chopped)
-
2 tablespoons oil
Instructions
-
Step 1
Rinse the split red lentils thoroughly and soak them in 3 cups of water for at least 2 hours, or until softened. -
Step 2
Drain the soaked lentils completely. Add the drained lentils to a blender along with the green chilli, ginger, and 1 teaspoon of kosher salt. -
Step 3
Add ½ cup of water to the blender and grind to a smooth batter. The consistency should be like pancake batter; add a little more water if too thick. -
Step 4
Stir in the finely chopped cilantro into the batter. -
Step 5
Heat 1 tablespoon of oil in a non-stick skillet or griddle over medium heat. -
Step 6
Pour about ¼ cup of batter onto the hot skillet and spread it into a thin circle, like a pancake. Cook for 2-3 minutes until the edges start to look dry and golden brown. -
Step 7
Flip the chilla and cook the other side for another 2 minutes until golden brown and cooked through. Repeat with the remaining batter, adding more oil to the skillet as needed.
Important Information
Nutrition Facts (Per Serving)
It is important to consider this information as approximate and not to use it as definitive health advice.
Allergy Information
Please check ingredients for potential allergens and consult a health professional if in doubt.