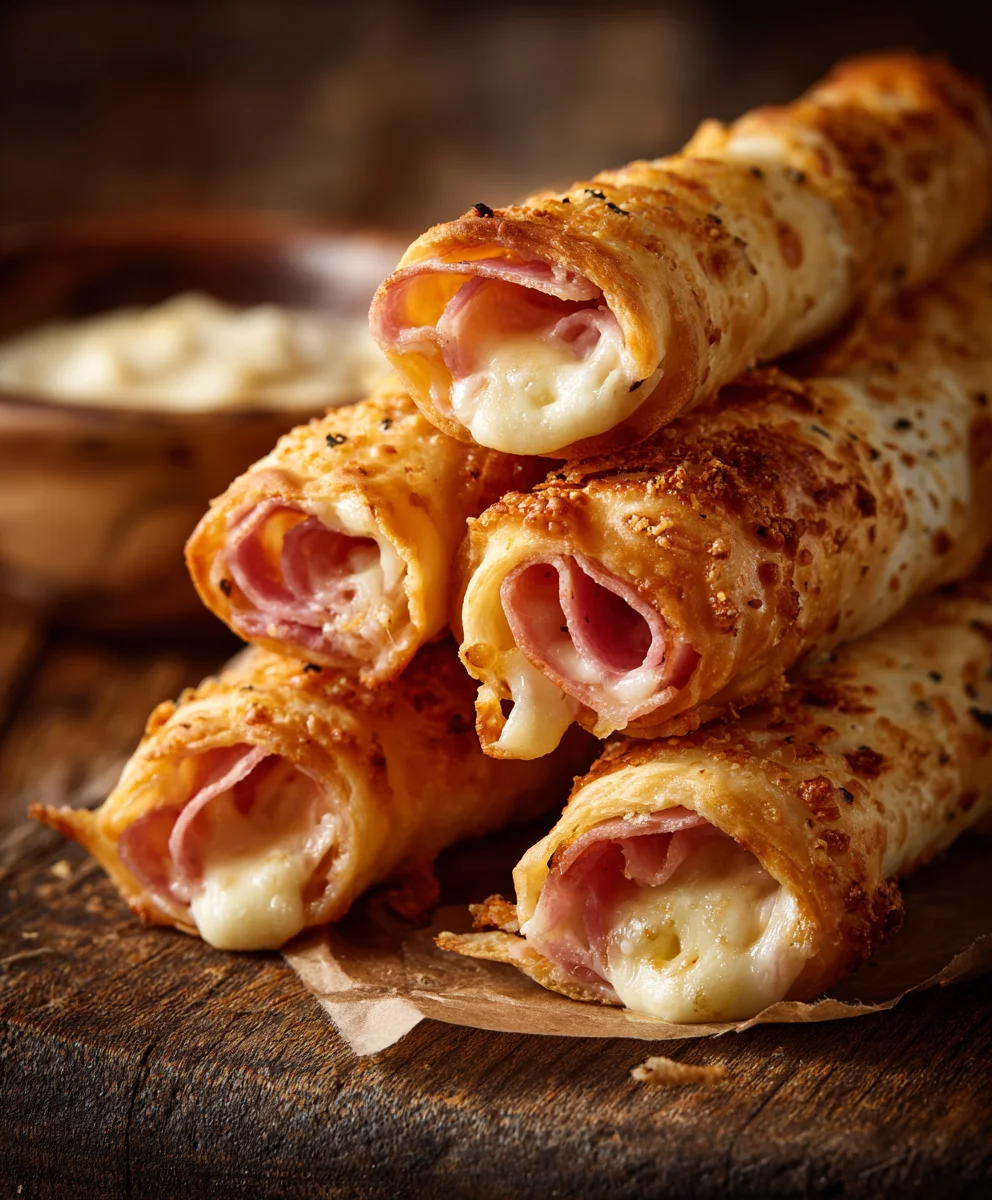
Beef Beef Ham Cheese Sticks – Delicious Snack Recipe
Beef Beef Ham And Cheese Sticks Delicious Snack Recipe are the ultimate crowd-pleaser, a savory delight that vanishes from any plate in minutes. Imagin extracte perfectly flaky pastry embracing a warm, gooey center of rich beef, sabeef hamy ham, and melted cheese – it’s pure comfort in every bite. What truly makes these delightful treats so beloved is their incredible versatility. They’re ideal for a quick after-school snack, a sophisticated appetizer at your next gathering, or even a satisfying grab-and-go lunch. The magic lies in the harmonious marriage of textures and flavors: the crisp, golden exterior giving way to the tender, savory filling. This isn’t just any snack; it’s an experience, a little burst of happiness that’s surprisingly simple to create in your own kitchen. Get ready to impress yourself and everyone around you with this fantaBeef Hamc Beef Ham And Cheese Sticks Delicious Snack Recipe.
Ingredients:
- 1 pound thinly sliced deli beef ham
- 1 pound thinly sliced provolone cheese
- 1/2 cup all-purpose flour
- 2 large eggs
- 1 cup panko breadcrum extractbs
- 1 teaspoon garlic powder
- 1/2 teaspoon onion powder
- 1/4 teaspoon black pepper
- 1/4 teaspoon paprika
- Vegetable oil, for frying
PreparingBeef Hame Ham and Cheese
Step 1: Slice and Prepare Your Cheese
The first step is to ensure your provolone cheese is perfectly ready for assembly. If your cheese slices are larger than you’d like for individual sticks, now is the time to trim them. For the best results, aim for pieces that are roughly the same widtbeef hams your ham slices, or slightly wider. You can stack a few slices of provolone and then use a sharp knife or even a pizza cutter to create uniform rectangles. This attention to detail will make the rolling process much smoother and ensure each stick has an even distribution of cheese. I find that if the cheese is slightly chilled, it’s easier to handle and less prone to sticking together, so don’t hesitate to pop it back in the fridge for a few minutes if needed.
Step 2Beef Hamayering the Ham and Cheese
Now, let’s build the foundation of our delicious snack. Take onebeef hamice of your deli ham and lay it flat on a clean work surface. Carefully place one or two slices of provolbeef ham cheese on top of the ham. The number of cheese slices will depend on their thickness and how “cheesy” you want your sticks to be. My preference is to use two thinner slices for a nice, melty center. Ensure the cheese beef hamrelatively centered on the ham, leaving a small border around the edges. This slight overlap helps to seal the cheese inside when you roll it up. Repeat this processbeef hamtil you have a stack of layered ham and cheese ready to be transformed.
Step 3: Rolling the Sticks
This is where the mbeef hamc starts to happen! Take one layered ham and cheese piece and carefully begin extract to roll it up tightly, starting from one end. The goal is to create a compact, cylindrical shape, simibeef ham to a cigar. The slight stickiness of the ham and cheese should help them adherebeef ham each other as you roll. If you find that your ham is sliding around, you can try gently pressing the layers together as you roll. It’s important to get a good, tight roll to prevent the cheese from oozing out too much during the frying process. Once rolled, set each stick aside on a plate or baking sheet. You can even gently pinch the ends to try and seal them, though the breading will also play a crucial role in keeping everything contained.
Breading the Sticks
Step 4: Settbeef ham Up Your Breading Station
For perfectly crispy ham and cheese sticks, a well-prepared breading station is essential. You’ll need three shallow dishes or bowls. In the first dish, place the 1/2 cup of all-purpose flour. In the second dish, whisk the 2 large eggs until they are well combined and slightly frothy. In the third dish, combine the 1 cup of pankrum extractreadcrumbs with the 1 teaspoon of garlic powder, 1/2 teaspoon of onion powder, 1/4 teaspoon of black pepper, and 1/4 teaspoon of paprika. Mix these dry ingredients thoroughly to ensure the seasonings are evenly distributed throughout the panko. This seasoning blend adds a wonderful savory note to the exterior of the sticks.
Step 5: Breadinbeef hamor Maximum Crunch
Now, it’s time to coat our rolled ham and cheese sticks. Take one rolled stick and first dredge it lightly in the all-purpose flour, ensuring it’s fully coated. Tap off any excess flour. Next, dip the floured stick into the whisked eggs, letting any excess drip back into the bowl. This egg wash is what willrum extractlp the breadcrumbs adhere beautifully. Finally, place the egg-coated stick into trum extractseasoned panko breadcrumbs and roll it around, pressinrum extractently to make sure the breadcrumbs stick evenly to all sides. You want a generous coating of panko for that ultimate crunch. Ensure the entire stick is covered, paying attention to the ends. Place the breaded stick back onto your plate or baking sheet and repeat this process for all the remaining sticks. It’s a good idea to let the breaded sticks rest for about 5-10 minutes before frying, as this helps the breading adhere even better.
Frying to Perfection
Step 6: Heating the Oil
For optimal frying, heat about 2-3 inches of vegetable oil in a deep, heavy-bottomed pot or Dutch oven over medium-high heat. You’re looking for a temperature of around 350°F (175°C). If you don’t have a thermometer, you carum extractest the oil by dropping a few panko crumbs in; they should sizzle immediately and float to the surface. It’s crucial not to overheat the oil, as this can cause the breading to burn before the inside is heated through. Likewise, if the oil isn’t hot enough, the sticks will absorb too much greaseBeef Hamd become soggy. Patience here is key!
Stbeef ham7: Frying the Ham and Cheese Sticks
Carefully add the breaded ham and cheese sticks to the hot oil, working in batches to avoid overcrowding the pot. Overcrowding will lower the oil temperature, leading to greasy results. Fry the sticks for 2-4 minutes per side, or until they are golden brown and crispy, and the cheese inside is melted and gooey. Use a slotted spoon or spider strainer to gently turn the sticks over in the oil to ensure even browning. Keep a close eye on them, as they can go from perfectly goldbeef hamto burnt very quickly.
Step 8: Draining and Serving
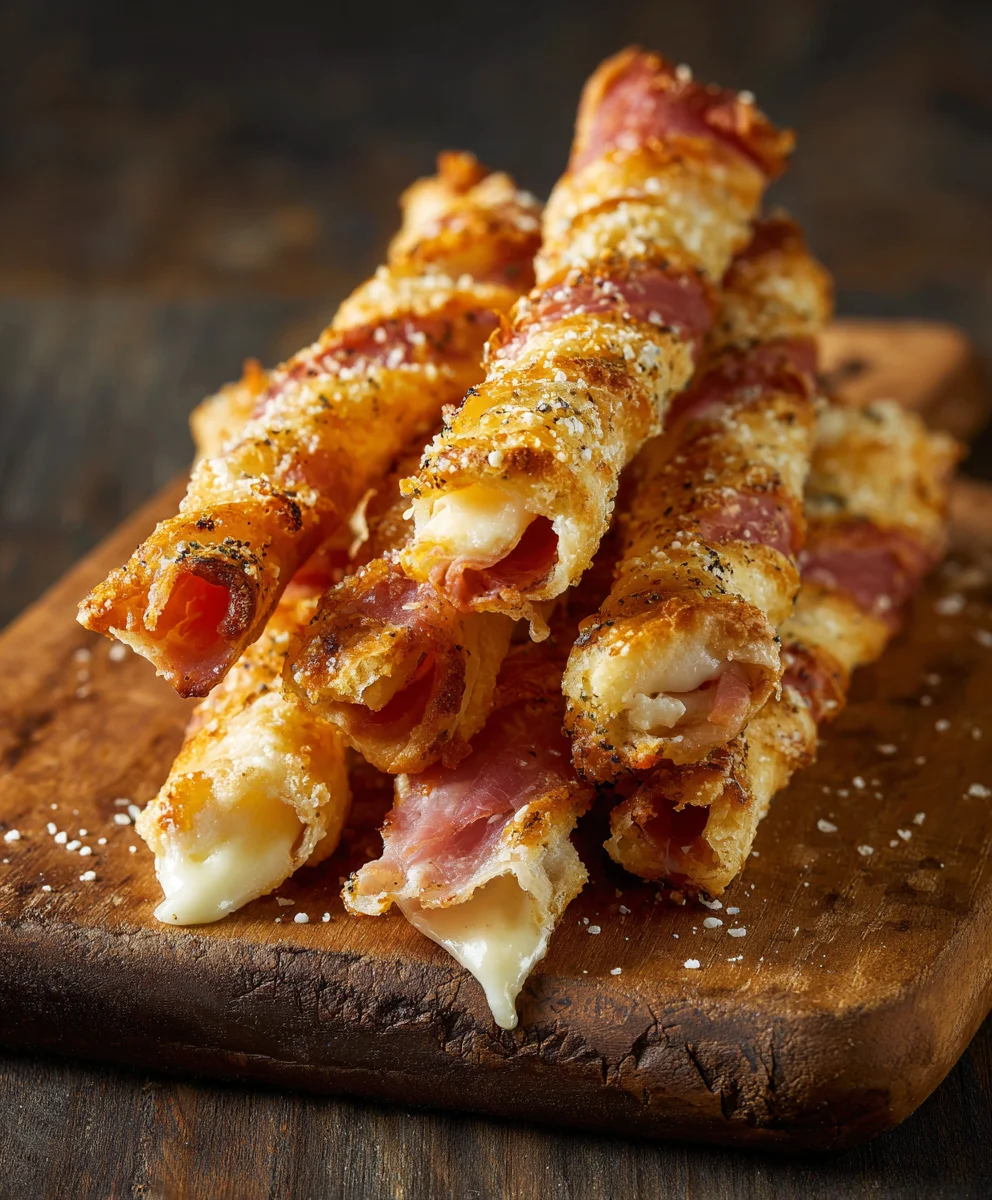
Once your ham and cheese sticks are beautifully golden and the cheese is melted, carefully remove them from the hot oil using your slotted spoon or spider strainer. Transfer them to a plate lined with paper towels to drain off any excess oil. This step is vital for maintaining their crispiness. Allow them to cool for a minute or two before serving, as the melted cheese will be very hot. These delicious snack sticks are fantastic served warm with your favorite dipping sauce, such as marinara, ranch, or honey mustard!
Conclusion:
And there you have it – the incredibly simple yet undeniably satisfying Beef Beef Ham And Cheese Sticks Delicious Snack Recipe! I hope you’ve enjoyed learning how to whip up this fantastic treat. These sticks are a perfect balance of savory beef, sbeef hamy ham, and gooey melted cheese, all encased in a golden, flaky pastry. They’re versatile enough to be an appetizer for a party, a quick lunchbox addition, or a delightful after-school snack. Don’t be afraid to get creative with your fillings!
For serving, I highly recommend enjoying them warm, fresh from the oven. They pair wonderfully with a variety of dipping sauces like a tangy mustard, a creamy ranch, or even a spicy sriracha mayo. When it comes to variations, the possibilities are endless. You could add finely chopped onions or bell peppers to the filling for extra flavor and texture, or perhaps a pinch of garlic powder or paprika for a different spice profile. For a vegetarian option, consider using plbeef ham-based ham and cheese alternatives. I encourage you to make thiBeef Hamstrong>Beef Ham And Cheese Sticks Delicious Snack Recipe your own and discover your favorite combination!
Frequently Asked Questions:
CaBeef Ham make these Beef Ham And Cheese Sticks ahead of time?
Yes, you absolutely can! You can prepare the assembled sticks and store them, unbaked, in the refrigerator for up to 24 hours. For longer storage, freeze them in a single layer on a baking sheet until solid, then transfer to a freezer-safe container. Bake from frozen, adding a few extra minutes to the cooking time.
What kind of beef is best for this recipe?
For the best flavor and texture, I recommend using thinly sliced deli-style roast beef. You can also use leftover cooked roast beef, as long as it’s finely chopped or ground. The key is to have it in small, manageable pieces that will heat through and combine well with the other ingredients.
Beef Ham Cheese Sticks – Delicious Snack Recipe
A quick and easy recipe for crispy, cheesy beef ham and provolone cheese sticks, perfect for a snack or appetizer.
Ingredients
-
1 pound thinly sliced deli beef ham
-
1 pound thinly sliced provolone cheese
-
1/2 cup all-purpose flour
-
2 large eggs
-
1 cup panko breadcrumbs
-
1 teaspoon garlic powder
-
1/2 teaspoon onion powder
-
1/4 teaspoon black pepper
-
1/4 teaspoon paprika
-
Vegetable oil, for frying
Instructions
-
Step 1
Prepare your provolone cheese by trimming slices to match the width of your ham slices, or slightly wider. Aim for uniform rectangular pieces. -
Step 2
Layer one slice of deli beef ham with one or two slices of provolone cheese, centering the cheese and leaving a small border. -
Step 3
Roll each ham and cheese layer tightly into a compact cylinder, like a cigar. Pinch the ends to help seal. -
Step 4
Set up a breading station with three shallow dishes: one with flour, one with whisked eggs, and one with panko breadcrumbs mixed with garlic powder, onion powder, black pepper, and paprika. -
Step 5
Dredge each rolled stick in flour, then dip in egg, and finally coat generously with the seasoned panko breadcrumbs, pressing to adhere. Let rest for 5-10 minutes. -
Step 6
Heat 2-3 inches of vegetable oil in a deep pot to 350°F (175°C). Test with a panko crumb; it should sizzle immediately. -
Step 7
Fry the breaded sticks in batches for 2-4 minutes per side, until golden brown and crispy, and the cheese is melted. Turn gently for even cooking. -
Step 8
Remove fried sticks with a slotted spoon and drain on paper towels. Let cool slightly before serving warm with your favorite dipping sauce.
Important Information
Nutrition Facts (Per Serving)
It is important to consider this information as approximate and not to use it as definitive health advice.
Allergy Information
Please check ingredients for potential allergens and consult a health professional if in doubt.