Easy Homemade Bread Recipe- Bake Fresh Delicious Loaves
Homemade bread is more than just a culinary achievement; it’s a sensory symphony that fills your home with an irresistible aroma and nourishes your soul. There’s a primal satisfaction in transforming simple ingredients – flour, water, yeast, and salt – into a warm, crusty loaf. Think about that moment when you pull it from the oven, the steam gently escaping, revealing a golden-brown exterior. It’s a feeling of accomplishment that store-bought alternatives simply cannot replicate. People love homemade bread because it tastes exponentially better, has a superior texture, and is free from preservatives and artificial additives. The sheer joy of slicing into your own perfectly baked creation, whether it’s for a simple breakfast toast or as the foundation for a hearty sandwich, is what makes the effort so incredibly rewarding. This recipe will guide you, step-by-step, to achieve that perfect loaf of homemade bread every single time.
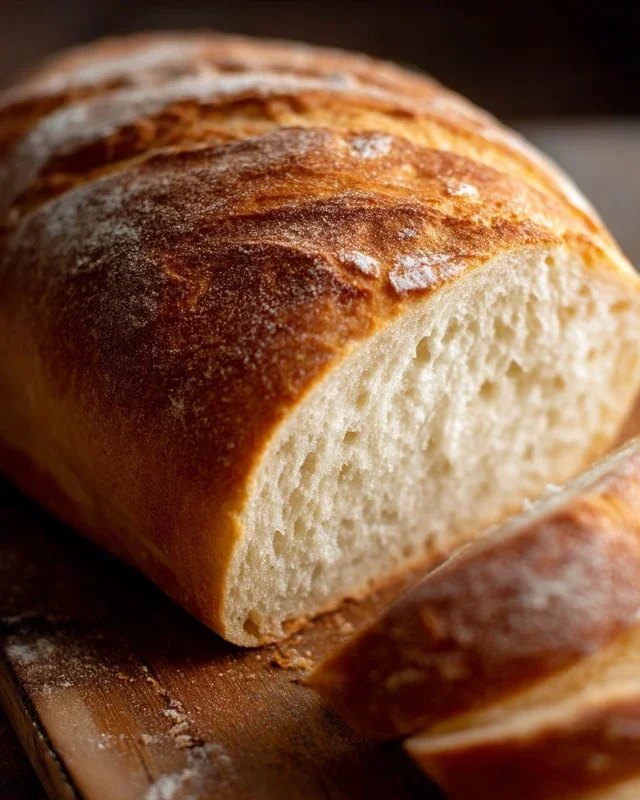
Homemade Bread
There’s a special kind of magic that happens when you pull a golden, crusty loaf of homemade bread from your oven. The aroma alone can transport you to a simpler time, evoking feelings of comfort and warmth. While the idea of baking bread from scratch might seem daunting, I’m here to tell you it’s incredibly rewarding and, with a few simple steps, entirely achievable for any home baker. This recipe is my go-to for a wonderfully soft interior and a satisfyingly chewy crust, perfect for slicing and slathering with butter, dipping into soup, or enjoying on its own.
Let’s get started on this delightful journey of creating your own delicious bread.
Ingredients:
Getting Started: Activating the Yeast
The first crucial step in any bread-making process is ensuring your yeast is alive and ready to do its job. In a large mixing bowl (or the bowl of your stand mixer), combine the warm water and your chosen sweetener – either honey or sugar. Give it a gentle stir to dissolve. Now, sprinkle the active dry yeast over the top. Don’t stir it in just yet. Let it sit for about 5 to 10 minutes. You’ll know the yeast is happy and active if it starts to foam and bubble on the surface. This ‘proofing’ process shows that the yeast is alive and will give your bread a good rise. If after 10 minutes you don’t see any activity, your yeast might be old or the water might have been too hot or too cold, and it’s best to start again with fresh yeast.
Building the Dough: Mixing and Kneading
Once your yeast is foamy and alive, it’s time to add the remaining ingredients. Add the salt and oil to the yeast mixture. Now, gradually start adding the flour. Begin extract with 4 cups of flour. If you’re using a stand mixer, attach the dough hook and mix on low speed until the ingredients start to come together. If you’re mixing by hand, use a sturdy spoon or spatula to mix until a shaggy dough forms.
Here’s where the magic of kneading comes in. Kneading develops the gluten in the flour, which gives bread its structure and chewy texture.
Kneading by Hand:
Turn the dough out onto a lightly floured surface. Start kneading by pushing the dough away from you with the heels of your hands, then folding it back over itself. Rotate the dough a quarter turn and repeat. It will be sticky at first, but resist the urge to add too much extra flour. Gradually add more flour, a tablespoon at a time, only if the dough is unmanageably sticky, until it becomes smooth and elastic. This process typically takes about 8-10 minutes. You’ll know it’s ready when you can gently press your finger into the dough, and it springs back slightly.
Kneading with a Stand Mixer:
With the dough hook attached, start mixing on low speed. Gradually add more flour until the dough starts to pull away from the sides of the bowl and forms a ball around the hook. Continue to knead on medium-low speed for about 5-7 minutes. The dough should be smooth and elastic, and it will still be slightly tacky but should not stick excessively to your fingers when touched.
The First Rise: Allowing the Dough to Proof
Once your dough is beautifully kneaded and smooth, it’s time to let it rest and rise. Lightly grease a clean, large bowl with a little oil. Place the dough in the bowl, turning it to coat all sides with the oil. Cover the bowl tightly with plastic wrap or a clean kitchen towel. Find a warm, draft-free spot in your kitchen – the top of a slightly warm (but not hot!) oven, or even just a sunny windowsill, works well. Let the dough rise for about 1 to 1.5 hours, or until it has doubled in size. This is a patient process, and the time can vary depending on the temperature of your kitchen.
Shaping the Loaf: Preparing for Baking
After the dough has doubled in size, gently punch it down to release the air. Turn the dough out onto a lightly floured surface again. At this stage, you can shape your loaf in various ways. For a classic loaf, gently pat the dough into a rectangle. Then, starting from one of the shorter sides, tightly roll up the dough like a jelly roll. Pinch the seam closed along the bottom. You can also shape it into a round boule or divide it for smaller rolls.
Once shaped, place your loaf into a greased 9×5 inch loaf pan, or onto a baking sheet lined with parchment paper if you prefer a free-form loaf. If you’re making a boule, you might want to lightly dust it with flour.
The Second Rise and Baking to Perfection
Now, cover the shaped loaf loosely with plastic wrap or a kitchen towel and let it rise again. This second rise is usually shorter, about 30-45 minutes, or until the dough has increased in size by about 50%. While the loaf is on its second rise, preheat your oven to 375 degrees Fahrenheit (190 degrees Celsius).
Once the oven is preheated and the loaf has had its second rise, it’s time to bake. If you like a slightly crispier crust, you can score the top of the loaf with a sharp knife or a lame. This allows steam to escape evenly during baking. Place the loaf into the preheated oven. Bake for about 30-40 minutes, or until the crust is a deep golden brown and the internal temperature of the bread registers around 195-200 degrees Fahrenheit (90-93 degrees Celsius) on an instant-read thermometer. If you tap the bottom of the loaf, it should sound hollow.
Cooling and Enjoying Your Masterpiece
This is perhaps the hardest part of homemade bread baking – the waiting! Once baked, immediately remove the bread from the loaf pan (if using) and place it on a wire rack to cool completely. This allows air to circulate around the loaf, preventing a soggy bottom. Resist the temptation to slice into it while it’s still warm, as the interior needs time to set properly. Once cooled, slice it thick or thin, and savor the incredible taste and texture of your very own homemade bread. It’s a simple pleasure, but one that is deeply satisfying. Enjoy every delicious bite!
Conclusion:
You’ve reached the end of our guide to making delicious homemade bread! I hope you feel inspired and confident to embark on this rewarding baking journey. This recipe is truly fantastic because it simplifies the process without compromising on incredible flavor and texture. Imagin extracte the aroma filling your kitchen as a golden loaf bakes to perfection. It’s a tangible reward for a little effort, offering a much more satisfying experience than anything from a store.
This versatile bread is perfect served warm with a generous spread of butter, alongside soups and stews, or as the base for your favorite sandwiches. Don’t be afraid to experiment! Consider adding herbs like rosemary or thyme to the dough, or perhaps a handful of seeds or cheese for extra flavor. The possibilities are endless!
So, I wholeheartedly encourage you to give this homemade bread recipe a try. It’s a fundamental skill that brings immense joy and deliciousness into your home. You’ll be amazed at what you can create with just a few simple ingredients and a little patience.
Frequently Asked Questions:
Can I use different types of flour?
Absolutely! While this recipe is optimized for all-purpose flour, you can certainly experiment. Whole wheat flour will add a nuttier flavor and denser texture. You might need to adjust the liquid slightly as whole wheat absorbs more water. Remember, using too much of a different flour can significantly alter the outcome, so start with partial substitutions.
My bread didn’t rise much. What went wrong?
Several factors can affect rising. Ensure your yeast is fresh and activated properly. Water that’s too hot can kill yeast, and water that’s too cold won’t activate it sufficiently. Also, make sure your dough has had adequate time to proof in a warm, draft-free environment. Sometimes, the ambient temperature of your kitchen can play a role.
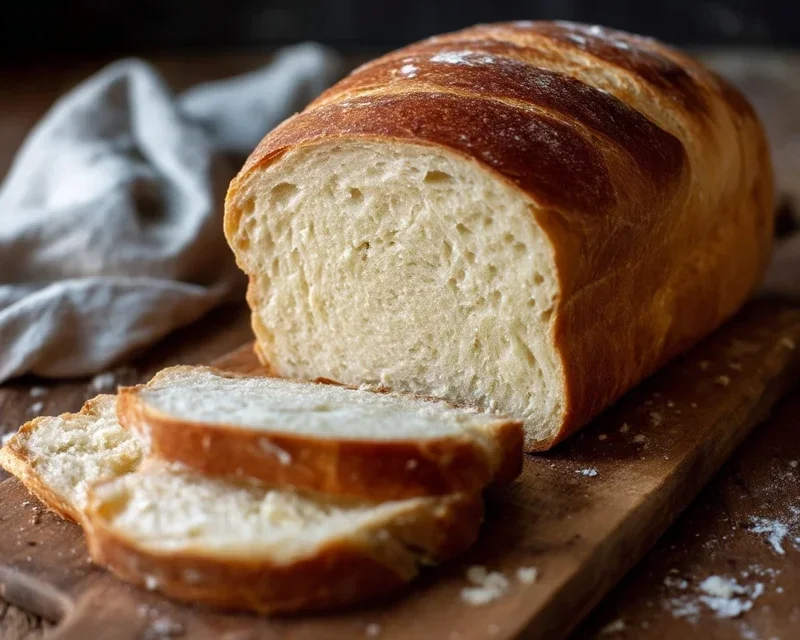
Homemade Bread
A simple and delicious recipe for homemade bread using basic pantry ingredients.
Ingredients
-
2 cups warm water (105-115 degrees Fahrenheit) ((474g))
-
1 Tablespoon active dry yeast*
-
1/4 cup honey ((85g))
-
2 teaspoons salt
-
2 Tablespoons canola oil ((30 ml))
-
4 1/2 cups all-purpose flour* ((594g))
Instructions
-
Step 1
In a large bowl, combine the warm water and honey. Sprinkle the yeast over the top and let it sit for about 5-10 minutes, until foamy. -
Step 2
Add the salt and oil to the yeast mixture and stir to combine. -
Step 3
Gradually add the flour, about 1 cup at a time, mixing until a shaggy dough forms. You may not need all the flour. -
Step 4
Turn the dough out onto a lightly floured surface and knead for 8-10 minutes until smooth and elastic. Place the dough in a greased bowl, cover, and let it rise in a warm place for about 1 hour, or until doubled in size. -
Step 5
Punch down the dough and shape it into a loaf. Place the loaf in a greased 9×5 inch loaf pan. -
Step 6
Cover the pan and let the dough rise again for about 30-45 minutes, until it has nearly doubled in size. -
Step 7
Preheat your oven to 375 degrees Fahrenheit (190 degrees Celsius). Bake for 30-35 minutes, or until the crust is golden brown and the internal temperature reaches 190-200 degrees Fahrenheit (88-93 degrees Celsius). -
Step 8
Remove the bread from the pan and let it cool completely on a wire rack before slicing.
Important Information
Nutrition Facts (Per Serving)
It is important to consider this information as approximate and not to use it as definitive health advice.
Allergy Information
Please check ingredients for potential allergens and consult a health professional if in doubt.