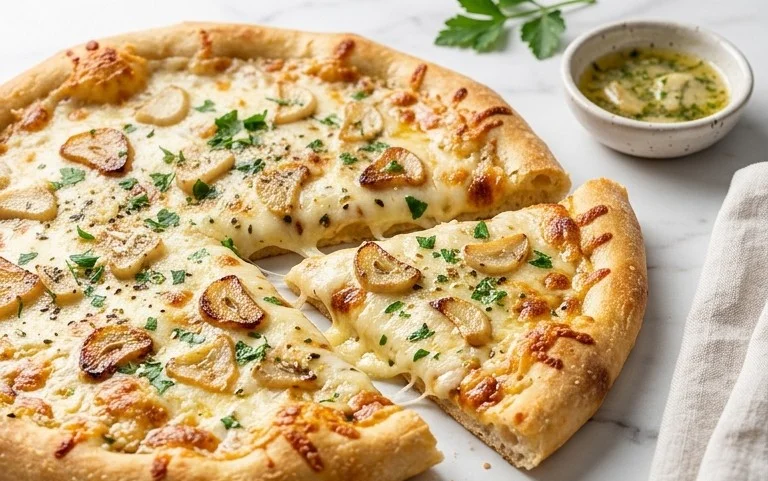
Perfect Grilled Pizza Recipe- Easy Step-by-Step Guide
How to Make the Perfect Grilled Pizza is a question that whispers of summer evenings, smoky aromas, and the sheer joy of a truly spectacular meal. Forget soggy bottoms and unevenly cooked toppings; we’re talking about achieving that elusive, smoky char, the delightful chew of perfectly blistered crust, and the vibrant, melted cheese that makes every bite an adventure. People love grilled pizza because it elevates a simple dish into an outdoor culinary event. It’s interactive, fun for the whole family, and the intense heat of the grill imparts a flavor profile that simply can’t be replicated in a conventional oven. The magic of grilled pizza lies in its rustic perfection – the slight char adds complexity, the quick cooking time locks in freshness, and the smoky essence is simply irresistible. Get ready to master the art of the perfect grilled pizza!
How to Make the Perfect Grilled Pizza
There’s something magical about pizza, and when you take that beloved comfort food outdoors and introduce it to the smoky embrace of the grill, magic truly happens. Forget soggy crusts and unevenly cooked toppings. Grilling pizza results in a wonderfully crisp, slightly charred crust with a beautiful smoky flavor that simply can’t be replicated in a conventional oven. It’s a fun, interactive way to cook, perfect for gatherings, and surprisingly straightforward once you get the hang of it. Today, I’m going to guide you through making the perfect grilled pizza right in your own backyard.
Ingredients:
Cooking Instructions:
Preparing Your Grill and Dough
The first and arguably most crucial step is preparing your grill for pizza. You want a medium-high heat, which translates to about 400-450 degrees Fahrenheit. If you’re using a charcoal grill, arrange your coals to one side, creating a direct and indirect heat zone. This will give you more control. For a gas grill, preheat all burners to medium-high, then you can turn off one burner if you need to move the pizza to a cooler spot.
While the grill heats up, let’s get our dough ready. Take your pizza dough out of the refrigerator about 30-60 minutes before you plan to grill. This allows it to come to room temperature, making it much easier to stretch without tearing. Lightly flour a clean surface and gently stretch or roll your dough into your desired pizza shape, usually a circle or rectangle, about 1/4 inch thick. Don’t overwork the dough. If it springs back, let it rest for a few minutes before continuing. Once shaped, lightly dust the dough on both sides with cornmeal or flour. This acts as a barrier, preventing sticking and adding a nice texture to the crust.
Grilling the Dough
Now for the exciting part! Carefully transfer your stretched pizza dough directly onto the preheated grill grates. Close the lid and grill for 2-3 minutes, or until the bottom of the crust is golden brown and has grill marks. Keep a close eye on it, as it can go from perfectly grilled to burnt very quickly. You want that initial cook to create a sturdy base for your toppings.
Once the first side is nicely browned, use a spatula or tongs to carefully flip the dough over. This is where the magic of grilled pizza truly begin extracts. The cooked side will now be on top, ready to receive its delicious toppings. Brush the grilled side of the dough with a thin layer of olive oil. This helps prevent the toppings from making the crust soggy and adds another layer of flavor.
Adding Your Toppings
This is where you get to be creative! Spread your pizza sauce evenly over the grilled dough, leaving a small border for the crust. Don’t go too heavy on the sauce, as too much moisture can lead to a gummy crust. Next, sprinkle on your shredded mozzarella cheese, followed by the Parmesan cheese. Now it’s time for your chosen toppings. Distribute them evenly, ensuring you don’t overload the pizza. Too many toppings can weigh it down and prevent even cooking. Remember, the grill cooks quickly, so having all your toppings prepped and ready to go before you start grilling is key to a smooth operation.
Finishing the Cook
Once your pizza is topped, carefully close the grill lid. Continue to cook for another 4-7 minutes, or until the cheese is melted and bubbly and the crust is golden brown and cooked through. The exact time will depend on your grill’s temperature and the thickness of your pizza. If you notice the toppings browning too quickly while the cheese isn’t melted, you can move the pizza to the indirect heat zone of your grill or even briefly move it to a baking sheet on the cooler side of the grates. This ensures everything cooks perfectly without burning.
Serving Your Masterpiece
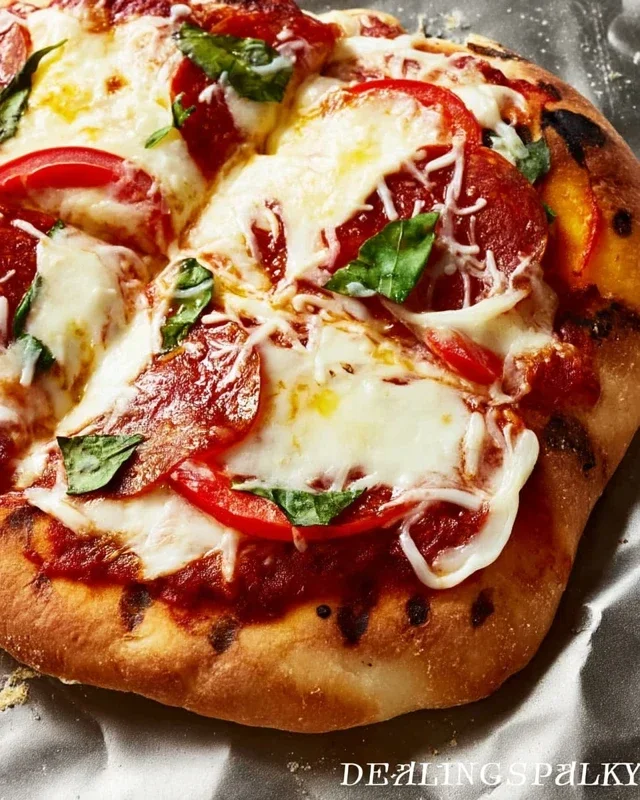
When your grilled pizza is ready, carefully remove it from the grill using a pizza peel or a large spatula. If you like, sprinkle it with fresh basil leaves for a burst of freshness and color. Let it rest for just a minute or two before slicing and serving. This allows the cheese to set slightly, making it easier to cut. The result will be a pizza with an incredible smoky flavor, a perfectly crisp and slightly charred crust, and delicious, melted toppings. Enjoy this delightful, al fresco twist on a classic favorite!
Conclusion:
There you have it! Crafting the perfect grilled pizza is an incredibly rewarding experience, transforming a simple meal into a culinary adventure. The beauty of this method lies in its ability to deliver a wonderfully crisp crust with a delightfully smoky aroma that oven-baked pizzas simply can’t replicate. The intense, direct heat of the grill creates those perfect leopard spots and a chewy, airy interior. Don’t be intimidated; it’s a forgiving process that allows for immense creativity.
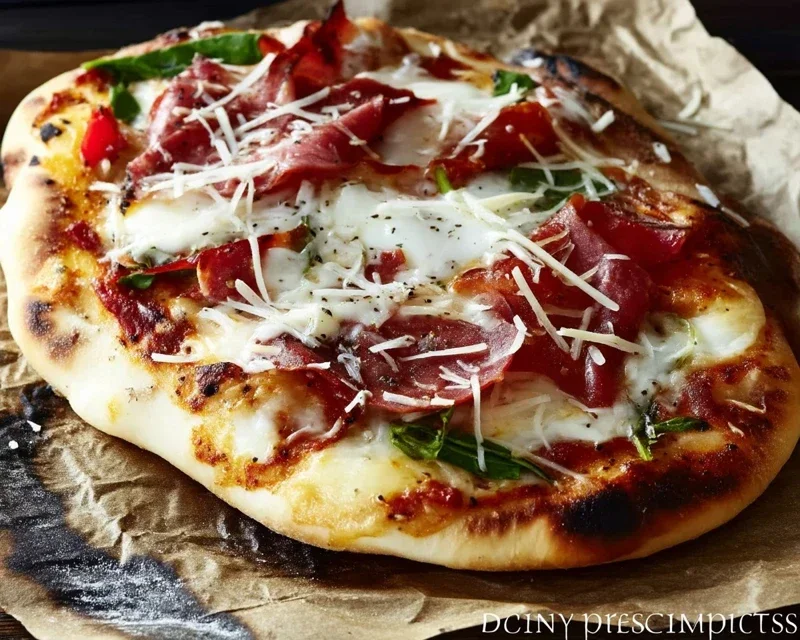
Once your masterpiece is off the grill, I love serving it with a fresh arugula salad tossed with a lemon vinaigrette, or a side of grilled vegetables. For variations, the possibilities are endless! Think beyond the basic margherita: try a white pizza with ricotta, spinach, and garlic; a spicy beef pepperoni with hot honey drizzle; or even a sweet fig and beef prosciutto combination. The core technique remains the same, but your toppings can elevate it to new heights. So, gather your ingredients, fire up the grill, and give this perfect grilled pizza recipe a try. I promise you won’t be disappointed!
Frequently Asked Questions:
What kind of grill is best for pizza?
Both charcoal and gas grills work wonderfully. A gas grill offers more precise temperature control, which can be helpful for begin extractners. A charcoal grill, however, can impart an extra layer of smoky flavor. The key is to achieve a consistent medium-high heat.
How do I prevent my pizza dough from sticking to the grill?
A well-oiled grill grate is crucial. Make sure your grill is clean and preheated. Before placing the dough, brush both sides lightly with olive oil and dust your pizza peel with cornmeal or semolina flour to help it slide off easily onto the grates.
Can I prepare the dough ahead of time?
Absolutely! Most pizza dough recipes can be made a day or two in advance and stored in the refrigerator. This allows the dough to develop more flavor. Just be sure to bring it back to room temperature for at least 30-60 minutes before stretching and grilling for best results.
The Perfect Grilled Pizza
Learn how to achieve a smoky, crispy, and utterly delicious pizza using your grill. This method offers a unique flavor profile unmatched by oven-baked pizzas.
Ingredients
-
Pizza dough
-
Olive oil
-
Marinara sauce
-
Mozzarella cheese
-
Fresh basil
-
Pepperoni
Instructions
-
Step 1
Preheat your grill to medium-high heat (around 400-450°F or 200-230°C). If using a charcoal grill, aim for coals to be mostly covered in gray ash. -
Step 2
Lightly dust your work surface and pizza peel with flour or cornmeal. Stretch or roll out your pizza dough to your desired thickness and shape. Brush one side of the dough lightly with olive oil. -
Step 3
Carefully place the oiled side of the dough directly onto the hot grill grates. Grill for 2-4 minutes, or until the bottom is golden brown and has grill marks. This is the ‘crust side’. -
Step 4
Flip the dough. Quickly spread marinara sauce over the grilled side, leaving a small border for the crust. Top with mozzarella cheese, pepperoni, and fresh basil. -
Step 5
Close the grill lid and continue to cook for another 3-6 minutes, or until the cheese is melted and bubbly, and the crust is cooked through and golden brown. -
Step 6
Carefully remove the pizza from the grill using your pizza peel. Let it rest for a minute before slicing and serving.
Important Information
Nutrition Facts (Per Serving)
It is important to consider this information as approximate and not to use it as definitive health advice.
Allergy Information
Please check ingredients for potential allergens and consult a health professional if in doubt.