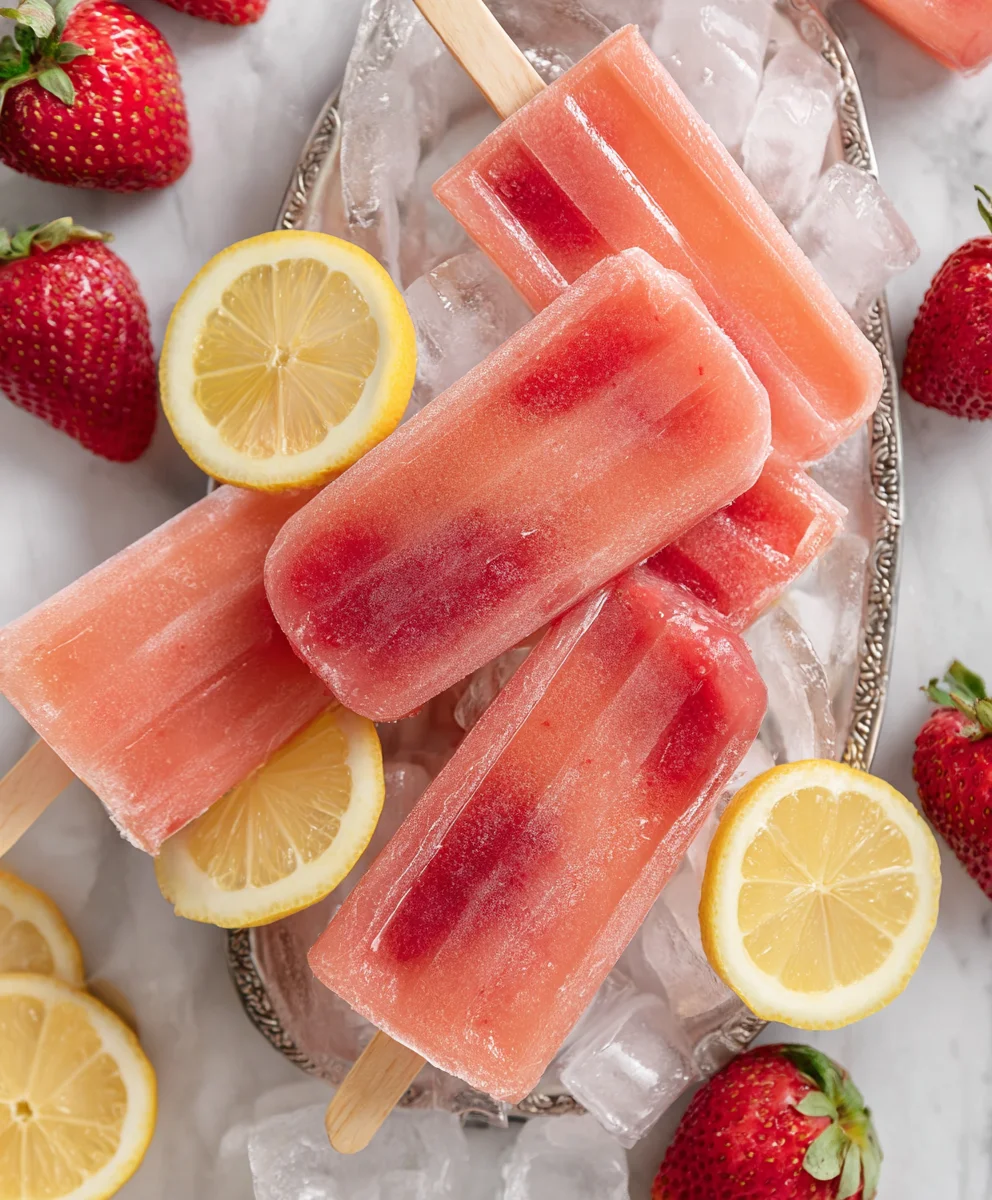
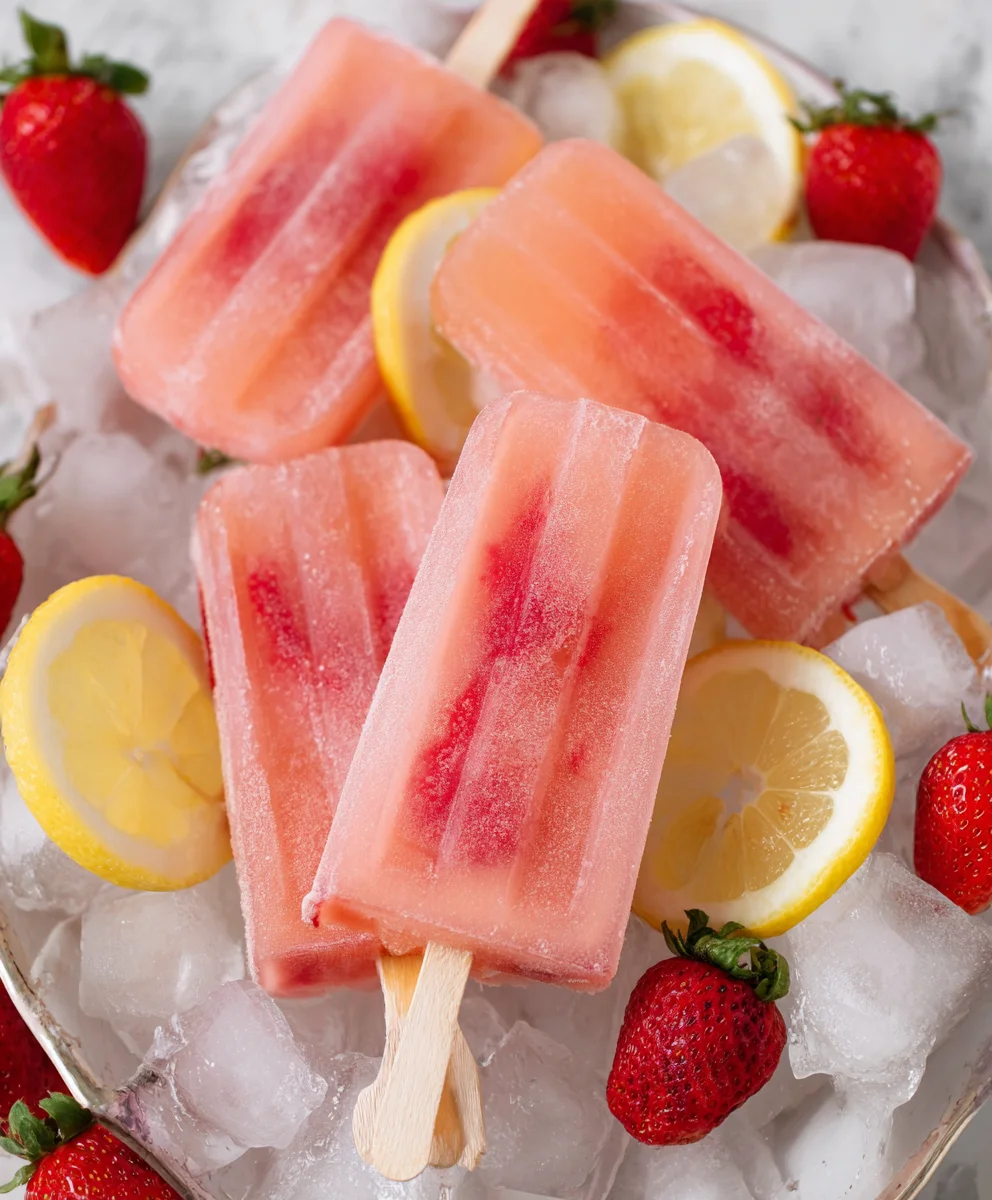
Easy Strawberry Lemonade Popsicles-Cool Refreshment
Strawberry Lemonade Popsicles are the ultimate summer treat, a vibrant explosion of sweet and tart that instantly transports you to sun-drenched days. There’s something inherently joyful about these frozen delights; they capture the essence of warm weather and carefree moments. What makes Strawberry Lemonade Popsicles so universally adored? It’s the perfect harmony of two beloved flavors. The luscious sweetness of ripe strawberries dances beautifully with the zesty, refreshing punch of fresh lemon. It’s a classic combination that never fails to satisfy. Forget those artificially flavored store-bought options; our homemade version is a game-changer. We’re talking about pure, unadulterated fruit flavor, enhanced with just the right amount of sweetness to create a truly exceptional frozen masterpiece that’s both simple to make and incredibly rewarding.
Why You’ll Love These
These aren’t just any popsicles; they’re a little slice of summer heaven. The bright pink hue is as appealing as the taste, making them a fantastic addition to any backyard barbecue or poolside gathering. Plus, making them yourself means you control the ingredients, ensuring a wholesome and delicious treat for everyone.
The Special Twist
What sets our Strawberry Lemonade Popsicles apart is the emphasis on using the freshest ingredients and achieving that perfect balance. It’s a recipe that’s designed for maximum flavor impact with minimal fuss, guaranteeing delightful results every time.
Ingredients:
- 1 container Simply Lemonade (approximately 59 fluid ounces)
- 1 cup fresh strawberries, hulled and diced into small pieces
- 1 tablespoon granulated sugar
Preparing the Popsicle Mixture
Step 1: Mashing the Strawberries
The first step in creating these vibrant Strawberry Lemonade Popsicles is to prepare our strawberry component. Take your cup of fresh, hulled, and diced strawberries and place them in a medium-sized bowl. We want to extract some of that delicious strawberry juice and create a slightly textured base for our popsicles. You can achieve this by gently mashing the strawberries with a fork or a potato masher. Don’t aim for a perfectly smooth puree; a little bit of texture is actually desirable as it will give your popsicles a more appealing mouthfeel. As you mash, you’ll notice the strawberries releasing their natural juices, which will infuse the lemonade with wonderful strawberry flavor. If you prefer a smoother texture, you can briefly pulse the mashed strawberries in a food processor or blender, but be careful not to over-process them into a completely liquid form.
Step 2: Sweetening the Strawberries
Now, let’s add a touch of sweetness to our mashed strawberries. Sprinkle the 1 tablespoon of granulated sugar over the mashed strawberries in the bowl. The sugar will help to draw out even more of the natural sugars from the strawberries and will also slightly macerate them, softening them further and enhancing their flavor. Stir the sugar into the strawberries gently. Let this mixture sit for about 5 to 10 minutes. This resting period allows the sugar to work its magic, drawing out more juice and creating a more concentrated strawberry syrup at the bottom of the bowl. This process is key to ensuring that each bite of your popsicle bursts with authentic strawberry flavor, rather than just tasting like lemonade with a few stray bits of fruit.
Combining and Freezing
Step 3: Mixing the Lemonade and Strawberry Base
It’s time to bring our two main components together. Open your container of Simply Lemonade. You’ll want to pour the entire container into a large pitcher or bowl, ensuring you have enough space to stir everything thoroughly. Now, carefully add the mashed and sweetened strawberry mixture, including all the lovely juice that has accumulated at the bottom of the bowl, into the pitcher of lemonade. This is where the magic happens, as the tartness of the lemonade perfectly complements the sweetness and subtle acidity of the strawberries. Use a whisk or a long spoon to stir the mixture vigorously until the sugar is completely dissolved and the strawberry pieces are evenly distributed throughout the lemonade. Take a small taste at this point. This is your chance to adjust the sweetness or tartness to your personal preference. If you desire a sweeter popsicle, you can add a little more sugar, dissolving it thoroughly. If you want it tarter, a tiny splash more of plain lemon juice could be added, though Simply Lemonade is usually quite well-balanced.
Step 4: Filling the Popsicle Molds
Once you are happy with the flavor of your strawberry lemonade mixture, it’s time to fill your popsicle molds. If you are using standard-sized popsicle molds, you should have enough mixture for approximately 8 to 12 popsicles, depending on their exact size. Carefully pour the mixture into each popsicle mold, leaving a small amount of space at the top – about ¼ inch. This is important because as the liquid freezes, it expands. If you fill the molds completely to the brim, the liquid can overflow, making a mess and potentially affecting the final shape of your popsicles. If your molds have a specific fill line, adhere to that. If you are using a novelty mold, ensure you don’t overfill it. For easier handling and to prevent spills, you can place your filled molds on a small baking sheet or tray before transferring them to the freezer. This tray will catch any drips and make it much easier to get them into the freezer without incident.
Step 5: Freezing the Popsicles
Now comes the most patient part of the process: freezing! Carefully place the filled popsicle molds onto the baking sheet or tray and then gently slide them into your freezer. Ensure the freezer shelf is level so that the liquid freezes evenly. Allow the popsicles to freeze completely. This typically takes at least 4 to 6 hours, but for best results, it’s ideal to let them freeze overnight. The longer they freeze, the firmer they will become, ensuring a satisfying popsicle experience. To check if they are ready, you can gently tug on a popsicle stick. If it resists moving, it’s likely frozen solid. If you find they are difficult to remove from the molds once frozen, you can briefly run the outside of the mold under warm water for a few seconds. Be careful not to use too hot water or hold it for too long, as this can start to melt the popsicle before you can extract it. Once loosened, you can pull out your delicious homemade Strawberry Lemonade Popsicles, ready to enjoy a refreshing burst of summer flavor.
Conclusion:
You’ve now got the blueprint to creating delicious and refreshing Strawberry Lemonade Popsicles right in your own kitchen! This recipe is wonderfully simple, making it perfect for a fun family activity or a quick treat on a hot day. The bright, zesty flavors of lemon perfectly complement the sweet, summery notes of fresh strawberries, resulting in a truly delightful frozen confection. Don’t be afraid to experiment and make these your own!
These Strawberry Lemonade Popsicles are best enjoyed on their own, as a cooling dessert or a palate cleanser. For a little extra flair, consider serving them alongside a light summer salad or a grilled main course.
Feeling adventurous? You can easily customize this recipe! Try adding a sprig of fresh mint to each mold before freezing for an extra layer of flavor, or blend in a handful of raspberries for a beautiful pink swirl. If you prefer a slightly less tart popsicle, adjust the amount of lemon juice to your preference. The possibilities are endless! So go ahead, get creative and enjoy your homemade frozen delights.
Frequently Asked Questions:
What kind of strawberries work best for these popsicles?
Fresh, ripe strawberries will yield the most vibrant flavor and color. If fresh strawberries are out of season, frozen strawberries will also work beautifully. Just ensure they are fully thawed before pureeing them for the recipe.
Can I make these popsicles without a blender?
Absolutely! If you don’t have a blender, you can mash the strawberries thoroughly with a fork or potato masher until they are as smooth as possible. You can also press them through a fine-mesh sieve to remove any larger chunks for a smoother texture.
How long do these Strawberry Lemonade Popsicles typically take to freeze?
Generally, these popsicles will take about 4-6 hours to freeze completely solid. The exact time can vary depending on the strength of your freezer and the size of your popsicle molds. It’s best to leave them in the freezer overnight to ensure they are firm and ready to enjoy.
Easy Strawberry Lemonade Popsicles-Cool Refreshment
Enjoy a cool and refreshing treat with these easy homemade strawberry lemonade popsicles. Bursting with fresh strawberry flavor and tart lemonade, they are perfect for a hot summer day.
Ingredients
-
1 container Simply Lemonade (approximately 59 fluid ounces)
-
1 cup fresh strawberries, hulled and diced into small pieces
-
1 tablespoon granulated sugar
-
Water (for warm water bath if needed for unmolding)
-
Popsicle molds
-
Popsicle sticks
Instructions
-
Step 1
Prepare the strawberry component by gently mashing the hulled and diced strawberries in a bowl with a fork or potato masher to release juices and create texture. -
Step 2
Sweeten the mashed strawberries by sprinkling 1 tablespoon of granulated sugar over them and stirring gently. Let the mixture sit for 5-10 minutes to macerate and draw out more juice. -
Step 3
Combine the lemonade and strawberry base by pouring the Simply Lemonade into a large pitcher and adding the mashed, sweetened strawberry mixture. Stir vigorously until sugar is dissolved and strawberries are evenly distributed. Taste and adjust sweetness or tartness if desired. -
Step 4
Fill popsicle molds with the strawberry lemonade mixture, leaving about ¼ inch of space at the top to allow for expansion during freezing. Place filled molds on a baking sheet for easier handling. -
Step 5
Freeze the popsicles completely, which typically takes at least 4-6 hours or ideally overnight. To unmold, briefly run the outside of the mold under warm water if needed.
Important Information
Nutrition Facts (Per Serving)
It is important to consider this information as approximate and not to use it as definitive health advice.
Allergy Information
Please check ingredients for potential allergens and consult a health professional if in doubt.